Showing posts with label Congratulations. Show all posts
Showing posts with label Congratulations. Show all posts
Friday, April 25, 2025
Peony Sunshine with Pink Fresh Studios
Happy Friday! Today I’m bringing a little floral sunshine with this pretty new set from Pink Fresh Studios, it’s called Peony Perfection. In my garden I have 7 different peony plants, and one of my favourite ones is called Coral Charm, so I coloured the blooms with that variety in mind. The set comes with coordinating dies, which I used to cut them out.
I stamped the background layer of the card with the set, then added texture with the Dotted Chevron Coverplate Die. Each of the blossoms are popped up.
Isn’t that sentiment a lovely one? A perfect way to congratulate someone, or use as a Wedding design.
Sunday, June 30, 2024
Green and Gold for a Grad Girl with The Stamp Market
Today I’m back with the second grad card this week for our son’s girlfriend. I went with the same colours as yesterday - their University colours of green and gold, but a much more feminine style using The Stamp Market products. This beautiful floral die set is called Big Bloom Bouquet. Marvellous, don’t you think? I placed the arrangement onto a mini-slimline size card that I foiled with a Spellbinders foiling die called Plaid Tidings (retired?).
I added some ink blending and pencil colour blending on the petals and the same gorgeous shimmery gold cardstock for the flower centers.
And it’s finished with a perfect gold foiled sentiment from The Stamp Market called Best Wishes Foil Plates and some gold sequins. It has a very summery feel with the rich colours!
Monday, May 27, 2024
The Bunny is a HS Grad with TCP
Hello! Today I’ve got a High School Graduation to celebrate. Our niece is graduating and I thought it would be fun to create a card to celebrate her with new TCP Goodies! Our favourite bunny is created with a new set called Change the World! I looked up her High School colours and used them as my guide for the whole card. So, he’s got a maroon cap and gown, and I drew in a little big of his hood with a Copic Multiliner pen.
A lot of the design is just paper striping, including a fun sentiment banner from a retired TCP die and stamp, gold embossed on the banner. I also added some cute wood veneer stars to the design giving them a bit of Copic colouring to coordinate with his brown bunny fur.
I think she’ll get a kic out of it. He’s definitely cute and ready to celebrate!
Tuesday, May 14, 2024
Baby Week - Bunny Hatching with SU!
In what feels like a lifetime ago, I was a Stampin’ Up! Demonstrator, doing this for many years. And along the way I collected a few sets that I just can’t part with. This cutie is one of them - Everybunny, long since retired, but still with the most adorable images that work for both Easter and babies.
I used the cute little bunny hatched out of his egg and did a little Copic colouring on him. Then I used some pretty dies from PinkFresh Studios called Essentials: Mini Slimline Bundle to showcase him.
The pretty plaid in the background is layered dies from Concord and 9th, both the Thick Plaid and the coordinating Thin Pad dies. They combine so nicely together. A faux grossgrain die is from a retired TCP die.
A little baker’s twine bow, sentiment from another retired SU! sentiment set, and an enamel heart keep it simple and oh so sweet! Baby cards are just the best to make. Thanks for joining me today!
Tuesday, April 9, 2024
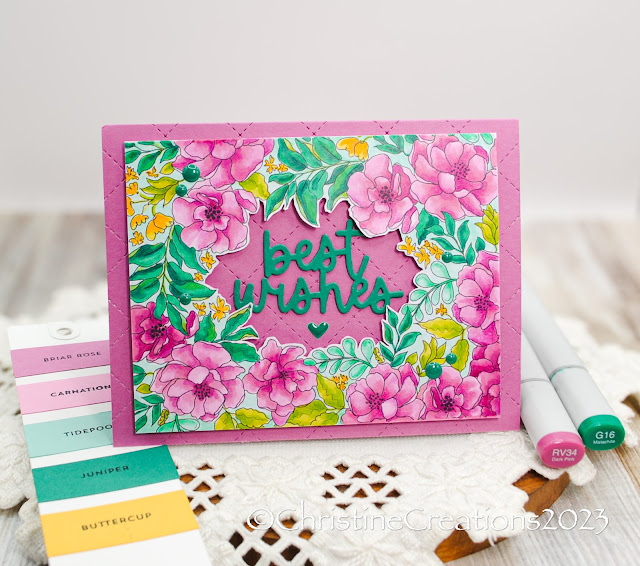
Petite Flower Frame with Alex Syberia
Hello on this Wednesday Eve! I’m back with some more pretty and petite flowers from Alex Syberia called Grateful Heart it’s a digital design and right now Alex Syberia is working on a reopening, so I won’t be able to link the image, but oh isn’t it the sweetest? I love the little flowers in a frame.
Colouring is done with Copics and finished with coloured pencils, and then I fussy cut out the center of the design to make room for the background of the card base in this pretty Briar Rose colour from Concord and 9th. That layer is run through the Quilted Card Front Die.
I die cut the sweet sentiment from Concord & 9th’s Everyday Expressions dies, layered 3 x for some thickness. Then a few enamel dots to sweeten the finish! Pretty cute!
Wednesday, February 7, 2024
Dainty Notecard with Concord & 9th
The other day when I was creating the Parcel of Petals card I had a number of leftover die cut flowers that I didn’t want to go to waste, so I popped them on a little 4 1/4 x 4 1/4 note card using the same colour palette, just with a colourful card base.
It makes for such a pretty combination don’t you think? The flowers and sentiment use the new Bundle Parcel of Petals. I thought the font on congratulations was the perfect dainty script and size.
Just another case for not tossing your scraps from a project. This was a quick 10 minute card!
Saturday, August 12, 2023
Stitching Saturday - Happy Everything
Hello! I’m back with another stitching project I completed just for fun. This one has a bit of a fall colour theme. I started with MFT’s Cross-Stitch card panel die (since retired I believe), and a pattern slightly inspired by Jennifer McGuire way back in 2017 HERE, using some of my own creative liscence.
These cute dies are from MFT called Happy Everything and I stamped the letters from the set with Concord & 9th inks.
Another sweet Saturday stitching project! Thanks for popping in!
Friday, July 7, 2023
Baby Week: Baby Onesies
Having just done laundry, I remembered the scent of our baby’s clothes as they came out of the wash. Such tiny little pieces of endless laundry that was so cute! This adorable onesie is from an old Flourishes set that Marcy retired, (the same set that has the cute booties from the other day). I’ve had it coloured up in my stash forever! It’s coloured with Prismacolor Pencils in soft greens the turquoises, trimmed out an popped up on this cute little tag.
The tag behind the main tag is stamped with cute little hearts from another polymer set I have, and laid on a lovely plaid background using dies from Concord & 9th, the Thick Front Plaid and the Thin Front Plaid. Cutting it out of three different colours allows you to fill in your desired parts of the pattern with different colours.
A few sentiments from retired SU! sets complement the design and a little button and twine finish it off! I love sweet details like this for a baby card. Hope you’ve enjoyed the sweet cards this week!
Thursday, July 6, 2023
Baby Week: Precious One
I’m back today with another card for Baby Week on the blog! They’re so sweet to create! I have an elegant design today using an old set that I think was from Flourishes, and illustrated by Marcy. It contained sweet vintage baby items, including this little set of baby shoes that are so cute! I’ve gone with a very neutral palette in all creams that would be great for a boy or girl. Colouring is done with Copics, and I’ve added lots of texture in that cream on cream layering.
After colouring I die cut the shoes, added some pretty crochet lace, and then began layering with Spellbinder’s dies, and a lovely embossing folder from Spellbinders - Tufted. The sentiment is from an old SU sentiment set that words perfect in it’s petite size. A few wood veneer stars add just the right touch to finish it off! It’s oh so elegant for a special baby!
Monday, May 31, 2021
TCP’s June Release is Soaring!
Hello out there! I’m popping in for some pretty soaring stamp sets for you from The Cat’s Pajamas for June! The theme this month is flight and you’ll find fabulous images and cut-files to play with. I’m kicking off the month with 5 cute cards. It’s also a new month, so that means the TCP Progressive Sale is up to 50% off now!
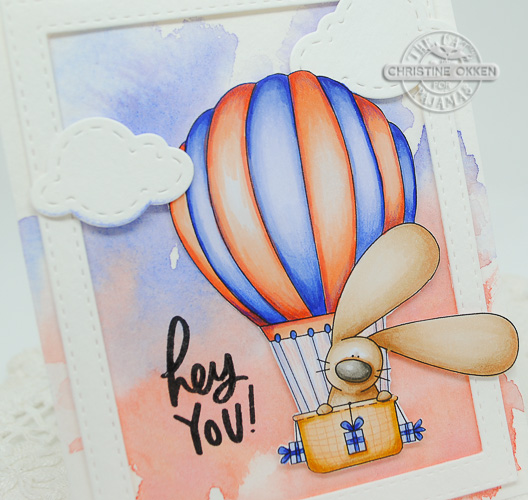
First up is this adorable bunny in balloon called Sky’s the Limit. this cutie was actually a mid-month release, but I love the image so much I had to throw it in today as well. I began by colouring the bunny with Copics in these fun shades of coral and periwinkle blue. I added a few defining details to the image with Prismacolor Pencils and trimmed it out.
I created a coordinating background with Watercolour to really give you the feel of a beautiful sunset ride. A couple of TCP Stitched Clouds and the sentiment is from TCP’s stamp set Scatter Joy.
Next up we’re flying a kite!
It’s Up, Up and Away! This little dude is getting swept away by some great gusts today, but he doesn’t seem too bothered by it. I’ve coloured up the penguin with Copics and found some great kite themed paper in my stash to accent the design die cut with TCP’s Four Seasons Duo Die to get that pretty deckled edge.
I also found an old kite die in my stash, so I used it to create a kite accent with a little baker’s twine bow to match. A drawn black outline of the kite accent, and around the card tie it all together and almost give it a comic book feel.
Now we’ll buzz on over to the third design.
Bee Happy, Bee Gnomie showcases a fun Gnome in Bee attire, but it also has a lot of other great images, including this fun sentiment and the little sunflower sprays. I created the background with the digital images of the flowers by randomly adding them to the background. It’s like your own custom background paper. I also added the little flower to the sentiment, and popped another one up. Colouring is done with Copics.
A cheerful golden yellow bow ties it together.
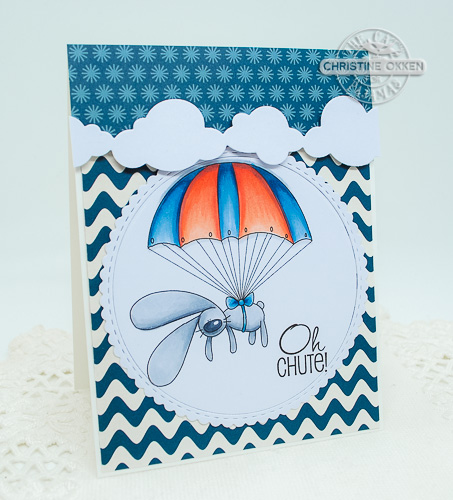
Ever gone parachuting? I don’t think I could jump out of a plane, but our favourite Bunny is back with an opened chute, and it looks like he’ll make it to earth safely with this fun set Oh Chute! I coloured him up with Copic markers and die cut the image. I paired him with some blue patterned paper and added the TCP Cloud Border CutUps Die as an accent.
Perfect for any occasion you might have forgotten.
Last but not least, I have a design for anyone who’s SUPER in your life.
This set is called Superhero! It’s a great set to customize for many loved ones, Mom, Dad, Son, Daughter and Friend are all included in the set. I’ve highlighted the sentiment and my favourite super-bunny. I picked some fun shades in turquoise and yellow, colouring with Copics, and accented the design with some TCP 3 x 3 paper stars.
A little touch of enamel dots and it’s complete.
I hope you’ve enjoyed this tour through the TCP June Release and all the flight themed designs!
Here’s a peek at all the NEW RELEASE items I showcased today. And don’t forget about the Going Digital Progressive Sale at 50%!
Tuesday, April 16, 2019
An Abundant Wedding Bouquet
A friend of ours was married last weekend and it was lovely to see them commit their lives to each other. They wrote and spoke some beautiful meaningful and personal vows that were very touching. I’m not usually big on hand written vows because I have seen them not say enough - or try to promise the moon, but these were lovely and sacrificial, real and authentic. A beautiful expression of their covenant to each other.
I created this design for their wedding card with Power Poppy’s Abundant Petals, which is abudantly gorgeous! I always have a hard time narrowing down which parts of this set I want to use. I stamped the peony, ranunculus florals and leaves onto Strathmore Cold Pressed watercolour paper with Distress Ink in Tea Die ink so the lines would fade a bit when watercoloured.
Watercolouring is done with Daniel Smith Watercolours using Quinachridone Coral, Quinachridone Rose, Quinachridone Gold, Hookers Green, Jadite Green, Phthalo Turquoise, Lunar Violet and and Quinachridone Red.
All of the elements were done with time between layers so that I could build up some colour vibrance in the blooms. I used the Coordinating Dies for this set to put it all in pieces that I could work with to form the bouquet. I’m not a flower designer so it take me a little bit of time to fiddle with it until I get an arrangement I like. Then I took a quick picture of the way I liked it and worked on the background.
I washed in some soft and watery Quinachridone Gold and Quinachridone Coral to the background, adding a bit of Quin. Rose as I went. After it was all dry I took some light washes of colour to paint in some leaves and Ranunuculus into the background so it looks like it’s in a field of flowers, or part of a larger bouquet. Just the soft suggestion of painted flowers really makes a lovely difference in the overall card.
Here you get a better look at the background, and the brushed gold sequins to accent and the embossed sentiment from another Power Poppy set, Dream Wedding. I splashed some leftover paint and shimmery gold spray at the end to complete the design. Finished card is about 4 3/4 by 6” completed.
Thanks for popping by!
Sunday, November 25, 2018
Sneaky Peek Week with TCP!
Welcome to my day of The Cat’s Pajamas November release! I have two cutie patootie cards to show you today in anticipation of the release on Tuesday. We’ve got 3 new stamp sets and 6 new dies for you this month!
First up is the ultra adorable Lettuce Be Friends. It showcases 4 fruit/veggies with the option of also giving them some cute kawaii type faces. I chose to leave them just as their lovely fruit and veggie selves, stamping them on watercolour paper and then watercolouring with Zig Real Brush markers. I created the background and then also stamped a separate strawberry and cut it out with the coordinating dies for this set.
I finished it with a little black border using TCP’s Icing Cut Ups Die, a bit of baker’s twine around the strawberry stem and a enamel dot.
He’s waving a love flag to congratulate someone special! Coloured up with Copics and matched up with some fun valentine themed paper with these CUTE candy hearts. For a further take on Valentine’s, I’ve added these adorable NEW Lacy Arrows. This die can also be yours FREE with a $65 purchase. I thought they would look great to frame up our little bunny.
Here is a closer look at what I used today that we’re releasing this month.
Isn’t it all SO cute!
Now it’s your turn! You could WIN just by commenting on this post! Alma will select a name from my comments for a TCP Gift Card!
Subscribe to:
Posts (Atom)


