Showing posts with label Bloom Brigade. Show all posts

Saturday, November 23, 2024

Jeweled Christmas Florals with Power Poppy


We are snuggled up inside today because of what the National Weather Services calls “a major snow event”, where a good 8 - 10 inches, or 25 cm fell in the past 24 hours.  I have thoroughly enjoyed it - but I’ll admit, I wasn’t doing the shovelling.   So, tonight I’m in the mood for Christmas!  I pulled out this beautiful image from Power Poppy called Ultimate Poinsettia Digital Stamp set. Marcy always had the most beautiful arrangements of florals for any season, and this one is one of my favourites with the poinsettia and anemone flowers, plus berries and dusty miller greenery.  


The image is coloured with jewel toned Copics, with finishing detailing done with coloured pencils.  I’ve die cut the image out of the box style with the tiny dusty miller greenery in the lower corner peeking out.  The background is foiled in light lilac with a Spellbinders called Glimmer Monoline Stars.  

The sentiment is embossed on vellum with the Power Poppy set,  Joy to the World Bouquet. I ink blended Blueprint Sketch ink on the vellum to coordinate with the purply-blues.  


A few pretty rhinestones give extra shine, and I accented the sentiment and corner with silver die cuts from Spellbinders Christmas Bird Poinsettia Die.   Appreciate you stopping by! 

Thursday, February 8, 2024

Hello Roses with Power Poppy


It’s the perfect season for gorgeous red roses.  In a flower it speaks love.  I pulled out this beauty from Power Poppy called Everything’s Rosy.  An irresistable display of cut roses in little cups.  I can just picture popping out in the garden to bring them in.  I think when you look at the personality of roses, red ones are all about the drama, so I chose a very dramatic black, white and red palette to show them off.  


After colouring the roses with Copics and finishing with coloured pencils, I used some dies from Concord & 9th Plaid Card Front Die, and an older ornate Spellbinders oval dies with fancy scrolls.  Seems perfect for pretty roses.  


I stamped a sentiment from the original polymer set for this design so it can be used for more than one occasion but really it’s all about the love!  

Thursday, January 4, 2024

Winter Roses with Power Poppy


OO I’ve got some pretty colour for you today!  I will more often lean toward a warm palette, but sometimes you’ve just got to go coooool!  I pulled out this image from Power Poppy called Snowdrops and Tea Roses which is such a beauty!  And though it could lean Christmas, I’m just telling myself it’s still good for Winter, especially with a Birthday sentiment.  

This awesome image was coloured with Copics, and finished with coloured pencils.  I can tell my copic nibs need replacing because some of my colouring is getting shiny, so finishing with pencils help tone that down a little.  

Winter Roses with Power Poppy
 
It’s a gorgeous arrangement of little roses, snowdrops and holly leaves with tiny berries in a cup.  So darn sweet!  

I created the background with Pink Fresh Studios Slimline Diamond Builder and some Distress inks that coordinated with the colouring.  Then I layered some vellum over to give it a bit more softness.  Finished with some slim velvet ribbon, and tiny dew drops that look like water drops on the roses.  


The sentiment is from a Power Poppy polymer set and the banner die is a retired one from The Cat’s Pajamas.  Such a great colouring project to start the year!  

I have a colouring video on my Instagram page for this card if you’d like to pop by!  See me here at ChristineCreationsArt

Thanks for popping by today!  

Wednesday, November 8, 2023

Red Poppy Birthday


Well Hello!  I’ve had a bit of a break the past couple of weeks, as I was preparing to speak at a Women’s Retreat.  Today, I’m popping in with some some beautiful red poppies in anticipation of Remembrance Day coming up this weekend, but rather than as a memorial reminder, I chose this time to make them Birthday poppies.  

I’ve used Power Poppy’s gorgeous Perfect Poppies Digi set for this design.  


Colouring is with Copics, trying to get all the papery shades of a poppy.  The sentiment is from another Power Poppy set, in polymer because it worked just right for the size I needed.  

I’ve also utilized a lovely background coverplate die from Pink Fresh Studios, Ornate Medallions, and then a rick rac die retired from MFT as accent.  


Just a few black sequins add some depth of colour for the accents.   Feels good to be colouring and creating again!   


Wednesday, October 18, 2023

Flower Fields with Power Poppy


This Spring I planted a section of California Poppies in one flower bed that were such a bright spot all season long.  Their thick carpet of yellow-orange filled in the space in such a lovely way.  Thinking about them, I pulled out a digi set from Power Poppy called Countryside Bouquet and it’s companion polymer set, Countryside Bouquet Deluxe and created my own poppy fields on this card.  

I layered two of the flower bouquets side by side on Copic XPress It Blending cardstock, then stamped a few extra flowers from the set to make the cardfront feel really full of flowers.   


It was about time I did some colouring again!  Copics create a vibrant analogous colours mis of yellow-orange, pink and purple for a really cohesive colour scheme.  Then I picked a crisp blue - the opposite of orange on the colour wheel for the background.  These little colour cues make the flowers really pop with vividness.  


The sentiment uses another Power Poppy set, Vibrant Thanks. Which sits so nicely to contrast the flowers.  Nothing sweeter than a field of abundant wildflowers! 

Tuesday, August 8, 2023

Gratitude Plaid with Power Poppy


Oh it’s inevitable isn’t it?  Autumn is coming.  I’m just not ready!  But today we’ve had a rainy day and tomorrow it will be the same and it feels a little bit like fall is not so far away.  This pretty design is a Power Poppy digi called Bittersweet Thanks.  The combination of Sunflowers, Chinese Lanterns and bittersweet is a pretty one, especially with that lovely gratitude banner floating through.  Colouring is with Copics, and then fussy cut out.  


Layered up with pretty rich colours and layers of die cut Plaid Card Front Bundle from Concord & 9th.  It adds such great texture and pairs all the colour together beautifully.  The woodgrain banner uses an old embossing plate from PaperTrey Ink, and the little heart sprig uses PTI’s All You Need is Love.  

So, I’m easing into Autumn a little reluctantly, but also full of gratitude for all the lovely things ahead.  

Friday, May 19, 2023

Slimline Garden Bouquet


When I developed my front flower bed I had in mind to create a colour palette of peaches and orange, lime green and burgundy.  Rich and citrusy.  Right now all the new tulips I planted last fall are starting to bloom and it’s been so fun to see the different elements come to life.  So, this pretty design from Power Poppy using Abundant Petals and the coordinating dies was a sweet nod to those flowers.   


I coloured these gorgeous petals with Copics no-line style, use the dies to trim them out and arrnaged them on a mini-slimline size card.  The dies are from Pink Fresh Studio - Mini Slimline Essential Bundle Dies.   I often reach for them when I’m making a slimline design.  I love the mini size!  


A perfect way to say thank you to someone!  


Thursday, April 27, 2023

Bowl of Beauty from Power Poppy


I think its a great time to be a cardmaker.  There are so many options and materials available to use to create beautiful cards.  From new stencils, and ink blending, to specialty dies, it’s so fun to experiement!  Today’s design has a bit of my tried and true comfort zone, mixed with some fun new products too.  

My first love with cardmaking will always be colouring images, and there’s nothing like Copic markers to give you that vibrant, saturated colour in an image!  This is a beautiful digi by Marcy at Power Poppy called Bowl of Beauty, is always such a delight to colour.  


I love the awesome arrangement of tree peony, Spanish bluebells, hellebores and ferns.  I went for a really vibrant palette in colouring.  The sentiment is embossed using another retired Power Poppy polymer set.  

For the fun background, I used some new products, Spellbinder’s Origami Folds 3D Embossing folder 
and smooshed some Distress Oxide ink within the embossing folder, spritzed the folder and then ran the paper through the machine.  It not only gave a nice deep impression on the paper, but it “letterpressed” the ink into the design.  To finish off, I swiped some gold Lunar paste over the background layer to give it a golden shine.  And I splattered watered down Lunar paste over the main image to give it some glitz too.  


To tie it all together I used a ric rack die from MFT, those wavy lines anchor the image nicely.  
 

Friday, April 14, 2023

Tropical Camouflage


Hello!  Is anyone ready for some green?  My husband and I have an annual membership to our botanical glass pyramids, so we can find green whenever we want!  I especially appreciate it in winter, or like now where Spring has not really sprung here yet.  Today in honour of my favourite colour of green I pulled out an older set from Power Poppy called Big Sexy Leaves, stamped it on Copic XPress It Blending cardstock and then went to work colouring with my Copics and finishing off the details with Prismacolour Pencils.  It is a riot of colour and pattern that is so delightful!  


Once the panel was coloured, I used a die from TCP saying “enjoy” in a nice script, cut it out of the main image, then stacked it on 3 layers of white cardstock cut with the same die.  The sentiment pops up nicely, but give you that camouflaged look that’s really fun.  


I’ve set the sentiment on the main card, with some sponged vellum behind the sentiment so it adds something for it to sit on.  Then the little coral sentiment is stamped from Power Poppy’s Go Wild Stamp Set .  

And how fun, on this flatlay view you can see just how camouflaged the sentiment can be!  A colourist's dream to work with!  Thanks for sharing it with me today! 

Monday, February 20, 2023

The Blossom Challenge: Inspired by the Sea and Magical Powders


Welcome cardmaking friends!  Today I’m kicking off a brand new theme for The Blossom Challenge at Power Poppy!  

This month it is an Inspiration Challenge based on a photo from my recent trip to Northern California for work.  At a local friend’s recommendation we took a day off to head to the coast, through the Sonoma Valley wine country to a spot called Bodega Beach.  Its a sweet little coastal town with miles of beaches along the coastline.  It was such a stunning surprise with the cliffs, bluffs and pounding surf, you’d think for sure you’re in Cornwall, England rather than the Cali coast.  There was one spot called Bodega Head where you are high on the bluffs looking down at the rugged coast where I took this picture above.  In the foreground you can see the vegetation with the pop of pink.  These plants are succulents called Sea Fig, and the flowers bloom lots of different colours.  Its invasive in California, so they’re trying to control it, but it sure made for a beautiful picture!  

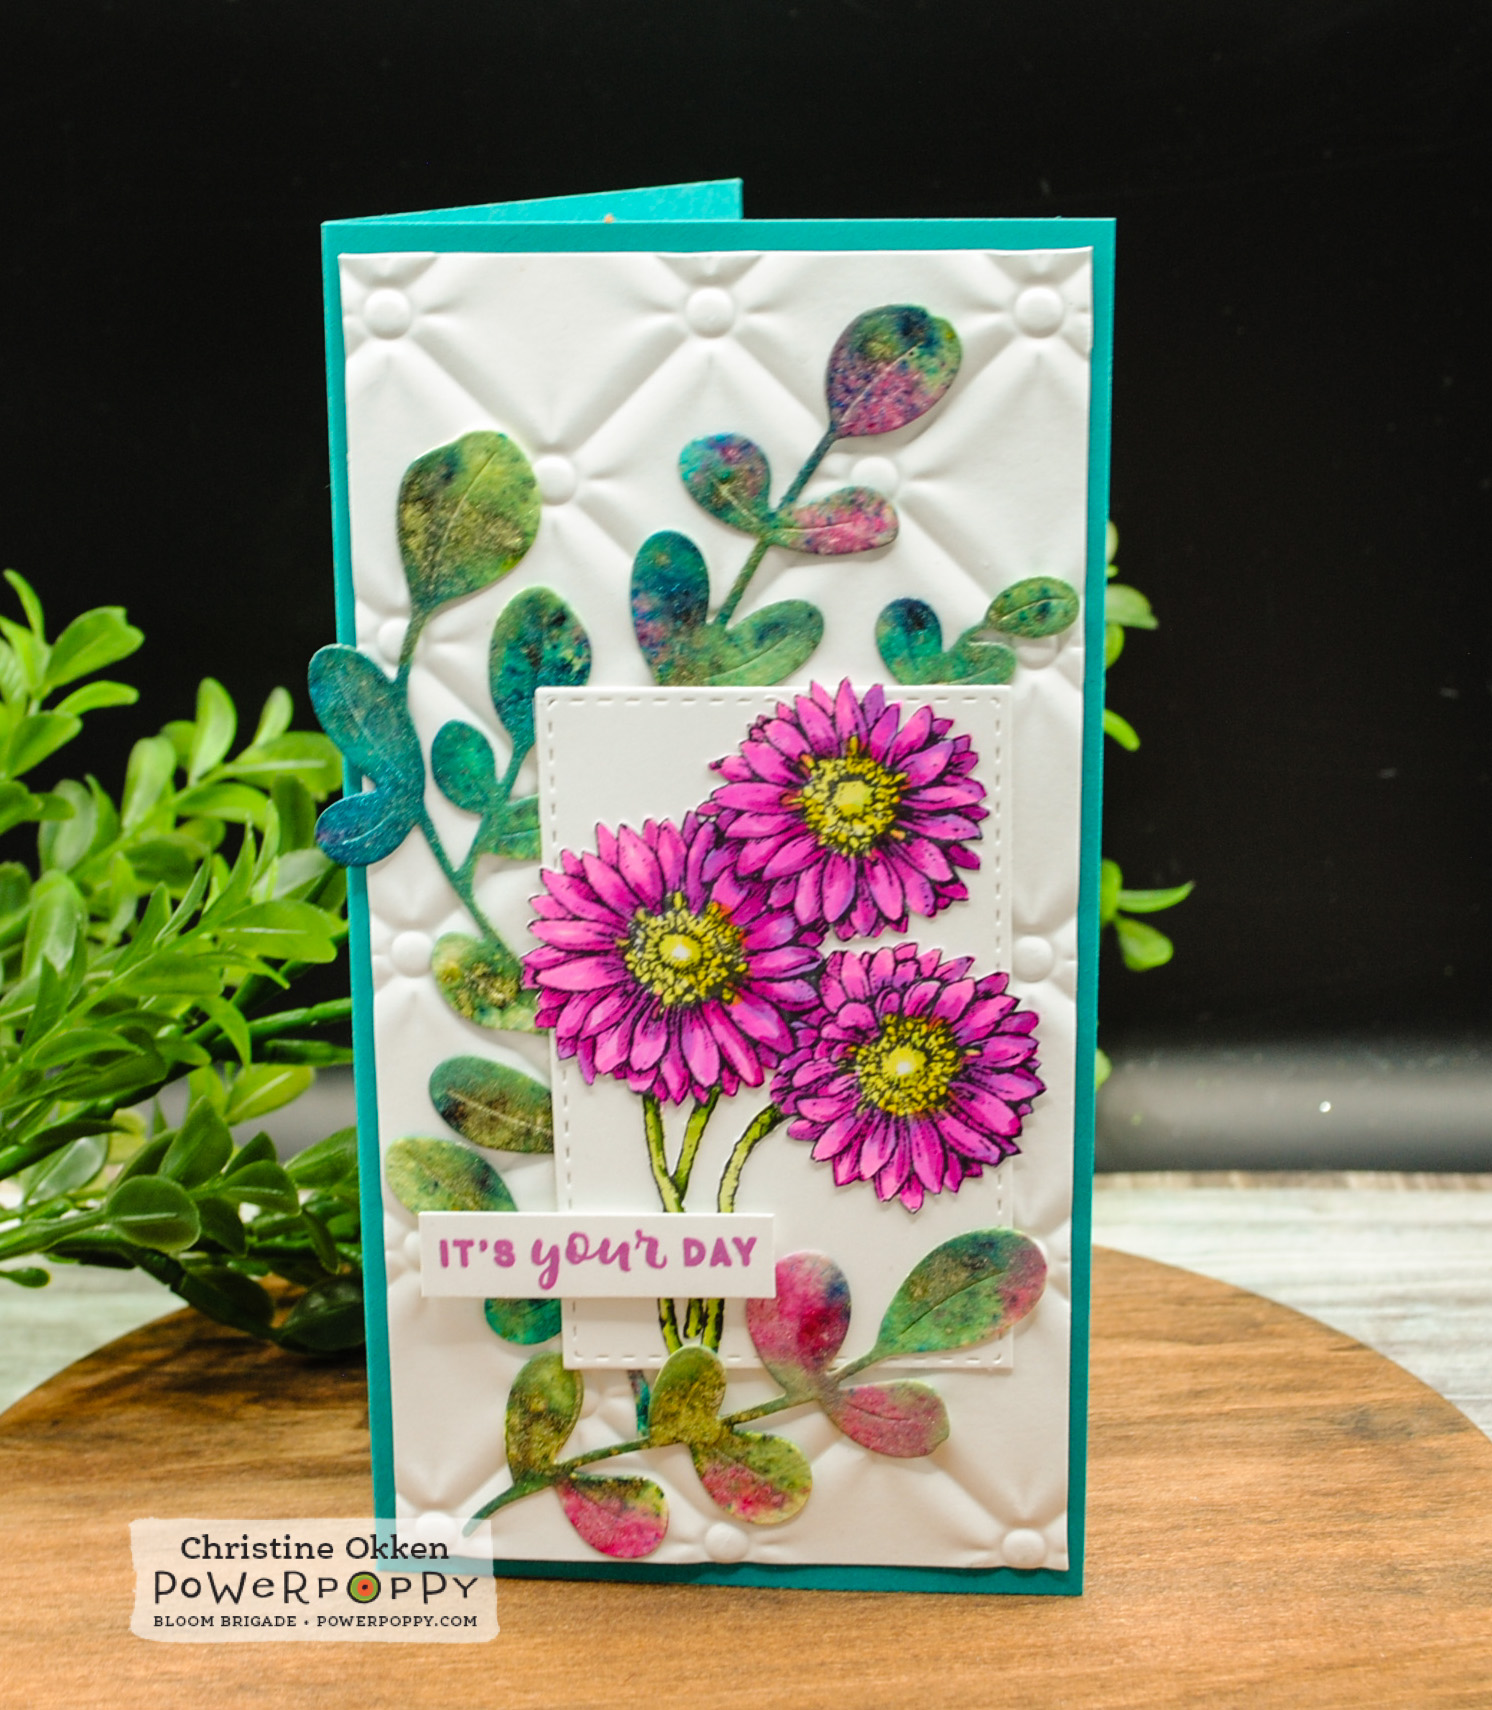
I’ve created two cards with this inspiration:  First up, a design inspired by the colours and plants in the photo.  


It’s a mini-slimline design using 
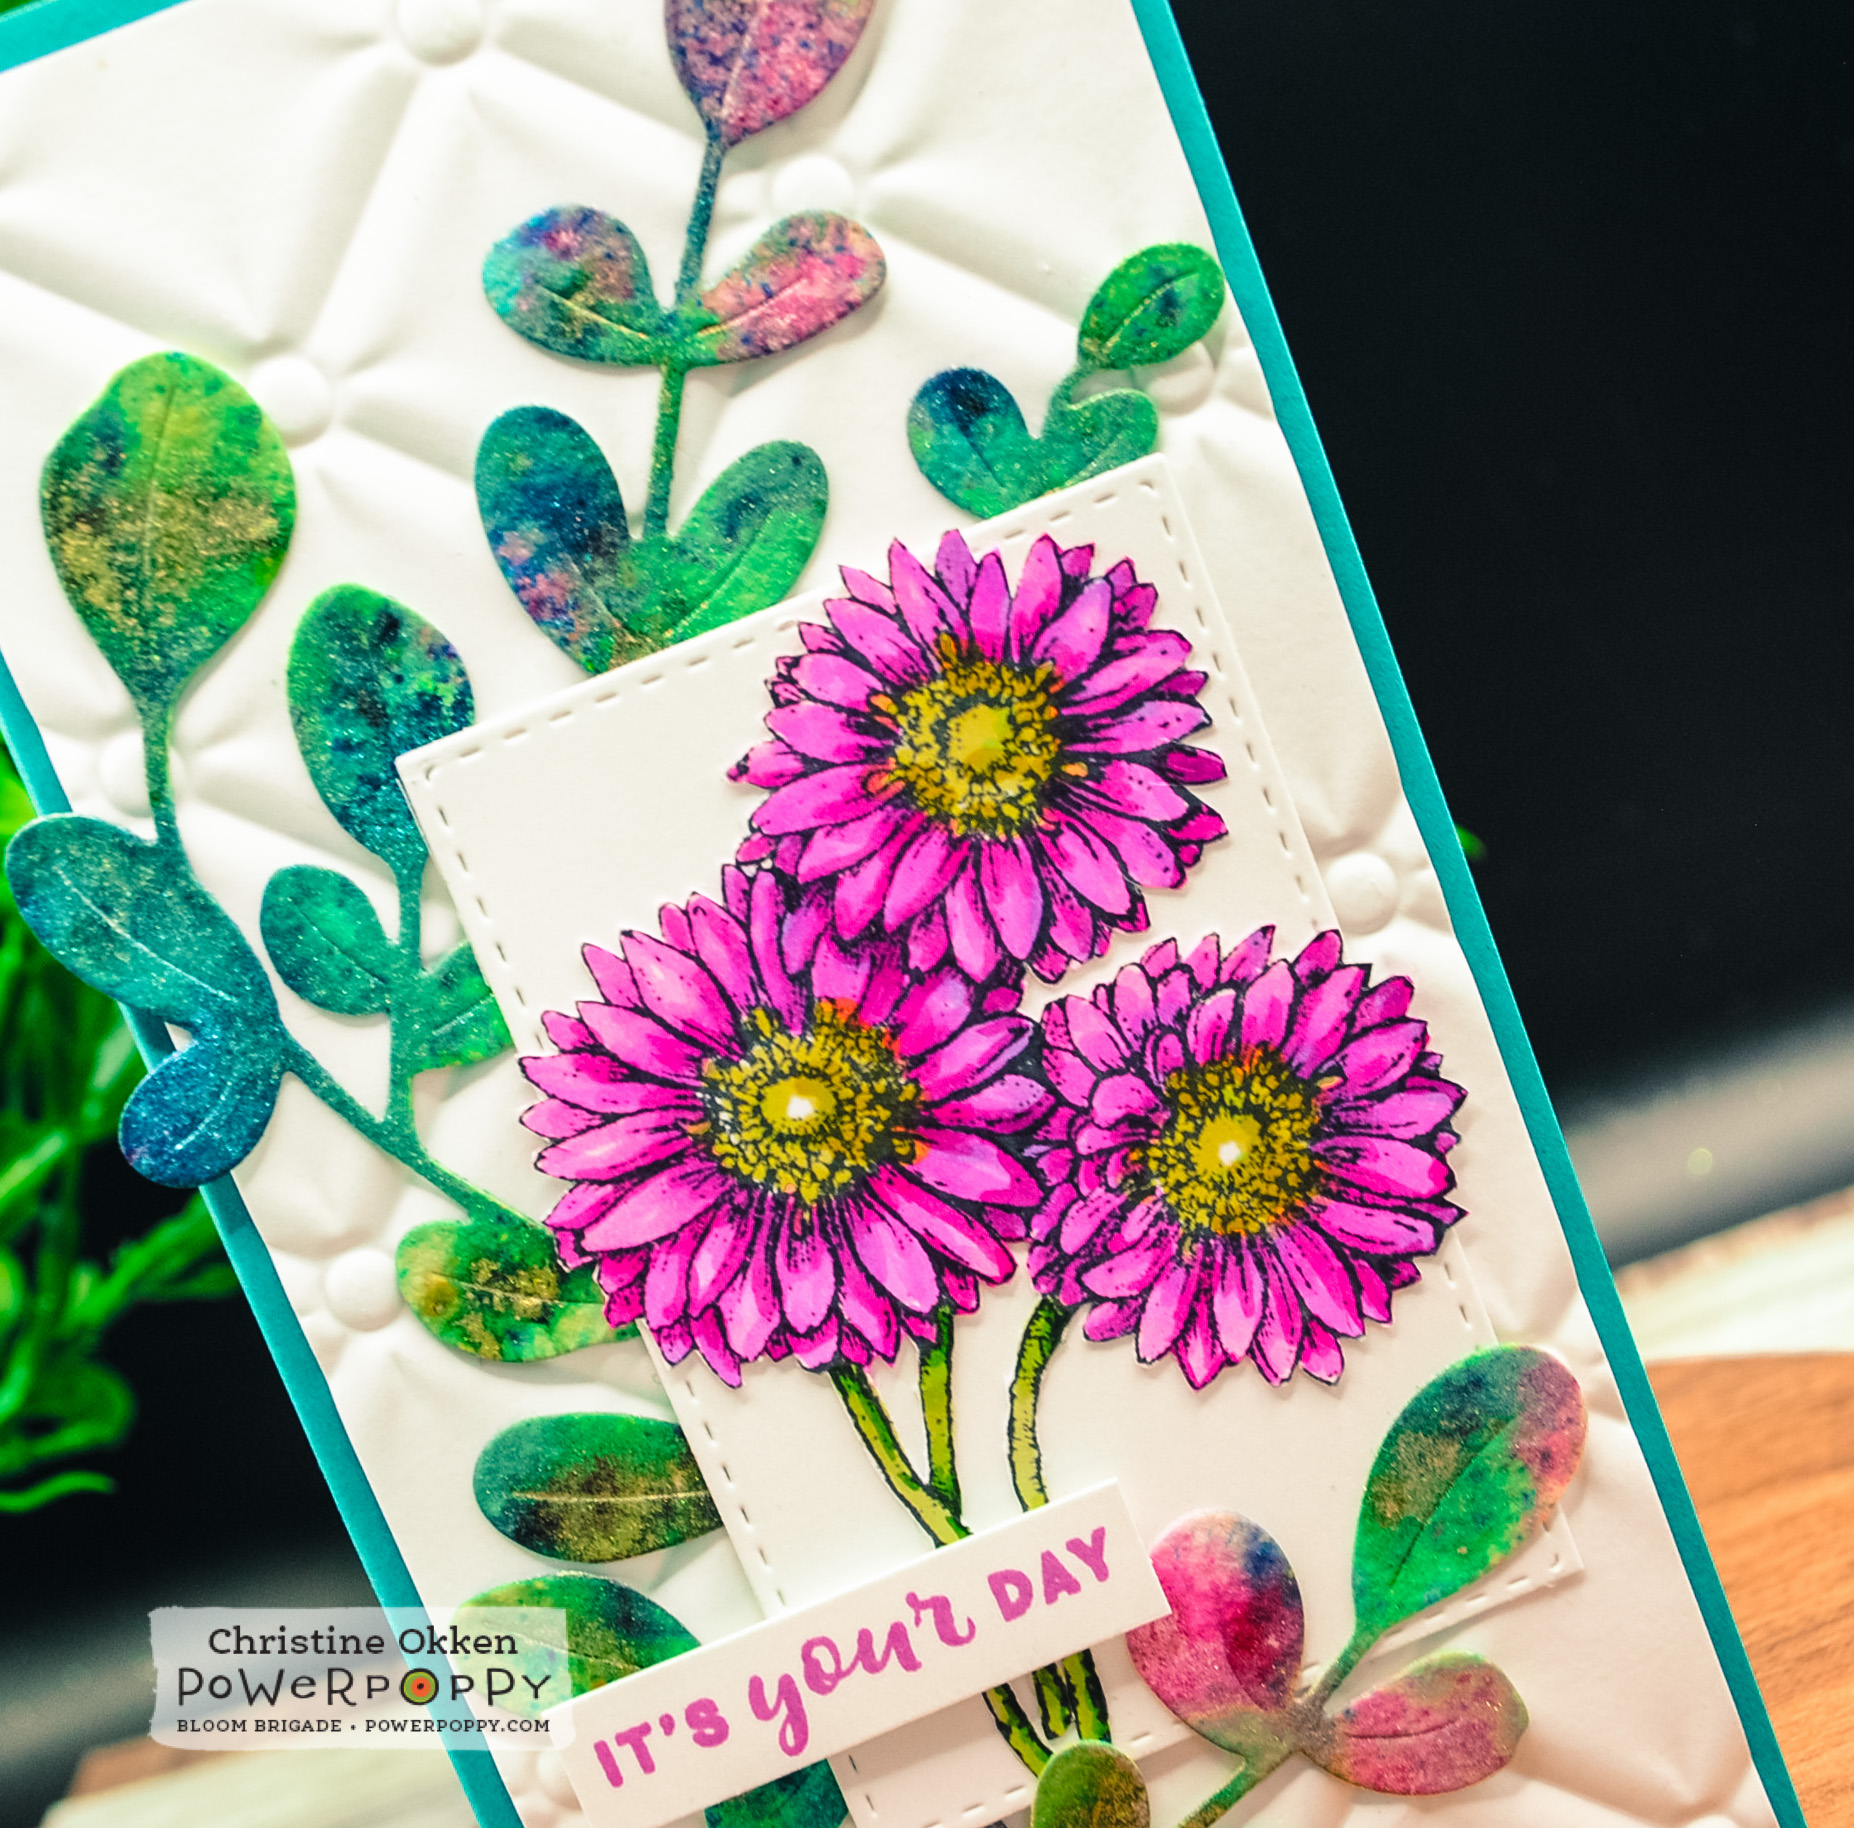
Power Poppy’s Gerbera Daisies Stamp set to mimic the flowers of the Sea Fig, colouring them in vivid pinks with my Copic Markers.  They are fussy cut and placed on a layered background with a die cut that I think imitates the sea fig vegetation.  A very FUN new find for me is the Lindy’s Magical Powders that I picked up which bring all the colour to that die cut!  These powders are dye based and activated in water, and result in gorgeous vibrant saturated colour and shimmer.  I think they really give the feel of the succulent vegetation and the colours of the sea.  


Here’s a view that helps you see how shimmery and shiny they are, and what awesome colour you are left with.  I’m going to be using them a lot in my future!  I’m using watercolour paper because it holds the moisture you need to activate the powders.  


The pretty little sentiment is from Power Poppy’s sentiment set, Nice Things to Say (in stock in polymer).  


Now I have a card that is very ocean forward.  


For this design I really took inspiration from the layout and colours in the picture.  I started with the background and used the same Lindy’s Magical Powders on watercolour paper to create sky, sea and ground with different powder colours, activited them with water and let them dry fully.  then I ran the background through an embossing folder I have that has the feel of the vegetation.  Next I brayered watered down white acrylic paint over the embossing to give the feeling of foamy waves and bring some highlight to the dimension of the embossing.  


For this beautiful sentiment I used one of my favourite Power Poppy sentiments M-Powering Words , embossed it with a metallic embossing powder in teal, trimmed it out and placed it on teal glitter paper and a layer of vellum.  Then, I accented the card with pretty dies from The Greetery Curio Summer Findings

I hope this inspiration has taken you on a lovely journey to the sea!  Join us in The Blossom Challenge this month!  You could win a Gift Code for the Power Poppy store!


Thursday, February 16, 2023

Repeated Pattern Simplicity in Flowers


Welcome Friends!  I’m back today with some tiny flowers that pack a powerful design punch because I’ve chosen to use them as a repeated design.  These dainty little Core0psis flowers are from Power Poppy’s polymer set, Vibrant Thanks (sold out).  But there are many Power Poppy flowers that have this small dainty look as well.  Coreopsis are ususally yellow, but after stamping them several in a row, I took some creative liscence and coloured them up in fresh blues (B21 - B26), with yellow centres.  

Blue and white make such a crisp fresh combination, so I chose a clean and simple design to go along with our Clean Slate Challenge at Power Poppy this month (ending tomorrow!).  


I pulled out a layered stencils from Pink Fresh and used Faded Jeans Oxide Ink and Chipped Sapphire in the diamonds and outlines and then used some embossing paste in the centres of the diamonds to give it some texture.  The blue background really sets off the flowers so nicely!  


The sentiment from the Vibrant Thanks works perfectly embossed on vellum because of the nice thick scripty font.  A couple of faint blue enamel dots help hold down the vellum fishtale banner and disguise the adhesive behind.  

That crisp clean look is so perfect for these dainty flowers in a row!  

Monday, January 16, 2023

The Blossom Challenge: Clean Slate!


Welcome to a new year Power Poppy friends!  We’re starting off the new year right with a new theme for The Blossom Challenge!  January brings a lot of new starts, maybe even new creative goodies and creative juices, so we’re all about a Clean Slate this month!  Where you can show your best clean and simple designs that celebrate that simple yet graphic style that packs a punch! 

I love when Clean and Simple designs accomplish somethings really eye-catching in more simple ways, so today I pulled out a now retired polymer set from Power Poppy which showcases all sorts of fun mushrooms!  Parts of that set are also available in digi form as Mushroom Trio, Miraculous Mushrooms and Morel Standards.  I stamped the image on Kraft cardstock and then pulled out my Prismacolor Pencils because I always love how pencils look on Kraft.  


You can achieve a look that almost glows!  I always lay down a layer of white prismacolor for the rest of the colours to lay on and blend.   A simple snail die from The Greetery seemed like the perfect accent, and then a bit of ribbon adds another pop of colour but keeps it clean.  


Come and join us for this month’s Clean Slate!  All you need to do is create a design show casing any Power Poppy image and link it up to The Power Poppy Blog to be in the running!  

Did you know Marcy’s got a gorgeous freebie you can use too?!  Just in time for Valentine’s The Rose Digi is FREE!  It would be a beautiful clean design image to use!  More details on the Power Poppy Blog!  

Monday, December 19, 2022

Warm and Toasty Jingle Bells


Are you warm and toasty where you are today?  From what I can tell from weather reports, both Canada and the US have had cold and snow all over the map!  

Today I’m bringing you something that might warm you up with this sweet image from Power Poppy called Blankets and Bells.  It’s a delightful little stack that looks cozy-cabin ready with the warmth of the lantern and the blankets for snuggling!  Colouring is done with Copics and I’ve paired it with some fabulous patterned paper I had in my stash with a fun colour palette. 


Behind the patterned paper I sponged Distress Ink through a basketweave stencil to mirror the patterns in the blankets, added a few enamel dots, and tied a pair of cute golden jingle bells to Baker’s twine to mirror the image.  


Always sweet to hear the sound of jingle bells on a card!  

Be sure to pop by the Power Poppy blog today to see who won November’s Gold, Silver and Shimmer Challenge from last month.  We’ll be back with The Blossom Challenge January 16, 2023!  

Thursday, December 15, 2022

Oh Santa Dear!


Santa sometimes needs a change of clothes don’t you think?  I’m sure he gets tired of all that red, and green is just as festive at Christmas!  So, while the laundry is being done, he’s feeding the crew a treat as he gets ready for Christmas.  I think this little pairing from Power Poppy is adorable!  It’s called Under Glass:  Christmas Traditions available in polymer (on SALE) and as Feeding Blitzen in digi.  All coloured up with Copics.  


Creating a fun snowy background came with both embossing paste and ink, and lots of splatters of green and white as well.  A bit of washi tape, twine, die cut snowflakes and enamel dots add pops of colour.  


Blitzen is looking very pleased with the snack and Santa might just stick with his green suit!    Thanks for joining me today!  

Thursday, December 8, 2022

Inspired Nativity


Oh the days are counting down towards Christmas!  In a busy season for us I have not done any decorating, or shopping or baking....I’m a little behind.  However, I did do a little creating!  I spoke last week at a Christmas event at our Church and as received a Christmas card thank you from one of the leaders that was so lovely!  I was so inspired by it, that I decided this Christmas design above with many nods to the original card (pictured below).  


I just loved the nativity scene of the shepherds entering Bethlehem, the metallic stars, the circle motif and the great colour combination with navy, blue/green white and peach.  


So I pulled out this beautiful set from Power Poppy called Enchanted Branches Nativity (on sale!), and in Digital its called Enchanted Branches Nativity:  Baby Jesus.  I started by stamping several of the branches in the set, a lamb and the baby Jesus, colouring them up with Copic markers with that great colour palette.  I trimmed out each piece with fussy cutting and added glitter pen to parts of the images.  


For the background I began by embossing silver stars from the set in silver onto cardstock and then sponged an ombre of Salvaged Patina, Unchartered Mariner and Grey Distress Oxide ink to give you that night sky feel.  To tie in the circle motif I placed Jesus onto the die cut circle and framed the image with the branches, accenting with the lamb and the sentiment from the set.  

Love how it turned out!  Hope you enjoyed it too!