Showing posts with label Prismacolor Pencil. Show all posts

Monday, February 26, 2024

Happy Day Florals with Alex Syberia


Hi There!  Today I’m bringing you another oh so lovely floral from Alex Syberia Designs.  It’s another Digital Image from them with such amazing colouring potential!   Because they are in the process of moving, I can’t locate the design on the shop, but it’s called Flower Garden Card Panel.  

One of the things I’m loving lately is finding unique colour palettes, whether through other cards I’m inspired by or products I see, and then swatching them with Concord & 9th’s colours so I have an inspiration jumping off point for cards.  This was a fun one with the warm shades on the petals and the cool shades in the leaves.  


I’ve combined Copic colouring with coloured pencils to finihs off the design.  Because the flowers are so vibrant I wanted them to take centre stage, so I added a small sentiment from Concord & 9th’s cutie patootie dies Short and Sweet.  They are stacked 3 x to get some added height, and then it’s really simple embellishments to accent the sentiment, and coordinate with the colours.  


All layered on a 3D embossed card base with Spellbinder’s Embossing Folder.  
It’s a great day to have a happy day!  


Tuesday, February 6, 2024

Faux Embossing with Stencils and SSS


Stencilled Spring Leaves with Simon Says Stamps Card

hello!  After a week in CA for work, I’m ready for Spring! Winter is still sticking around here, so I created a little splash of Spring leaves with this pretty stencil from Simon Says Stamp called Autumn Cascade, but it makes just as lovely a card in other seasons.  

I chose some Distress Inks and ink blended the stencil, also adding in some coloured pencil definition.  Then to give it a bit of extra pop, I got out my light table and embossed it! 


All you need to do is place the coloured image face down over top of your stencil (precisely), and then the light table shining through allows you to use an embossing tool to press the images through, giving you some light embossing.  For a clean and simple design like this, a little touch of depth goes a long way.  


It’s such a pretty touch!  I also added coordinating die cut leaves, and a circle and sentiment from Concord & 9th’s A Bit of Paradise die set and the Short and Sweet Dies.  


Ready for a sweet hello to a friend! 

Thursday, January 25, 2024

Loved Blossoms with Concord & 9th


Happy Thursday!  I love that you don’t have to use traditional colour palettes for Valentine’s!  You can embrace any colour you want!  And I sure did with these fun blossoms from Concord & 9th  Flower Medley Bundle.  I saw another card that inspired me with colours much like these, so I’m always taking notes or pinning things like that to remember for a future project.  The card I was inspired by wasn’t floral, but I think it really works to have these vibrant colours on a deep blue-green background like Juniper.  


I found a little arrangement I loved and placed the on the Plaid Card Front Bundle  card base.  I also stamped and detailed the sentiment with coloured pencils so it had some definition to the letters.  


 Its bursting with colour and love!  


Tuesday, January 23, 2024

Dainty Blue Petals with PTI


Hi there friends!  Today I’m bringing something simple and elegant.  There’s just nothing like simple stems of flowers.  I adore this stencil set from PaperTrey Ink called Wild Blooms.  So, I blended some Distress Ink through the stencil, then added some detailing in with coloured pencils, while keeping the softness of the design.  


Next, to give the panel some more textural interest, I ran it through a double lined card front die both horizontally and vertically to make a grid pattern.  I think it’s just the right touch for that white space, without distracting from the flowers.  


Another pretty sentiment from a retired PTI set and a tiny enamel heart complete it!  Sweet simple and encouraging.  Appreciate you joining me here today!  
 

Sunday, January 7, 2024

Beautiful Flowers with Simon Says Stamp


I’m delighted to share some new colouring with you!  This week’s Wednesday Challenge at Simon Says Stamp is to use something new.  These gorgeous roses called Beautiful Flowers are new to me, and aren’t they a knock-your-socks-off stamp?  This is my favourite type of image to colour, with tons of petal power potential!  I started my colouring with Copics and finished with colored pencils.  I wanted it all to have a soft vintage/shabby chic effect, so I’ve added deep greens and gold for the greenery.  

This card size is a bit bigger at 4 4/8 x 6 1/4.  


Aren’t the petals and leaves pretty?  I also vintaged it up by stencilling on the card base with gothic stencil, and added ink blending, gold Lunar Paste and little dew drops.  


The sentiments in the set are amazing!  I stamped Happy in Grapefruit Ink from Concord & 9th, embossed the smaller white parts of the sentiment and then added a little white gel pen to the Happy.  

Appreciate your visit and comments!   

Thursday, January 4, 2024

Winter Roses with Power Poppy


OO I’ve got some pretty colour for you today!  I will more often lean toward a warm palette, but sometimes you’ve just got to go coooool!  I pulled out this image from Power Poppy called Snowdrops and Tea Roses which is such a beauty!  And though it could lean Christmas, I’m just telling myself it’s still good for Winter, especially with a Birthday sentiment.  

This awesome image was coloured with Copics, and finished with coloured pencils.  I can tell my copic nibs need replacing because some of my colouring is getting shiny, so finishing with pencils help tone that down a little.  

Winter Roses with Power Poppy
 
It’s a gorgeous arrangement of little roses, snowdrops and holly leaves with tiny berries in a cup.  So darn sweet!  

I created the background with Pink Fresh Studios Slimline Diamond Builder and some Distress inks that coordinated with the colouring.  Then I layered some vellum over to give it a bit more softness.  Finished with some slim velvet ribbon, and tiny dew drops that look like water drops on the roses.  


The sentiment is from a Power Poppy polymer set and the banner die is a retired one from The Cat’s Pajamas.  Such a great colouring project to start the year!  

I have a colouring video on my Instagram page for this card if you’d like to pop by!  See me here at ChristineCreationsArt

Thanks for popping by today!  

Monday, January 1, 2024

Postage and Foodie Mini Valentines with TCP


January Release Graphic

Happy New Year TCP Friends!  I'm kicking off 2024 with lots of love.  I think it’s the best kind of theme for a new year, and a brand new The Cat’s Pajamas release full of all things adorable for January. 


I’m starting with a set of mini Valentine cards in a postage stamp shape that are perfect for tucking in to a lunch, school Valentine’s or surprising your child or sweetie with a little note at any time of year.  I have 5 cuties to show you using the brand new Food of Love Digi set.  Oh my WORD, it’s just so darn cute!  Little pairs of food buddies and punny sentiments that have to make you smile.  


We’ll start with this adorable little mushrooms!  I coloured all of the images with Copics, and finished off the detailing and blending with coloured pencils.  

Because I wanted to make the images coordinate like a set, I ink blended a little soft blue around the edges of each little card as a nice backdrop, then I used a retired TCP postage themed die to cut out the shaped cards.  

Each card is stamped with a postage mark from a retired TCP polymer set, and a coordinating heart “stamp”.  


Each little card is then completed by cutting a folded inside just smaller than the postage die, and the coordinating sentiment from that pair.  I also created coordinating envelopes in the same theme, with blue patterned paper (cut 5”x 5”).  


Here’s the sweet tomatoes.  You can also see the front of the envelope has a smaller rectangle postage die to address with a coordinating heart stamp.  I love those sweet matching details. 


Love you...right down tomatoes!  


Next, you stole a pizza my heart!  For this savory pairing I added little pieces of cheese with a white gel pen. 


YUM, pepperoni!  


I also added a heart on the back of the mini envelope where you can close it.  


This one might be my personal favourite because I just love limes, and they were really fun to colour wiht the addition of highlights on the lime with gel pen.  


I AM so glad you’re mine :)  

And finally it’s a berry cute pair...


Blueberry and raspberries are perfect together.  


Because you are berry special.  Such a delight to create these cuties!    I’m including a peek at the whole set.  Just look at the cute shadows you can use too!  Thanks for joining me today!  


Monday, November 20, 2023

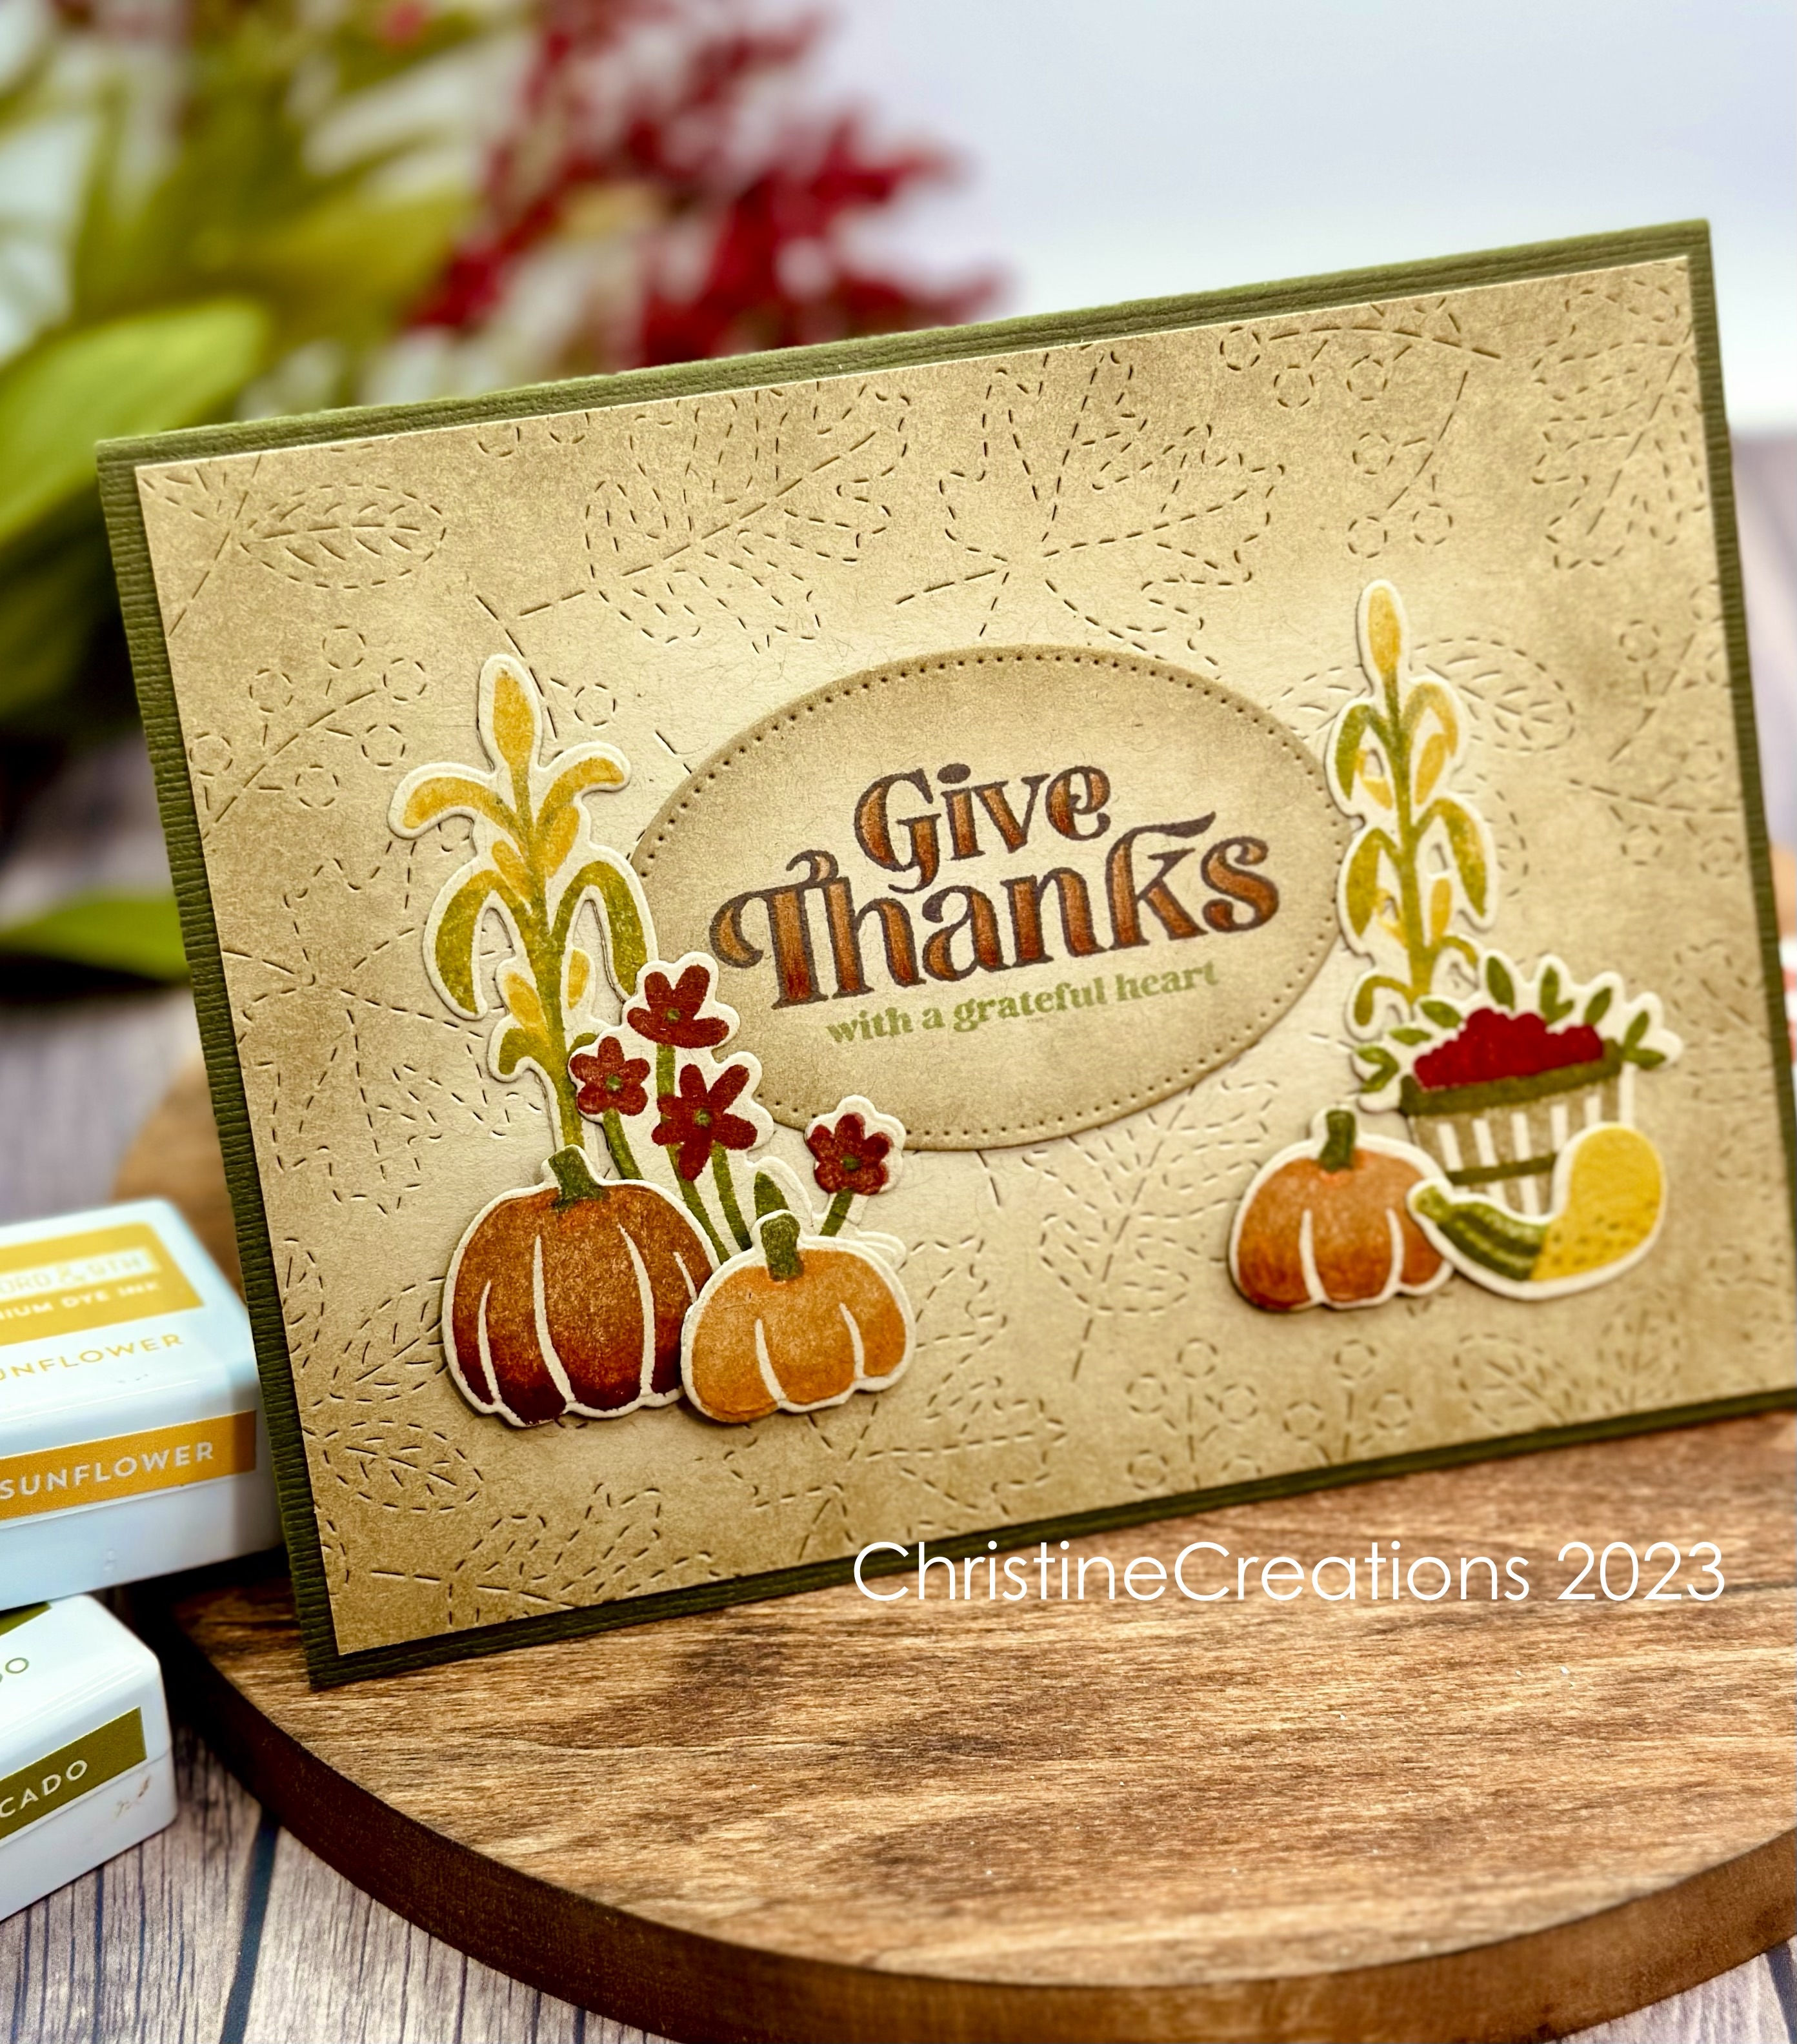
Give Thanks with The Greetery


A few weeks ago I was the speaker at a ladies retreat, which was a great event to be a part of.  So, I just popped this warm and rustic card into the mail to say thank you to them for having me.  I used The Greetery’s Thankful Heart Stamp and Stencil to create a simple mailable design.  

I used the elements in the set to make a little harvest scene, placing it on a kraft coloured background cut with Concord & 9th’s Stitched Leaves Card Front Die.  A match made in heaven!  


I added a little extra colour to the harvest elements with prismacolour pencils, and stenciled in the colour for the sentiment.  


Sweet and simple, but heartfelt!  Happy Thanksgiving to my American friends!  


Wednesday, November 15, 2023

TCP - Citrus Christmas!


Hello!  Today I’m bringing you two citrus coloured designs from The Cat’s Pajamas November Release!   Its full of fun and festive designs for the season and I had a lot of fun creating these designs.   First up, this adorable pair in front of the fireplace, tucked in for a cozy evening.  This one is called I Like Big Gifts.  


I began by colouring up the image with Copics in fun lime green, orange and coral red shades.  Non-traditional palettes are really popular right now, and this is a fun one. Then I added in the background details with prismacolor pencils, like the wallpaper and wood flooring.  

The background layer was embossed with a snowflakes folder, and then I added sparkly touches with some  sparkly embossing paste.  I also added the same sparkle to the die cut sentiment.  


They are such a cute pair!  

Now we’re headed to Grandma’s house for Christmas!  


This one is called Beary Christmas, and I just love our retro style bear driving on over to celebrate!  He’s even brought the Christmas tree and lights along!  


I started by colouring up the image with Copics, and then created a background with a retired TCP stencil by ink blending some deep greens and white ink for highlights and depth.  


I die cut some snowflakes in rich citrus shades to coordinate with this juicy palette and accent the little scene. 


A bit of twine ties it all together and we’re ready to celebrate!  

Here’s a peek at the new TCP goodies I used:


Friday, November 10, 2023

Mixed Media Coral Poppies


Hello!  I’m back with another poppy design to show you as we move into Remembrance Day tomorrow for Canadians.  Lest we forget the cost of war, the loss of life....it seems especially poignant this season.  So though this isn’t a remembrance card, those poppies are a nod to all the ways we need to remember. 

This design uses all sorts of mediums, but begins with these gorgeous poppies from PaperTrey Ink called Into the Blooms: Poppies.  This time I did a coral version, starting with coral cardstock, adding Distress Ink for shading as well as Prismacolor Pencils for definition in the petals and leaves.  


For the background of this mini-slimline design, I watercoloured some shades of light green and a few soft peachy shades so that it feels like the poppies are in a field of green.   A foiled sentiment from Spellbinders  Mini Everyday Sentiments foiled in Rose Gold.  The dimension with all the layers is really great!  


Thank you for joining me today!  


Sunday, September 17, 2023

MFT Coloring Superstar Entry


Hello!  Today I’m throwing my colouring utensils into the ring at My Favorite Things Card Design Superstar Challenge - Coloring Virtuoso.  I had a great time combining a number of MFT sets and adding in some of my own hand drawn details to create this cozy Autumn scene.  

I started with MFT’s Nobody Nose Me Like You Do - a since retired YUZU stamp set did some masking, and also added in the Scene Builder from Stacy Yakula. I hand drew the blanket and some of the hill line with a multi-liner pen, and then began colouring with Copics.  


To add in more details and depth of colour, I pulled out my Prismacolor Pencils and Faber Castell pencils and added in more colour.  Its great for adding in textures like the Corgi’s fur, the texture of the jeans, straw hat and tree trunk.  


Cutting the scene out with a Stitched Rectangle Scalloped Edge Frame die and a sweet sentiment strip finishes off the design.  It was so fun to create!