Showing posts with label Embossing. Show all posts

Friday, July 25, 2025

Treasure Sunrise Roses with Simon Says Stamp


Well, its been about 6 weeks since I’ve created for myself!  A lot of things have happened in the last few months including a big career change back into a church Pastoral role and our son got married last weekend.  A lot of my creating has gone to doing little bits and pieces for their wedding.  I honestly thought I might have lost my creative spirit.  It’s hard to start back up again isn't it?  

When I’m lost for inspiration, I always go back to what I know, and that’s my love of colouring.  I pulled out this stunning set from Simon Says Stamp called Beautiful Flowers and its coordinating die.  I inked it in Toffee Crunch Memento Ink for a no line look, and coloured the image with Copics, and a bit of coloured pencil for details.  I have some Sunrise Roses in the front flower bed which I used as inspiration for this design.  They come out of the bud in deep coral shades and then fade to apricot and the faintest peachy blossom.  


The image is so beautiful and large that I went with an A6 sized card for the design.  The background is first inked on the card base with SSS’s background stamp Overlapping Drops, and then the next layer is ink blended with Distress Oxide ink and then run through the SSS Pincushion Plate Die, where I left all the holes in the die so it just brings texture.  I’ve added in some ink blended die cut leaves for more tone on tone texture.  


The sentiment, from the stamp set is embossed onto a vellum strip.  Hope you enjoyed!  


Wednesday, April 23, 2025

Periwinkle Blossoms with Concord & 9th


 Hello!  I felt like colouring something really special this week, so I pulled out an older set from Concord & 9th called Blended Petals.  I chose not to use the stencil, and instead pulled out my Copics and some coloured pencils to bring it to life.  


I chose to go monochrome, even adding in blues to the greenery.  Then I created tone on tone texture and colour in the embossing folder, dies, and accents, including a little strip of glittery periwinkle paper.  


Love how it turned out!  I’m eagerly anticipating flowers this Summer...maybe not periwinkle coloured...but beautiful regardless!  

Wednesday, April 2, 2025

Watching You Bloom with Pink Fresh Studios


Hi There!  Ever have one of those days where you need a pretty card, but don’t have a lot of time to create?  Today was one of those days, and these new products from Pink Fresh Studios from the Peony Perfection Suite were perfect!  I started off with the Washi Tape in Pink and the coordinating Peony Perfection Dies for quick and showstopper blossoms.  


Next, I used the new Leafy Lattice Press Plate and coordinating Dies with foiling to create the gorgeous lattice.  I ink blended the background and then placed all the elements onto the page.  A little splash of gold paint adds that metallic touch.  

The sentiment is from the Peony Perfection Stamp set, and I embossed it in gold, and a few gold enamel dots are the pretty jewelry accents. 

Monday, March 24, 2025

Meraki Harmony Hop with Crafty Meraki


Today I’m excited to hop along with the Crafty Meraki Design Team celebrating the recent Meraki Harmony Release on Instagram.  There are prizes and giveaways, so be sure to join us there!  For my card today, I created a sweet little design with the Feathered Friends Suite of products.  I’ve used the Crafty Meraki Feathered Friends Press-tacular Plate, the Feathered Friends Layering Stencil, and the coordinating die.   


To create the background texture of this richly coloured design, I used the Crafty Meraki Parisienne Slimline Para-Dies, and then layered the image overtop.  With all the jewel tone shades, it feels very tropical!  


The sentiment from the coordinating Feathered Friends Stamp Set is embossed, and I’ve added Jade Shadows Dew Drops for some sparkle.  


Be sure to pop on over to my Instagram page and this post to join in on the hop, and enter to win!  

Friday, March 21, 2025

Floral Cake with Honey Bee Stamps


Hi there!  I’m back for day 2 of Birthday Cards this week, with another beautiful cake, this time from Honey Bee Stamps.  Its called Wonderful Wishes, and I’ve used both the stencil for the set, as well as the coordinating Honey Cut dies.  I adore the concept of a completly floral cake!  


The stencil produces just beautiful results!  I’ve stenciled and die cut a few extra elements from the set to pop up, and I’ve spritzed it all with glitter spray, so it sparkles.  And isn’t the green glass cake stand pretty?  

To coordinate, I’ve also added an ink blended and embossed background (Spellbinders) with coordinating colours.  


The HUGS sentiment seemed perfect (from the set), and a few sparkly sequins add to the shine and shimmer.  

Thursday, February 27, 2025

Rosey Roses with Simon Says Stamp


Hi There!  A few weeks ago when I was watercolouring a Simon Says Stamp’s amazing Beautiful Flowers Set, I also embossed the loose roses from the set, and after painting them I set them aside for later.  They made for a really pretty arrangement for a second card.  

To play off the colours of the roses, I did some ink blending, and colour lifting with a stencil in the background.  It makes for great colour and texture.  To accent and add some sparkle, I used Crafty Meraki’s Olive Leaf Para-Die on gold glitter paper.  It’s perfect for extra foliage.  

The sentiment is from Concord & 9th’s die set, Short and Sweet Dies,  and I’ve added in some ‘berry’ enamel dots to accent.  

Wednesday, February 26, 2025

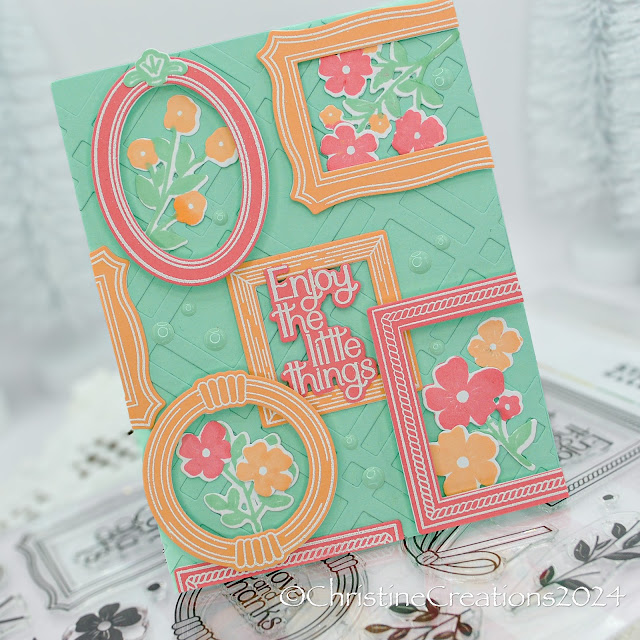
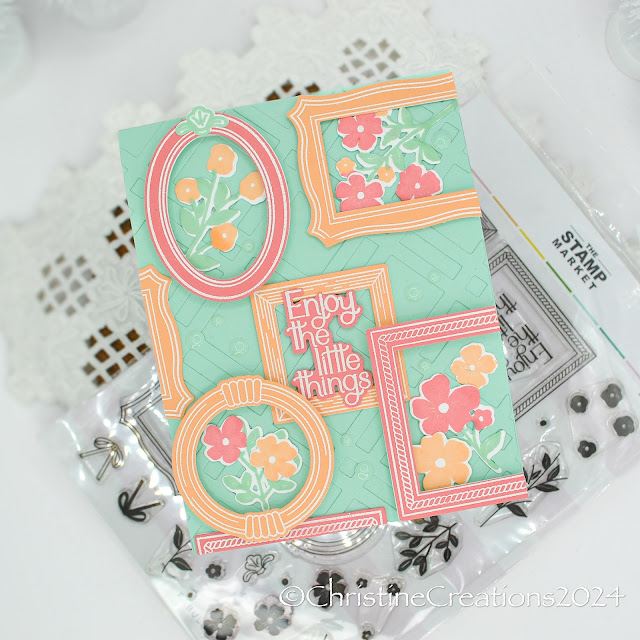
Framed Little Things with The Stamp Market


Hello!  Doing a little creating with The Stamp Market’s February Card Kit, because it’s just SO cute!  An big element in the kit are these adorable little frames.  I wanted to make a “framed wall” design, so I picked a sweet little colour combo to start with. 


I stamped and die cut the pretty flowers from the set, and then embossed the frames in the various colours in white to tie it together.  The background uses a Concord & 9th Die to create texture.  
 

The sentiment seems just perfect!  

Monday, February 24, 2025

Periwinkle Petals Birthday


Hello!  Have you ever pulled out a stamped image and you’re really not sure where it came from?  I have a pile of images I’ve printed or stamped and just never gotten to.  This gorgeous floral is illustrated by Marcella Hawley - that I know for sure.  Her style is unmistakable, I just can’t find if it was from Power Poppy back in the day....or even for Flourishes even farther back in the day.  Regardless, its a beauty - and needed to finally make an appearance on a card.  


The colouring is done with Copics, and finished off with coloured pencils.  I can’t remember the last time I used lace ribbon, but the cream of the cardstock and the pretty petals just lent itself to a old fashioned feel.  To liven it up I also added a strip of periwinkle glitter paper to accent.  The background embossing folder is one from Spellbinders.  Which gives it nice texture.  


The birthday sentiment is stamped from another Power Poppy image, Party Time, at least that I know :) 


Wednesday, February 19, 2025

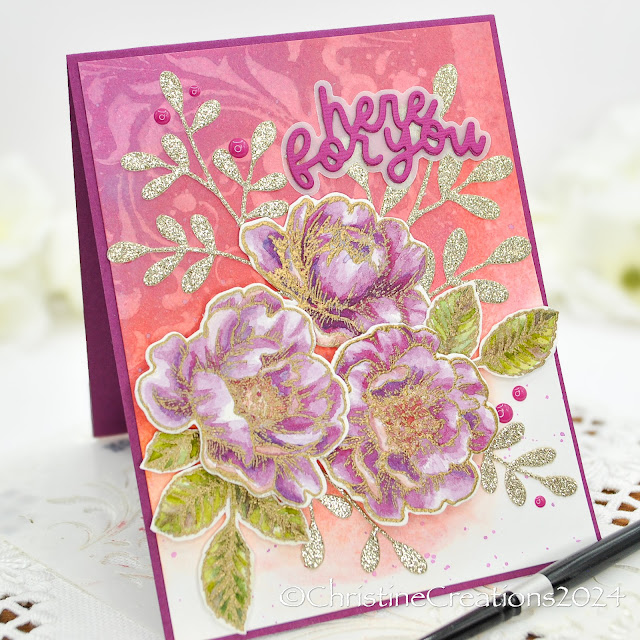
Love and Hugs Watercoloured Roses from SSS

Hello!  The monthly challenge on Instagram for Simon Says Stamp is watercolouring, so I thought I’d pull out one of my Simon Says Stamps sets called Beautiful Flowers , because it really IS beautiful!  I embossed the image onto Arches watercolour paper, and pulled out some of my Daniel Smith Watercolour tubes to paint.  


It almost feels a bit like cheating when you watercolour over embossing.  The raised edges of the embossing hold your colours in each section so nicely.  This image has a lot of gold in it, so over all it was easy to paint. I used the coordinating dies for the set to die cut the image out. 

I also created a background using a Gothic stencil and embossing paste with ink splatters.  It gives it so much great texture.  


The sentiment is from the set, also embossed in gold, and a few mirrored sequins make it sparkly.  

Sunday, December 15, 2024

Silvery Fa La La with Crafty Meraki


Happy Sunday!  Today I am bringing you another Crafty Meraki design as part of their countdown to Christmas!  I can’t believe there are only 10 days to Christmas Day!  We’ve finally made some dents in our Christmas lists and some Christmas baking so I’m feeling a lot better about that.  I want to celebrate Advent not stress!  

So, this pretty bejewelled design uses a few Crafty Meraki products.  I started with the Crafty Meraki Christmas Flower Layering Die, cut in silver cardstock, with teal greenery using the Olive Leaf Meraki Para-Dies.   


Next I created the background with the gorgeous  Holly Jolly Hot Foil Plate in shimmery silver foil.  I added depth to the layer with ink blending around the edges.  Along the top edge of the layer I added a strip of shimmery Jade Shadows Dew Drops from Crafty Meraki, attached with Scor-Tape.  


Then it was simply layering it all together with a very festive sentiment from Crafty Meraki’s Festive Flora Wreath Stamp set, embossed in silver and die cut with the coordinating die.   All that shimmer and glimmer is so classy!  

Wednesday, December 11, 2024

Scandi Christmas Deer with TCP

Scandinavian Christmas Deer Greeting Card

Hello Friends!  I’m back today with a pair of delightful deer done in a gorgeous neutral Scandinavian style.  I do love the simplicity and warmth of Scandinavian style, so I went all out with the neutrals and woodgrain textures on this card.  I began with TCP’s Scandi Santa SVG and Digi Stamp combinationfor this design, only using the digital stamp of these pretty deer.  


After printing and colouring with Copics and coloured pencil (for the gold scarves), I trimmed them out with my tiny scissors, then arranged them onto a diecut wood cut slice.  To keep the tones in that neutral/white combo, I used kraft white ink on the wood cut to bring out the texture of the grain.  This was placed on a card base with golden snowflakes.  


A gold sparkle paper banner, die cut snowflakes, wood veneer stars and a pretty white embossed sentiment from a retired TCP stamp give interesting textures and shine to the design.  It’s not often I create with neutrals, but I love the elegance and simplicity of this one!  


By now you’ve probably heard the sad news that TCP is closing at the end of the year.  It’s been my absolute delight and privilege to design for Alma for many years.  She is the best.   I will miss The Cats Pajamas for all its beautiful and unique style....and I’m also so grateful for all the fun and creativity we’ve had together!  

Thanks for joining me today!

Sunday, December 1, 2024

Merry Snowman with RAM Stamps


I don’t know about you, but it feels to me that November zoomed by and here we are at the beginning of December, with today being the first Sunday of Advent.  My little corner of the world is filled with snow, and I’m delighting in the cozy.  Today’s card uses the cutest image from RAM Stamps called Christmas Merry.  Isn’t that little snowman darling?  


The image is coloured in one of my favourite Christmas combos using coloured pencils, with some white gel pen accent.  I had some fun creating the background with embossing some swirling snow, a misty spritz of colour and some ink blending to really make it feel like a blizzard.  


To accent I’ve added sparkling glitter paper strips, die cut snowflakes and irridescent sequins that really make it sparkle.  Hoping that your season is Merry!  

Sunday, November 17, 2024

Creamy Kissed Christmas Florals with Crafty Meraki


Hello!  I’m delighted to be with you today working with Crafty Meraki’s Christmas Countdown, showcasing beautiful Christmas inspiration.  Today I’m back with a beautiful die called Christmas Flower Layering Die.  This die is designed to be stacked to give beautiful 3D effects to your floral.  I cut the layers of petals and leaves from cream cardstock, and then placed them on a sticky craft mat.  I pulled my stylus across the petals to create veining for more realism.  Then, I kissed the petals with some soft peach ink blending and gave the leaves layers of green ink.  It has such a beautiful effect.  


Next I layered my flowers together with foam dots between the sections to really amp up that 3d feel.  I splashed some pretty gold shimmery mist onto the layers to give it shimmer, as you can see below.  The background texture is created with the cream on cream theme using Crafty Meraki’s Mini Slimline Parisienne Para Dies.  I also inkblended the background to tie it together.  Because its a slimline die, I just ran it through sections of paper, and added in the piece as a design detail.  


The pretty Joy sentiment from Crafty Meraki’s Festive Flora Wreath Stamp Set, and I embossed it in gold.  


Simple gold enamel dots accent the sentiment for more touches of gold.  It has a lot of dimension and I’ll probably need to create a special envelope for it ....but oh so worth it for the effect!  

Thanks for joining me today!  

Wednesday, November 6, 2024

Berry Grateful Wreath with The Stamp Market


Wreath Shaped card with 3d leaves and embossed sentiment

Hello!  We had our first snow that stuck (for a day) this week.  It’s put me in more of a Christmas mood....while still wanting to hold on to Autumn as long as possible.  And while we’ve had Thanksgiving already in Canada, its always good to be full of thanks no matter the circumstances.  So today’s card is a bit of a transitional design between Thanksgiving and Christmas with new goodies from The Stamp Market.  This is the October Kit from The Stamp Market, and it includes a gorgeous oblong wreath for a shaped card design, lots of dies to accent the wreath and a coordinating sentiment set, dies and paper in the kit.  It’s a beauty!  


I went with some cool greens from the kit to design my wreath, and rather than flowers in the wreath, I only used the flower centers to create berries for the greenery.  Perfect to lean it more toward Christmas. Each bit of greenery was ink blended to give the leaves some extra dimension and colour.  


The sentiment is a lovely one, and I embossed it in silver and used the coordinating dies to cut it out and pop it up with foam.  With such great texture and colour, it didn’t need anything else to still be a gorgeous shaped design.  

Thursday, September 12, 2024

Covered in Blossoms with Pinkfresh Studios


Hi!  I’m back with a another Summer card for this week.  Even though the weather today was decidely Fall-like, I’m bringing the blossoms with this lovely set from Pinkfresh Studios called Handpicked Flowers.   I was totally inspired by one of the sample pictures on the Pinkfresh site that I both had to have the set, and then did my own version of one of the cards.  

I started by using the coordinating stencil for the set on various parts of the cardstock in warm summery shades to cover most of the layer.  


Then I embossed the stamp set over the stencilling in white to give some definition to the petals.  I cut a tiny strip of white for the smaller sentiment, and added in a leafy vellum branch beneath this layer for a bit of whimsy.


And finally, I added the larger sentiment from the set cut with the coordinating die for this stamp set.  No extra embellishments needed with the romantic pattern of the flowers!   Thanks for stopping by! 

Thursday, August 22, 2024

Blossom Butterfly with The Stamp Market


I had the best time making today’s card!  I pulled out a couple of products from The Stamp Market, including the Enchanted Wings Dies and the Big Bloom Bouquet Dies, to create a botanical blossom butterfly.  I cut out the different layers in vellu and cardstock and layered up the large butterfly die.  


I also have a layer of vellum underneath the flowered butterfly and a smaller butterfly in vellum on top with the butterfly body and an extra blossom.  The vellum adds a softening and see-through effect which is so pretty.  The dies are so detailed you really don’t have a to add a lot of extra.  I also cut out the sentiment 3x in white and Juniper so it would have more dimension and stand out from the card base, which I embossed with a Spellbinders Embossing folder.  


Before attaching the butterfly to the card base I swiped all the raised flowers with white ink to tie it in to the butterfly body.  Just delightful!