Showing posts with label Colouring Catch-Up Challenge. Show all posts

Friday, July 7, 2023

Baby Week: Baby Onesies


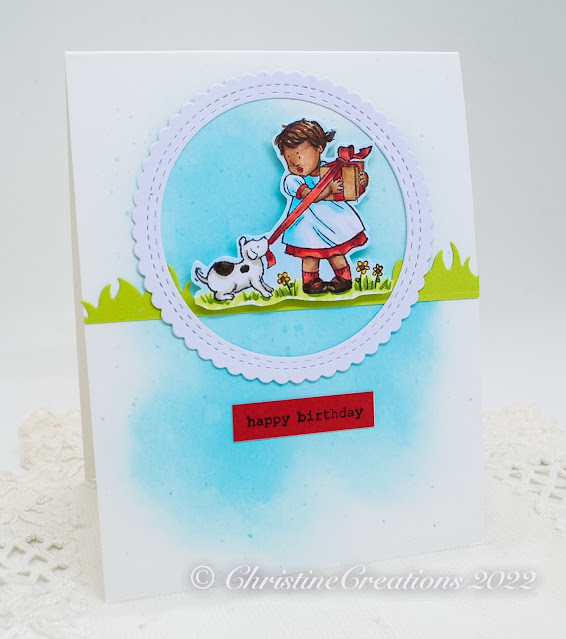
Having just done laundry, I remembered the scent of our baby’s clothes as they came out of the wash.  Such tiny little pieces of endless laundry that was so cute!  This adorable onesie is from an old Flourishes set that Marcy retired, (the same set that has the cute booties from the other day).  I’ve had it coloured up in my stash forever!  It’s coloured with Prismacolor Pencils in soft greens the turquoises, trimmed out an popped up on this cute little tag.  


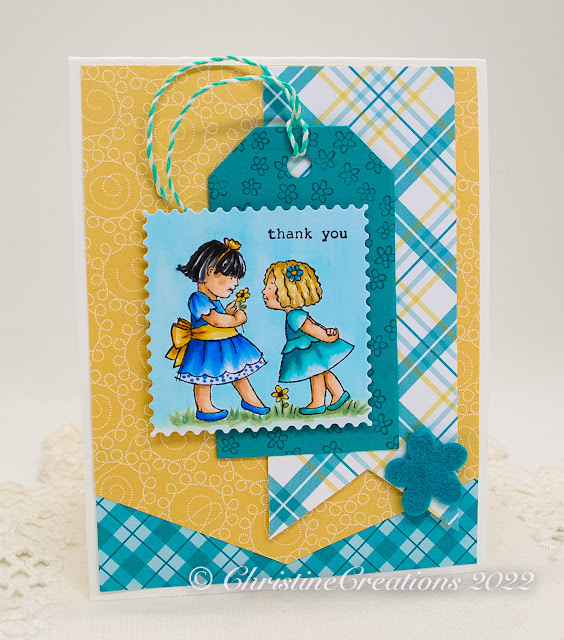
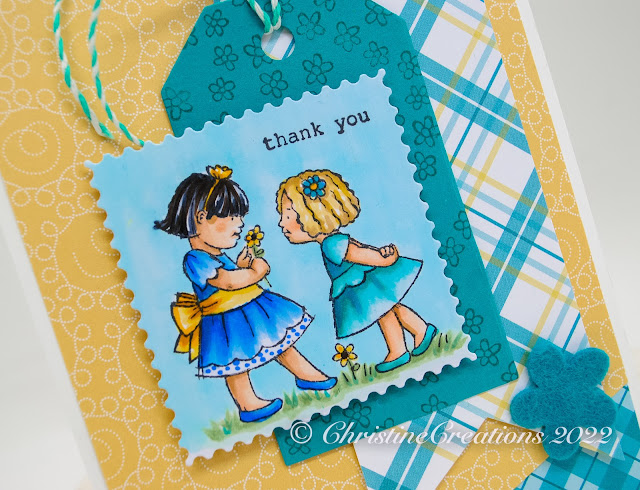
The tag behind the main tag is stamped with cute little hearts from another polymer set I have, and laid on a lovely plaid background using dies from Concord & 9th, the Thick Front Plaid and the Thin Front Plaid.  Cutting it out of three different colours allows you to fill in your desired parts of the pattern with different colours.  


A few sentiments from retired SU! sets complement the design and a little button and twine finish it off!  I love sweet details like this for a baby card.  Hope you’ve enjoyed the sweet cards this week!  


Monday, June 26, 2023

Teachers Are Amazing


Today is the last day of school for kids in our area, I know in the US school goes till the end of May, but int Canada, we most often go until late June.  Our daughter is a teacher, and I know she’s been counting the days as much as the kids have.  This cute set is a retired one from MFT that I had in my Colouring Catch Up basket, so it made for an easy card.  She’s coloured up with Copics, and I added some texture to her jean skirt with Copic Blender solution and a canvas background stamp, as well as hand drawn glasses and polka dots for her top.   


The design has a bit of a mathmatical theme with the background images on the coral layer, and the cute Positively Cut Card Front Die from Concord & 9th.  Easy to use one of the “plusses” for an accent.  


I used that same Canvas background on the sentiment layer and embossed the sentiment in white.  I think any teacher would love to hear words like this!  

Sunday, January 22, 2023

Hippo Birthday!


Birthday cards are such fun to create!  Our nephew celebrated 12 years this weekend and I didn’t like the cards I had to choose from, so I pulled out some images I had previously coloured up, and looked up MFT’s latest Sketch Challenge which worked to pull this design together.  

I’m using MFT’s Picture Perfect Party Animals Stamp set. These guys look like they’re having a great time, and their energy matches our nephew’s goofiness.  


I’ve added some stencilling and embossing to the red layer to go with the round balloons in the images, and then popped up some balloon dies, adding strings to them with a multi-liner pen, and white highlights, with a few enamel dots to coordinate.   


The inside coordinates with the outside using a scrap of the embossed paper.  

Sunday, January 8, 2023

Magical Dragons


I’ve got the cutest pair for you today!  I’ve been going through my stash of already coloured up images and trying to put a few more into cards.  I had coloured up these two from MFT’s Magical Dragons and finally had an idea for a design with some inspirational jumpstart of MFT’s latest sketch challenge.  

I thought it would be great to create rows of clouds to mimic the lines in the card sketch. So I incorporated both clouds from the set, and stencil sponged clouds.  


For a pop of colour I added the embossed sentiment in the foreground, and I think they make a handsome pair!  


Just a few clear sequins give it a bit of shimmer, and adds to that magical theme!  

Thursday, March 17, 2022

Copper Jungle


Well, I hope you’ve enjoyed some “greenery” on St. Patrick’s Day, and now you’re ready for some more  - but in the botanical variety!  Months ago I embossed the set in copper, and watercoloured this beautiful background from Power Poppy called Big Sexy Leaves (retired).  It was a 6 x 6 stamp that is great for backgrounds, simply stamped, but also with so much potential for great colouring.  

I used Daniel Smith Watercolours, and then added a bit of punch with the vibrant Zig Clean Colour Real Brush Markers.  It really ups the vibrancy.  


I’m always amazed by the variety in leaves.  This Christmas our boys got us a year round pass to our botanical pyramids called Muttart Conservatory.  There are 4 pyramids that have unique biospheres, including a tropical one that is full of varieties of colourful leaves.  We’re there at least once a month to enjoy the warmth and growth.  I thought you might enjoy a couple of pictures from recent visits.  
 

Amazing isn’t it?  The new feature pyramid just opened this week, it changes 5 - 7 times a year and this season it’s a Tulip theme.  I can’t wait to go and see it!  


The diecut sentiment is from MFT, and I added some ombre colour to the lettters with the Zig markers to deliniate it from the background, as well as popping it up.  


Copper is such a classy colour and pairs so nicely with this blue green!  

Thursday, March 3, 2022

Watercolor Hope Series - Day 4


Today I’m back with the last of my Hope Series Watercolour Wreaths.   This last design was a fun one to create because there is such a simplicity about the flowers that makes it a little folksy.  

To create the flowers I used Daniel Smith’s Quinacridone Coral and painted the largest and palest circles first.  This allowed me to get the composition I’d like.  Then as each layer dried I added in more concentrated colour and the smaller flowers to give the feeling of deeper colours of petals.  A few dots of black paint in the center of each flower and simple two-toned leaves (DS Sap Green) give the wreath definition and body.  


Layered on the circular card base with a few background dots to tie it together, makes the cheerful design complete.    The stamp is again from Stamp Simply, called Hope.  

I hope you’ve enjoyed the Watercolor Hope Series 


Monday, February 28, 2022

Watercolour Hope Series - Day 2


Hello!  I’m back with Day 2 of my Watercolouring series based on the theme of Hope.   

The wreaths I’m showing are ones I painted last year as part of a 30 Day Project.  This design is painted with Daniel Smith Watercolours, including dainty roses and petals and different types of greenery in this one.  After I finished painting them, I outlined the shapes with a fine line multi-liner pen.  


The lovely verse is from Stamp Simply’s Hope stamp set.  When your heart and brain are racing with all of the worries of your day and the world, it is good to know that we can find rest and hope from God.  

I’ll be back on Thursday with another Watercolour Hope Wreath.  Thank you for coming by! 


Sunday, February 27, 2022

Watercolour Hope Series - Day 1


It seems with events around the world we could use a good infusion of hope.  So, this week I’m going to showcase some of the watercolour wreaths I painted last year that I’ve made into cards, pairing them with some Stamp Simply Scripture stamps.  

Today I’m starting with this pretty olive wreath I painted using Daniel Smith Watercolours paired with the Hope stamp set.  Olive leaves have a beautiful long wispy style and vary from silvery green to lighter green.  


This Scripture passage works so perfectly with the theme of hope and olives - as it’s the crushing of olives that produces the oil.  So even in the midst of suffering or affliction, God can be producing something beautiful, useful, fragrant, and hopeful.  So much beautiful symbolism.  Like many crafters around the globe our prayers are fervant for people in Ukraine. 

Hope you’ll join me again tomorrow for another Watercolour wreath.  

Friday, February 25, 2022

A Sympathy Poppy


Last Fall I seeded some poppies in our flower bed.  I’m so hoping they winter well so that we will enjoy them this summer.  I love the papery-thin petals and the gorgeous centers.  Today I’m bringing you another stunning poppy from Power Poppy called Ultimate Poppy.  I really showcases the flower so beautifully.  And it’s of a really awesome size to make a statement on a card.  Here I’ve used it on a sympathy card, but I think pairing it with white really simplifies it in a way that’s elegant.  


I’ve placed the poppy on some elegant damask paper, which also includes the sentiment, and framed the edge with some Spellbinders dies.  


Here is the verse inside the card, also from a retired Power Poppy set.  You never wish to send a sympathy card, but it means so much to the recipient to know you are thinking of and praying for them.  


Here is a peek at the Copics I used for colouring.  


Monday, February 21, 2022

Mini Mouse Blessings


Hopping in with a very cute sketch from My Favorite Things today and some pretty adorable mice from the set Harvest Mouse.  Another in the collection of images I’ve had coloured up for a long time.  These little cuties are coloured on Kraft cardstock with Prismacolor Pencils, and it makes for a fuzzy cozy look for them, which is perfect for their fur.  


To create the openings I used two stitched dies one a square, and one a rectangle I extended for 2 cuts to create the longer windows.  It’s a great sketch for creating little scenes.  I marked the openings onto the Olive cardstock with pencil so I knew where to put the background stamping.  Then I popped the top layer up with foam tape.  


Just a tiny wood veneer star as an accent and they’re sending blessings!

Friday, February 18, 2022

Peace, Love and 60’s Tassels


Sometimes you’ve just gotta get in the GROOVE!  I found this adorable little girl from Mo’s Digital Pencil called Berkeley  in my coloured up stash and thought she’d be fun to give some 60’s Peace and Love treatment.  She’s off to school with her tassled backpack and patches on her frayed jeans.  She’s such a cutie!  I’m also trying to do more varieties in my skin tones to represent more of the beautiful colours of the world and she was delightful to colour with my Copics.  


To coordinate with her vibe, I added cut paper “tassels" to the right edge of the colour-blocked patterned paper.  It’s easy to do with little paper snips.  And then I added felt flower accents to match her patches.  For the sentiment I stamped the blue-jean tab with a canvas stamp and then added the birthday sentiment (from Stampin’ Up!) for fun.  I think she’s very groovy :)  

Wednesday, February 16, 2022

Tomato Pincushion Love


Interested in a little more love-themed card making?   I created this design with another of my images in my Colouring Catch-Up Challenge that I had in my stash.  It’s a sweet image from the now closed Paper Smooches store.  

My mom was a seamstress for so many years.  She made the most beautiful garments for us, and in the same way that I have craft supplies, she had sewing supplies.  So, this image reminds me of her handiwork and the fun tomato pincushions that held pins on top as she was sewing, and the boxes and jars of buttons.  


I created the backgrounds on this mini-slimline design with a mini-heart stencil (MFT), and added some fun accent papers from MFT as well, and finished it off with a bit of scalloped lace ribbon, reminiscent of Mom’s sewing supplies.  The sentiment is from an old Stampin’ Up! set that sweetens the deal with a tiny wood veneer heart that’s been smooshed in ink.  

Thanks for visiting!  


Thursday, February 10, 2022

Forced Hyacinth Bloom


Way up here in Alberta we’ve had a beautiful week of melting and sunshine.  While it will be a long time until all our snow is melted, it’s got me in the mood for flowers.  Some seeds I ordered for the spring arrived in the mail, and I can’t wait to see them bloom this year.  So, to suit the mood, I pulled out anothe of my images in my Colouring Catch-Up Challenge and put it into a card design.  This gorgeous forced hyacinth is a stunning one from Power Poppy called Hyacinth Bulb in Glass.  And it makes such a striking design.  Colouring is done with Copics and I’ve added touches of lace, sequins and faceted dots to accent.  


I’ll never forget visiting Butchart Gardens on Vancouver Island one Spring and being almost overcome by the fragrance of all the hyacinths they had on display.   I thought I’d include one of the pictures so you can enjoy the Spring scene vicariously too!  


Thanks for joining me today!  

Wednesday, February 9, 2022

Foxy Foxes


Sometimes you just have to go all out on cute!  These are more of my previously coloured up images that haven’t made it into cards until now.  I’m calling in the Colouring Catch-Up Challenge.  The fox images are from an older MFT set called Fox and Friend, which is retired now I believe.  

These adorable little foxes are tucked into an array of flowers and greenery using different little flower and greenery stamps I had on hand, and paired with some fabulous designer paper from Craft Consortium.  I was really trying to coordinate with that woodland theme.  


They’re such cuties aren’t they?  I’m also playing along with MFT Sketch this week for fun.  Copics were used for colouring them up.  I really let the flowers do all the talking on this one!  Thanks for popping by!  

Tuesday, January 25, 2022

SU Little Friends - Layered and CAS

Bringing some sweetness today with some cute Stampin’ Up! images called Little Friends. I’m pretty sure these are retired, but the storybook like images are darling, and part of my coloured images in my Colouring Catch-up Challenge.

What do you lean more toward? Layered up or Clean and Simple? Though I appreciate both styles, I am probably more of a medium layered person. I like patterned paper, and lots of colour. Today I have two designs, this first one layered and the next clean and simple.

I’ve gussied up these sweet girls with lots of colouring (Copics), stamped and patterned layers, with the use of some fun dies for the layers.


 I love how the patterns and colours accent the image.  Just a touch of baker’s twine and felt flower as accent. 

Next up, the Clean and Simple version.  


This adorable little one is working hard to keep that puppy out of her present!  The image is coloured with Copics and trimmed out.  I sponged Distress Oxide Broken China ink on the card base and then added some framing with a scalloped frame, a die-cut grass die (TCP), and the type-set happy birthday in a pop of red to coordinate with the border of her sleeves and hem.   


Something so sweet about the simplicity of the design.  Layered or CAS, totally precious images to work with.  Thanks for joining me today!  

Saturday, January 22, 2022

Valentine’s Power Poppy Style


It’s the season of Valentine’s!  I found a few of the Va Va Valentine’s from Power Poppy that I had already coloured up, so it was easy to pull these two cards together.  These sweet matched socks hung on old fashioned clothespins are a cute pair.  My boys love wild socks, so it makes me think of them.  

I’ve added a few diecuts from TCP to frame the image and add the heart accent.  A little twine ties it into the clothes line.  


Next up something a little more firey!  


This is a fun playful image for your sweetie!  I’ve tied in all the warm colours of the colouring into the background which I’ve stamped and sponged to really warm it up. 


The notebook paper die is also from The Cat’s Pajamas.  Love!  xoxo friends!

Thursday, January 13, 2022

Sun Conure Birds - Two Mediums


Happy Friday!  Today I’m bringing you two lovely designs using two mediums.  Some images just invite more time because they are beautifully detailed.  This image from Power Poppy is called Perched in the Orchids.  The amazing details of the image, the delicate orchids and the colouring on the Sun Conure Birds really make an awesome piece, especially when you have time to put a little more into it.  

I’ve done the card with both Copic Markers and Watercolours.  This first design showcases the vibrant colour you can get using Copics, and it’s so perfect for those colourful feathers on the birds.  


I’ve had these two images done for months because my brother in law and sister in law have a Sun Conure bird, called Judson that looks just like this.  It squacks like crazy....but its a pretty bird!  This makes it another in my Colouring Catch-Up Challenge I mentioned last week of images I have waiting for cards.  

I love how Copics allow you to work on tone, undertone, and details in your colouring to make it really dynamic, clear and bright.  


A simple CAS card design allowing all the colouring to shine against some teal patterned paper.  The sentiment is a sweet one from an older Stampin’ Up! set.  


Next up is the watercolouring version of this image:  


I printed my lines on the watercolour design quite a bit lighter than on the Copic image so the edges are more softened.  Watercolouring the image definitely took time, because you’re adding your layers through glazing, but the overall effect is rich and moody.  

These little birds have great personality as they’re tucking in close to each other.  Delightful to colour and paint!  

Let me know which medium is your favourite!  Thanks for joining me today!