Showing posts with label Teen. Show all posts

Friday, February 24, 2023

Rose Gold Magnolias


Have you noticed how popular the colour rose gold has become?  I hadn’t noticed it until our niece began wanting everything in rose gold, her room is decorated with this colour, she loves her clothes in this colour, her phone, jewelry, and I began to see it everywhere too!  She’s going to be turning 14 next month and I am actually ahead of the game with this Birthday card for her in many layers of rose gold.  

I picked up the beautiful Magnolia Pattern Cling Stamp from Pink Fresh Studio this month as well as the Coordinating Stencils .  I was just so taken with the beautiful pattern and how the products can work separately or together as a background or main image.  

So, for this design I stamped the cling stamp with my WOW Embossing Pad, and added Rose Gold embossing powder (from Simon Says Stamp), then sponged Distress Oxide ink with the stencils in Victorian Velvet and Tattered Rose.  It has such a classy look!


I also stamped a single magnolia bloom from the background sponged it and trimmed it out as accent.  Then I added this pretty sentiment from The Greetery Arched Sentiments, also embossed in Rose Gold on vellum.  It’s perfect to allow you to see the flowers behind yet add a focal point.   I picked up some fabulous sparkly rose gold paper from Michaels that was the perfect touch of bling for layering!  


Lastly, I added rose gold sequins from Studio Katia as that final pretty touch.  I know the first words out of her mouth will be “ooo, pretty!  Rose Gold!”  

Sunday, January 22, 2023

Hippo Birthday!


Birthday cards are such fun to create!  Our nephew celebrated 12 years this weekend and I didn’t like the cards I had to choose from, so I pulled out some images I had previously coloured up, and looked up MFT’s latest Sketch Challenge which worked to pull this design together.  

I’m using MFT’s Picture Perfect Party Animals Stamp set. These guys look like they’re having a great time, and their energy matches our nephew’s goofiness.  


I’ve added some stencilling and embossing to the red layer to go with the round balloons in the images, and then popped up some balloon dies, adding strings to them with a multi-liner pen, and white highlights, with a few enamel dots to coordinate.   


The inside coordinates with the outside using a scrap of the embossed paper.  

Friday, September 7, 2018

Packed and Ready


We’ve had some big beginnings in our house this fall.  Our youngest son started high school, our middle son started University and our oldest daughter is a brand new 3rd Grade teacher!   We’re so grateful for good starts for each of them.  With Power Poppy’s new September Challenge called Hit the Books, hosted by the lovely Katie, I thought it would be fun to have a back to school vibe in my card.  


I pulled out the adorable set from Power Poppy called Well Played.  Even though it’s got a big of a beachy theme, I think that back-pack is perfect for back to school, hitting the books! I did this one up for one of my niece’s birthday, but looking at it now, I think I could also use it as a fun card for my new teacher-daughter!  

Some fun colours in aqua blues and reds, which is always a fun combination.  


I’ve added some fun hearts, sequins, sewing, wood veneer arrow and enamel dots to accent.  


Here’s the inside  - and its why I also think it would make a great card for our daughter too.  I think every teacher would be encouraged by that!  

It’s such a fun theme this month to be inspired by anything related to books, and if you play along you could win a $50 gift code to the Power Poppy store!  We’ve got so much great stuff to show you this month in the new release.  You’re going to love it!  


Allison Cope
Christine Okken

Katie Sims
Stacy Morgan

and Marcy at the Power Poppy Blog

Monday, November 20, 2017

The Reel Deal


A few weeks ago one of our son’s best buds turned 15.  He happens to love fishing, so I knew I had the perfect image to use from Power Poppy, Leaping Trout (digi) and the sentiment from another Power Poppy Digi, Reel Deal.  

Last year I did a larger trout design that I really loved, it’s actually my most pinned image ever, so I used some similar colours and a bit different layout.  

As I was pulling out some papers I thought might work, I realized the tones in the designs were a bit off.  That’s why I love my Copics, I could just sweep a light colour that I used in my colouring overtop of the patterned paper and it matches perfectly, tying everything together.  


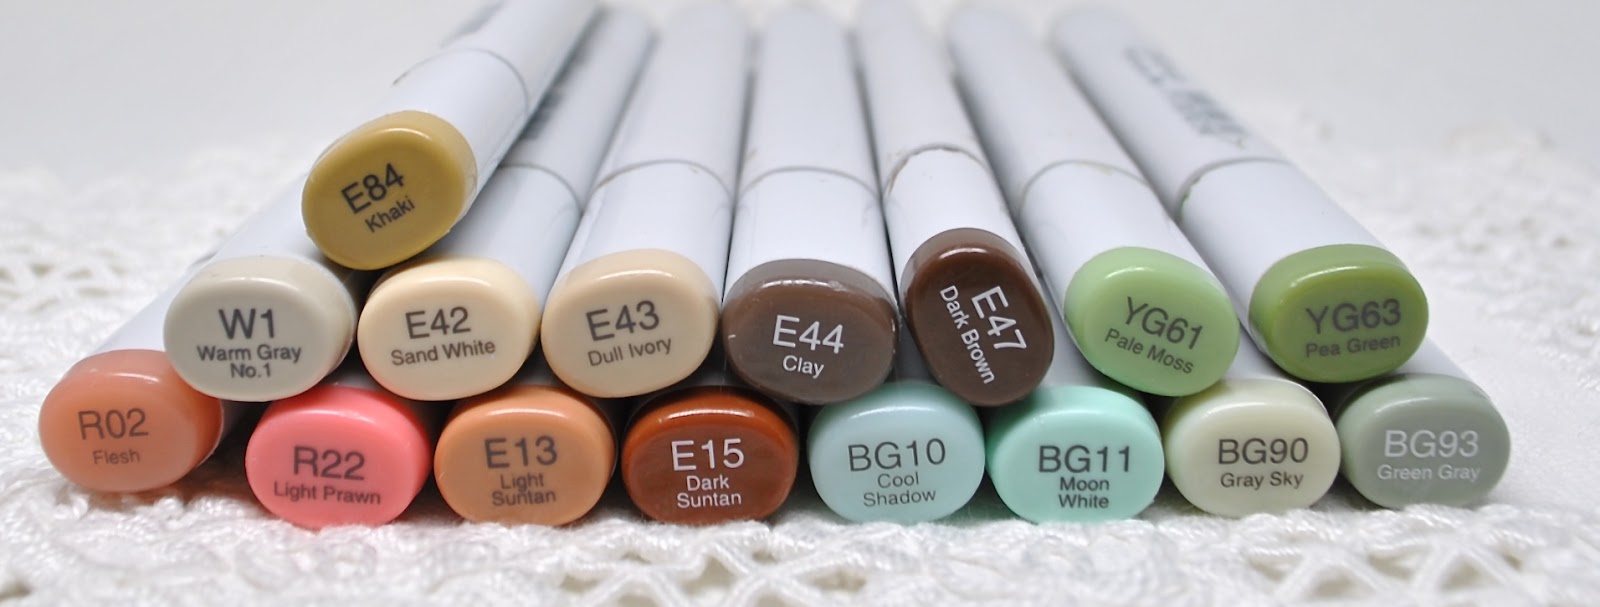
Here’s my Copics for the colouring.  Isn’t he a handsome fish?  Best part of all, after opening it, the 15 year old said “this is actually really cool!"


Monday, May 22, 2017

Super 15 with TCP


This week we have family visiting from the States, and the cousins are celebrating a lot of special occasions together.  The two oldest boys have birthdays at the end of May, so I thought I’d create this card for my 15 year old nephew.  It showcases The Cat’s Pajamas fun combination of Boom! CutUps, Comic Balloon CutUps and TCP’s stamp set My Hero.  My nephew loves green so this is a bit of a “Green Lantern” superhero card.  

Our bunny is coloured with Copics, trimmed out and placed on TCP’s Framed Up 2 CutUps.   I added a notebook edge with TCP’s Toppers CutUps.  


A few black enamel dots finish it off.  You don’t need a lot of embellishing with the pop of the comic book style colours and words.  The inside of the card reads “Dare to Be Who You Are” from the stamp set.  A good encouragment for a 15 year old.  


Here’s the Copics I used above.  

Did you new Sneaky Peek Week starts today??  All the TCP items are being previewed each day on the TCP Blog.  I’ll be up with all my new goodies next week!  Thanks for stopping by!  


Monday, May 30, 2016

Boom! 17


Here we are with a TCP Reminder of our latest challenge.  This week it’s all about using Bright Colours.  

This week was also our older son’s 17th Birthday.  He’s my Marvel Superhero loving son so I thought I’d create a superhero style card for him, and that’s easy to do with bright colours. 


I started with TCP’s Boom! Cutups Dies and Comic Balloons Dies and some primary colours of card stock.  All the best superheros wear them :)  I love these dies!  What’s awesome about them is that each of the words and the balloons come with a border in the die, so you can add more than one colour to each word or balloon.  Very comic-book-like.  

I created a comic book strip style panel using stitched dies to cut windows, then added the balloons and words popped up overtop.  I also added some stars from TCP’s Holiday Toppers CutUps.  The only stamping is with the My Hero stamp set.  


I also created a bit of a sunburst with embossing paste and the Sun Cutable from TCP.  I cut it out and used it as a template to add the embossing paste.  Once it was dry I die cut it in a circle and placed it behind the comic strip to give that explosion sort of feel to the design.  


Twelve years ago this was our little guy beside his baby brother.  Talk about cute overload!  And below that is him getting ready to light up all the candles as we celebrated 17 years with family.  Same smile too!  How we love this kid!  


Here’s some more of The Cat Pack bringing you inspiration today....


Brenda Nakandakari
Christine Okken (you are here)
Deborah Anton
Jessica Rone
Stacey Schafer
and Alma at the TCP Blog!

Come play along!  Use your bright colours and you could win Cat’s Cash up to $15!


Thursday, July 30, 2015

Well Played


We’re here for Day Two of the Color Me Grateful Polymer release at Power Poppy!  Today we’re showing off such a fun set that Marcy designed with her sweet daughter in mind.  It’s perfect for a number of occasions...teens, summer, the beach, it’s called Well Played, and I know you’re going to enjoy us showing it to you, the Bloom Brigade have some really fun and creative ideas!    


I chose this fantastic backpack all packed up for a day at the beach.  Doesn’t it look ready for a girls day of fun with the water bottle, old school walkman and a pretty chevron towel?   I paired the image with some fun papers in the MME On Trend pack adding some wood veneer embellies with some white craft ink on top to give them more of a white washed feel.  


I am slightly addicted to my stitched dies lately....I find myself reaching for them all the time!  I love that it gives you a clean look, but with just the right amount of extra detailing. 


Here’s the Copics I used above....


Be sure to stop by the Power Poppy Blog to see what sweet things Marcy will have to say about this set and the rest of the Bloom Brigade playing along today...


Allison Cope
Christine Okken (you are here)
Cindy Lawrence
Kathy Jones
Katie Sims
Leslie Miller
Stacy Morgan
Tosha Leyendekker

Monday, September 3, 2012

Riding Hat and Giveaway Week Continues!

Let's start with the Winner of The Project 365 - Hero Arts Stamp Set...

The answer to the question was....rainbow colours ROYGBIV :)   I was sneaky and started with green, but I had pictures of all the colours in there.

and the winner is:  Joan V who said...
Theme: Life is a rainbow of color.
Great pictures. Thanks for sharing. Hope the school year goes great for your family.
Joan - Congratulations!  You have 48 hours to contact me with your mailing address, see my profile link for my email!  
Today's project is a gift I made for our daughter's friend for her BD.  She had an awesome party the other night.  Our daughter and this friend are in Symphonic Band together and last spring the band trip went to Whister, BC for a huge competition/festival.  The girls found a really cool hat store in the village that they went to twice.  This friend LOVES hats :)  So, as I was thinking about her birthday coming I thought I'd create a Riding Hat for her.


This is where having a new Silhouette Cameo is awesome.  I've had so much fun experimenting with it.  I picked out a 3.5 inch circle box from the store, then paired that with my Grand Nestabilities Circles dies for the hat bottom.  I love how it turned out!  


I made a little 3 x 3 card using Flourishes Feminine Charm set, because the hat from the set worked perfectly.  I coloured with Copic Markers in the Sunflower Collection, Creamy Collection, and Flesh Tones II Collection.  I accented the hat and card with some pretty ribbons, and leaf trinket pins, as well as some Prima faceted Crystals.  


Here is the back of the hat with the ribbons trailing down.  


I had some cute sunflowers in my stash and I thought they'd go perfectly.  


Inside you can see the "lid" of the box attached to the hat brim and the top part of the box goes into the brim.  It turned out so well!  I wish I could have seen her face when she opened it.  


Giveaway #3 

Now for the fun part for you...another Giveaway!

I have 4 Flourishes sets to give away today, one of which is the very set I used in the card above....


(Feminine Charm)


(A Season of Thanks) one of my favourite fall sets!


These are all Designer proofs, so -  no packaging, but they stamp beautifully :)  

HERES the RULES:  

Leave a comment here with your favourite FALL item to make, it can be a recipe (I'd love to see the recipe too if you can!), a type of paper-crafting project, anything your heart desires.

One entry per person please.

I'll draw the name Thursday at 10:00 PM.  You'll have 48 hours to send me your snail mail address.


Monday, May 28, 2012

I Have Two Teenagers

I wake up this morning to having two teenagers in our house :)  It's our middle son's 13th Birthday today! I can't quite wrap my head around that!  He's such a great kid.  Warm, loving, talented, athletic, goofy, loyal and witty.  I feel very blessed that he and I have a very strong bond too.  I think it will help us navigate the years ahead.  Because he has a ball hockey game tonight on his BD night, we celebrated a night early with a family party, and this was his card.


I pulled out TSG's set Out of This World for a little atmospheric fun.  Astro boy is colored with Prismacolor Pencils.  The star die is SU, the numbers are PTI.  I had to really pull this together quickly, because I left it till the last minute, so it's pretty straightforward as far as design goes. I'm also feeling like it won't be long and I'll have to find more "grown-up" images for him to up the "cool-factor".  But so far, we're good :)  


And here's my BD Teen :)  Handsome isn't he?  I know it won't be long before the girls come calling...AH be still my heart, THAT I'm not ready for!  
Thanks for dropping by!  

Tuesday, November 22, 2011

For Our Daughter

As promised I'm back with the card we'll be giving to our daughter to celebrate her baptism.  She is the pioneer, the first-born, the trail-blazer :) , and to see her walk out her faith and beliefs, to see her stretch and grow in her gifts and abilities, to see her heart for following God has been so beautiful to us.  Just the other day she saw God do something powerful (and quite unexpected) in restoring a broken friendship and healing some wounds and I could see how powerful that was in her walk with God.  I love these moments in raising her.  And it's been our privilege to be a part of beginning to watch her fly :)


I.love.this.card.  It's special to me, because it's for our girl.  I also spent a lot of time on the coloring, pulling in a lot of shading techniques and trying to give it as much realism as possible.  Plus I love that I tied in the roses theme to the papers (MME Blush) and beautiful rose ribbon too.  It's the very lovely Lenten Rose set from Flourishes. I've die cut it out with the new Classic Keyhole Tailor-Made die from Flourishes as well.  Boy I love this die!  And then added the sentiment on a Labels Eleven Die.  

Because I used an out of the box technique with the leaves, I added the rhinestones on the left side to balance out the card too.  


plus:  R89, YG17, YG61, G21, G0000, BV00, BV0000, BG15

Alright gang, all the family is here now and I'm sure it's crazy and filled up with excitement in our house, so I'll close for now.  I'll be back on Friday for Flourishes Friday and something yummy for Christmas to celebrate the Black Friday Sale at the store too.   

For my American Friends, Happy Thanksgiving.  I hope that no matter what your circumstance right now that you are able to see blessings vividly!  

Tuesday, November 15, 2011

Parisian Dress Form & Christmas Candy

One of the things that we (The Flourishes Girls) really enjoyed at CHA this past summer was looking at all the wonderful alterable items at the Kaiser booth.  They have some really lovely wooden pieces that are of excellent quality to make something special.

Today a few of us on the DT are going to focus on some of these great items.  I was able to work with this beautiful dress form and all along planned on making something for our daughter's new room.  


The dress form is amazing, it's 14 inches tall, so it can really be a show piece.  I began by painting it with some Acrylic paint, mixing some white with some shimmery white, and putting several coats and and letting dry overnight.  I probably put 5 coats and and still could have done more, but I also didn't want it to be bright white either.  More distressed white. 

Then comes all the fun :)  You can decorate it any way you please!  I started with some swatches of fabric that I ordered on-line that we're thinking of using for our daughter's room. Here's the web address (www.OnlineFabricStore.net).  Swatches are $1 a piece for probably a 4 x 4 square.  The ones we're looking at are from the Amy Butler Collection.  I took one of the swatches and added it behind the top bodice of the dress form, attaching the fabric behind the form using Scor Tape, trimming off any excess.    Then I added a peblum to the front of the dress around the waist area with the rest of that same swatch cutting it into waves with a Spellbinders die (Fancy Scalloped Border).  I attached that with Scor Tape and puckered the waist a little, trimming it up with some crochet lace and velvet.  I also added a fabric rose from one of the swatches using the Spellbinders Spiral Blossoms One .  I would advise running it through your die-cutting machine several times/passes, and you still may need to trim some of the threads in the cuts with a scissor because of the weave of the fabric.  


Then using the dress form as a pattern I laid it down on some Navy cardstock and traced out the size of the bottom skirt, trimming it out, then stamping with elements from Country Charm Labels Set and white Craft ink, again attaching with Scor Tape.  

I gave her a cute little ribbon scarf, because our daughter loves wearing scarves.  


Just a little ribbon accenting and some faceted Crystal jewels from Prima to complete it! So now, when we get everything done in her room, she'll have a custom Shabby Chic Parisian dressform, that perfectly matches her room!  

Be sure to check out the Flourishes Blog, Cindy and Stacy today who also are showing off some Kaiser Alterable fun!

Now... how about some Christmas Blog Candy to get ready for the Season?  It snowed here finally, just a bit, so it really does feel more like Christmas is coming :)

Here's what I have to offer....


A pack of 7 Gypsies Venice 6 x 6 paper
October's Release of Christmas Candles Set
Brand New November Release of Sentiment Christmas set

All you have to do is comment on this post :)

**Please leave me your email address within the post so I can contact you if your name is chosen. 

Winners will be chosen and posted by 10:00 PM MTN Time Monday November 21.  You will have 24 hours to contact me to claim your prize :)  I know that's a little short notice with American Thanksgiving coming - BUT you do want your stamps to be able to use for Christmas too right? :)