Showing posts with label Children. Show all posts
Monday, March 17, 2025
The Red Plane with RAM Stamps
I have distinct and nostalgic memories of being a little girl, laying on the grass in my backyard, or even at the school playground and looking at the sky and clouds. Often I’d hear the buzz of a airplane, and see a red prop plane fly over. For some reason, its a lasting childhood memory that makes me feel sweetly safe. I’ve come to learn that it is a surveying plane, taking daily runs over our city to monitor the oil pipelines making sure everything is running properly.
So its with a sweet nod to that childhood memory that I took this adorable little image from Rachelle Anne Miller called Little Pilot and coloured it up with Copics and coloured pencils. It definitely has a very Canadian feel in the layout too!
I used a cloud background die to add some texture, as well as some die cut and wood veneer stars to tie the themes together. The white rivets are added with a white Sharpie pen. The sentiment is from Concord & 9th and is layered on vellum.
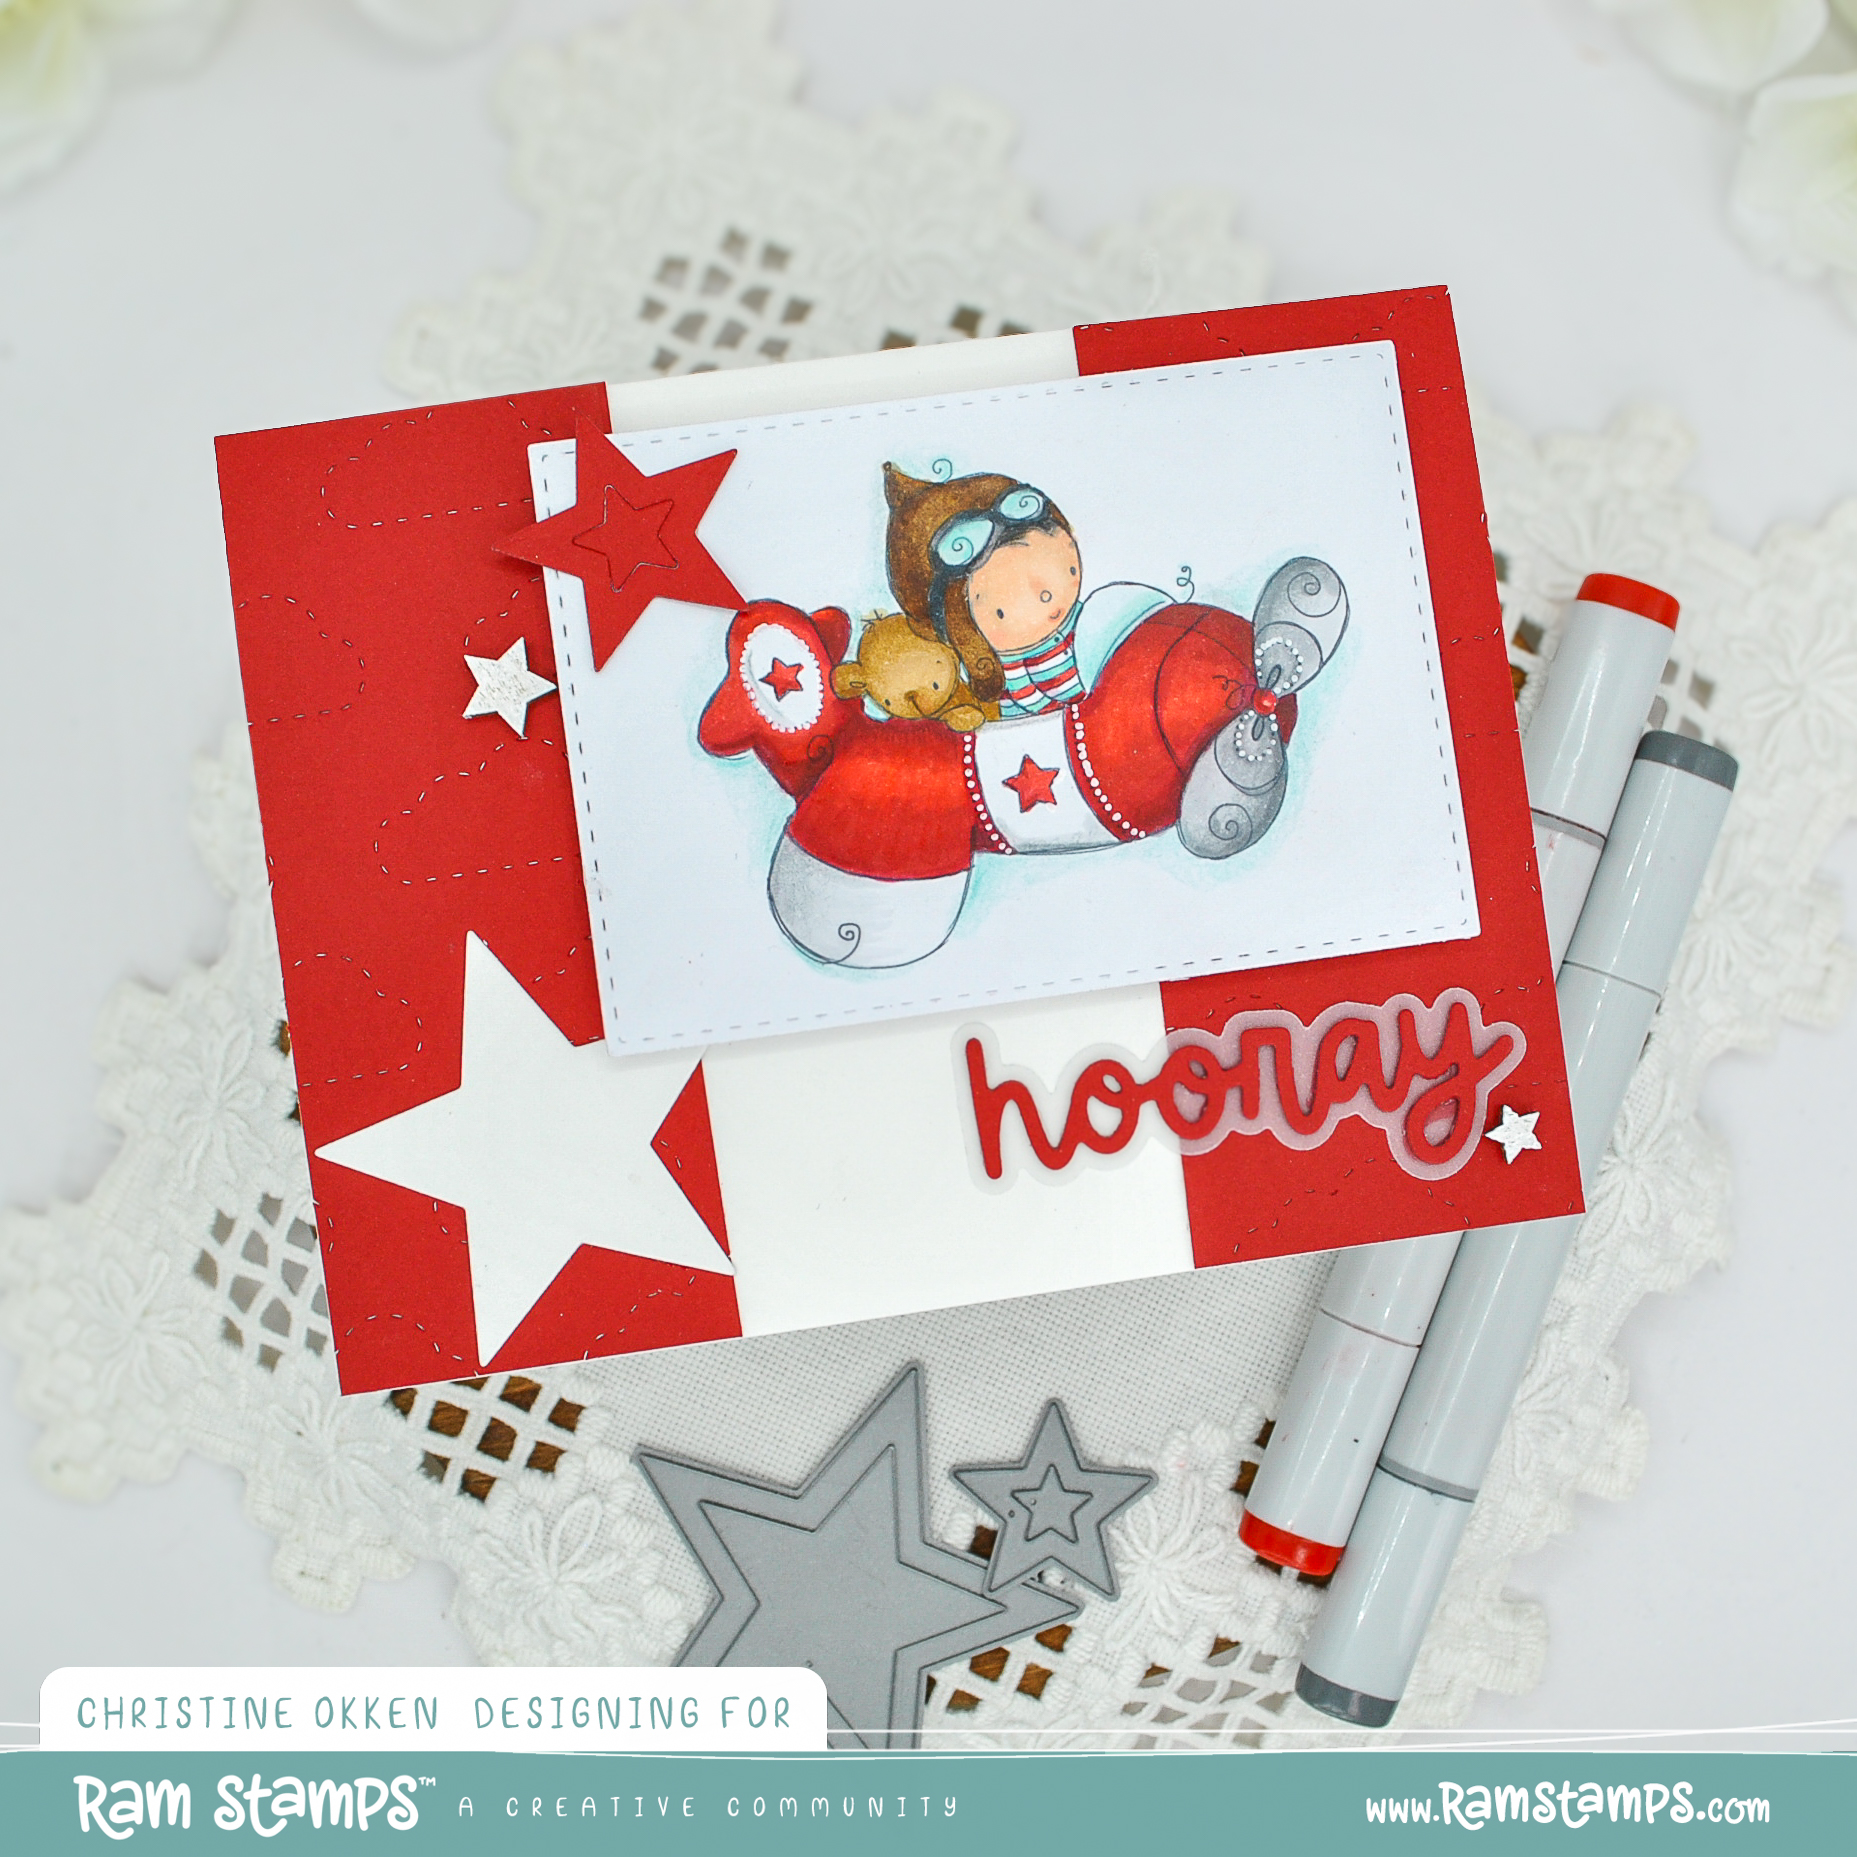
Created for one of our favourite 3-year old’s birthday!
Friday, February 28, 2025
Oh Happy Day with RAM Stamps
Hello! How about a cuteness overload? I’ve got this adorable little Balloon Girl from RAM Stamps today, and she’s just darling! She has the cutest little dress, which is where the inspiration came from to create the feeling of eyelet for the background.
I took strips of cardstock in white, Tidepool and Juniper (from Concord & 9th), and pulled out some of my older Spellbinders Dies to create eyelet sections, then I ink blended in varying layers to give the feeling of ombre and distressed colour.
She’s coloured up with Copics, and I gave her a cute little scalloped frame.
The die cut sentiment is from Concord & 9th, and I inked a few wood veneer stars with white ink to accent. I think she’s really sweet!
Thursday, January 2, 2025
Snow Bunnies with RAM Stamps
Hello! I hope you’re doing well on this early New Year! I’m popping in today with some adorable snow bunnies perfect for Winter! We were just driving today in our snow covered city and I am grateful to live in a place with four seasons. Snow is very beautiful, and I don’t even mind the cold, as long as it doesn’t stay too cold for too long. Today I created with RAM Stamps Christmas Sled. It’s perfect for the season and showcases winter without being too Christmasy.
I printed the image and coloured it with Copics in a cool Winter palette, then used some of the Snowy Christmas Digital Pattern Paper Pack with the adorable snowmen on it as one of my background layers. I’ve also added in some snowflakes with a white gel pen and dazzled up the snowflakes in the illustration with glitter pen. Aren’t they the sweetest looking children?
With a few die cut snowflakes, and some glittery paper it is the cutest snow bunnies you’ve seen yet this year! Thanks for joining me today!
Friday, July 26, 2024
Happy Birthday Pardner - A Western Scene with TCP
Howdy Pardner! It’s been ages since I’ve created a scene, so I thought it was high time to get to it! I pulled out two adorable digi images from The Cat’s Pajamas called Happy Trails Set and the Western Set.
For this adorable Old West scene, I arranged all the background elements on my computer to give the illusion of sandy hills in the desert and then printed it onto Copic cardstock. Then I used my multi-liner pen to join the hills together.
Next I masked the hills and cacti and used a retired TCP Cloud stencil and ink-blended the deep blue sky in with Distress Oxide ink, with bright white clouds at the horizon.
Then I was able to bring some life to the scene with Copic colouring. Starting with the background hills and Saguaro cactus, gradiating the colours to give perspective and distance to the hills. adding in pebbles and rough ground in the foreground. I coloured the cute cowboy and campfire separately, fussy cut them out and added them popped up to the scene, along with the ink blended sentiment, even right down to that hangry looking buzzard.
Finally, I cut some strips of Kraft coloured cardstock, ran those strips through a woodgrain cover plate and swiped them with Vintage Photo Distress Ink. Once I cut the corners of the frame to look like a picture frame, I then added a few vintage brads to accent to the corners.
What a hoot!
I hope you’ve enjoyed this old west scene!
Here’s a peek at these adorable sets:
Here’s a peek at the sets I used.
Wednesday, June 26, 2024
Oh Buoy! With TCP
Ahoy Matey! I can never resist a cute bunny design from The Cat’s Pajamas! And pirate bunnies?!! What a treat! This cute new digi image from TCP is called Bunnies at Sea. I printed and coloured the scene with Copics and coloured pencils with some wonderful saturated colour, which makes it so full of celebration!
To keep with the sea-faring theme, I make the card into a circular design, creating a circular buoy on the outside frame. Easily done by using two circular dies together cut in the teal and then in white. Then the white is trimmed into sections of the buoy. Then I wrapped some baker’s twine around the frame, securing it on the back. Then the buoy frame is popped up from the circular card base with foam tape.
The sentiment is from another retired TCP set, but fits so perfectly for this design I couldn’t resist it!
Here’s a peek at this cute set...
Sunday, February 18, 2024
Elephant Birthday Balloons with MFT
Dropping in today with an elephant that never forgets Birthdays! This sweet little dude is almost ready for the party, except he just lost one balloon! This set from MFT is called Adorable Elephants, and they really are. I’m also playing along with MFT”s Weekly Sketch and Colour Challenge.
Colouring is done with Copics, and I’ve also used several stencils to ink blend the background sky and the Small Brick Wall walkway that grounds the image. The patterned paper arch uses a retired MFT plaid that was perfect for the colours.
Thanks for joining me today! Hope you have a happy Monday!
Wednesday, February 14, 2024
Space Cadet with TCP
Hi There! I’m popping in today with another cutie card using The Cat’s Pajamas most recent Release. In amidst all of the cute Valentine’s Day items, was this fun bunny lost in space that needed a little air time. It uses the digital stamp set called Fly High.
He’s coloured with Copics and coloured pencils, and then placed on a starry stencilled and embossed background. I’ve added in a bunch of die cut stars from retired TCP dies that coordinate well with the background.
The sentiment uses another retired TCP set, and I thought it was a hoot. Perfect for a kid birthday!
Wednesday, January 17, 2024
Woodland Babies with Concord & 9th
Oh babies! Sweet, soft, squish able, gorgeous little ones. It is always so lovely to celebrate a precious little one entering a family! Today cards are a duo of baby designs using some older products from Concord & 9th that are so adorable. They’re called Woodland Turnabout Stamp Set, and what’s wonderful about the set is that you can custom design your own “paper” with these woodland animals and use that same pattern to die cut out the sweet little woodland animals in the set.
First up I’ll talk about the baby girl design. I used a portion of the background I created with this set to create a strip of pattern along the side of the card, then used the included sentiments and accents to create the sentiment section. I also used dies from the Triangle Confetti Dies to accent the card with the tiny sentiment flags that coordinate the with the Colours of this month’s C9 colour combo on Instagram. They spoke baby to me for sure! I really love these colours together!
A tiny bunny and skunk accent the rounded sentiment area die cut from the stamped paper.
A couple of wood veneer stars accent the design.
And now we have the boy card...
Here is where you can see the entire pattern of the stamp set, and how much fun the colours are together.
For this design I also used the tiny triangles to coordinate with the colours of the paper, and a wee wood veneer star.
I love how it all comes together! I think it would make a great theme for a baby shower!
Thanks for joining me today!
Wednesday, September 27, 2023
The Birthday Train with TCP
All Aboard! TCP has such a sweet release this month that is designed for Autumn and Christmas, including this cutie called Spirit of Christmas. It includes sweet characters from The Nutcracker, but as I looked at them, I thought that this image would work perfectly for a kid’s Birthday card. I love when images are versatile like that.
Colouring is all done with Copics and then I chose to make a striped design for the background with cardstock and retired TCP dies/SVG files that could give you the feeling of a background scene that our little train is passing by (and also mimic the feeling of train tracks), including Summer Borders, The Birthday sentiment is from a retired TCP image called Just the Ticket.
Here’s a peek at this adorable set!
Thursday, July 6, 2023
Baby Week: Precious One
I’m back today with another card for Baby Week on the blog! They’re so sweet to create! I have an elegant design today using an old set that I think was from Flourishes, and illustrated by Marcy. It contained sweet vintage baby items, including this little set of baby shoes that are so cute! I’ve gone with a very neutral palette in all creams that would be great for a boy or girl. Colouring is done with Copics, and I’ve added lots of texture in that cream on cream layering.
After colouring I die cut the shoes, added some pretty crochet lace, and then began layering with Spellbinder’s dies, and a lovely embossing folder from Spellbinders - Tufted. The sentiment is from an old SU sentiment set that words perfect in it’s petite size. A few wood veneer stars add just the right touch to finish it off! It’s oh so elegant for a special baby!
Wednesday, July 5, 2023
Baby Week with NEW TCP Stamps!
Hello! This week I’m planning a little fun with baby themed cards, and today we’re starting it all off with the new releases from The Cat’s Pajamas! I just love the sweet images in the new set, I’m Not Lion, and I saw baby cards in my head as soon as Alma showed it to us. I’ve coloured this cute little guy in golden yellows and paired it with these great patterned papers that match perfectly.
There are cute little details and accents in the set like these stars and clouds that I added to the design.
And to finish it off I added some enamel stars that coordinate well with the patterned paper. All out cuteness for a boy or girl.
Next up its a mini-slimline design using the new I Are Fun set. What’s great about digis is being able to manipulate the image the way you want, so I made my baby bears on the smaller side and then reversed one of the images so they could be facing each other. I printed and coloured them up no-line style.
I created a cloudy ombre sky with Distress Oxide inks and a retired TCP stencil, and added a fun sentiment from another retired TCP set.
These baby bears are ready to party! Here’s a peek at the sets in action:
Be sure you check out all the cute items at the TCP Store this month!
Sunday, May 14, 2023
Stencil Fun with The Cat’s Pajamas
Hello! Today I’m showcasing some fun ways to stencil with some tried and true products from The Cat’s Pajamas. I posted this on the TCP blog earlier this week and realized I hadn’t finished my post on my blog....so here it finally is!
As I was perusing through some older TCP products looking for some inspiration, I found these cuties called Yeti to Party that are retired, but oh so cute! I coloured the Monster’s Ink-like pair with Copics and then created a background to match.
I don’t think plaid will ever go out of style in cardmaking. It provides the perfect way to tie colours together. So, I used my TCP Plaid Maker stencil (retired), on my Make Art Station. This board with its magnetic ability has been a game changer for me with stencils! For this design I started with Salvaged Patina Distress Oxide ink.
Then I did the diagonal with Wild Honey Distress Ink, and added in Copics for the red and teal lines. I wanted the warm yellow to match better with my one-eyed dude, so I added some Faber Castell Coloured Pencils along that diagnoal to get a more orange tone.
Next is a great design that shows how to stencil, without stencils!
Folk art is a fun trend in cards right now, and this lovely set from TCP called Folk Art Flowers celebrates those iconic floral patterns found in this style.
So what do you do when you don’t have a stencil? Well, its easy to create a temporary stencil from heavy cardstock with coordinating dies! They aren’t as perfect and crisp as a regular stencil because the paper begins to soften and break down, but you can get a soft background effect that I stamped over with the stamps from the set.
In this case, it is a nice colour tie-in to bring the card colours together. For the sentiment, I die cut a circle in the card base and added a vellum layer with embossed sentiment into the card.

Great sweetness for Spring! Bloom, Grow and Blossom friends!
Subscribe to:
Posts (Atom)


