Showing posts with label Thank You. Show all posts

Monday, August 4, 2025

Secret Garden with Concord & 9th


Hello!  Today I have a delightful little scene for you from Concord & 9th’s newest release.  It’s called Secret Garden Stacks and it pairs with their Pop Out Stacks Base Die.  It is THE most delightful die set to create the most lovely garden!  I had the best time creating with it, and did a little borrowing from my own backyard for the colour palette.  I have the prettiest Indian Spring Mix of Hollyhocks that are having their best year yet, so that inspired the colours.  


The die comes with sections of pop ups that you can add details to on four levels.  Base, background, middle ground and foreground.  I love the little touches in a tiny birdbath, a stone wall and pathway, the pretty fence and sign.  There are several more die in the set that I didn’t even use this time. 


Amazingly, it all folds down into a A2 size for an envelope, without a lot of bulk.  Everything about it feels sweet and fanciful!   It feels like you can peek into little corners.  


Here you an see it folded up.  And here is my own secret garden along the backyard fence with my beautiful hollyhocks. 


Thursday, May 1, 2025

May Day Bouquet with Concord & 9th


I think the world is just better with the beauty of flowers in it!  I’m celebrating May Day with a gorgeous bouquet of florals from Concord & 9th’s new release.  This design uses the new Paper Posy Bundle, with the addition of the Paper Posy Embossing Folder .  


I couldn’t resist playing with the same colour palette as yesterday’s card, because I think it’s a great combination.  I die cut all the flowers and greenery, used the embossing folder to add some texture to some of the petals and leaves, and ink blended some of the colours into the layers.  I also ink blended the background with some water splatters in Rainforest to tie it all together.  


The sentiment is from So Many Sayings Stamp and Dies.  The whole design has so much texture and dimension.  Really delightful to put together!  
 

Friday, March 28, 2025

Sketches of Spring Bouquet with Power Poppy

Daffodil flower bouquet on a thank you card

I am so excited about Spring flowers this year.  We are a few weeks away from that ....but I can’t wait to see things pop up in the flower garden this year.  Being so in the mood for flowers, I pulled out this beautiful floral arrangement from Power Poppy called Sketches of Spring Vol. 1.  It is a dreamy combination of different daffodils, fritillaria, and a viridiflora tulip, with its varigated colours.  


Colouring is primarily with Copics, with a few smoothing details with coloured pencils.  The beautiful frame is from Pink Fresh Studios called Essentials:  Rounded & Braided Rectangle die, with a little out of the box cutting to make that tulip leap from the page.  


I love that daffodils are such a welcome sign of Spring!  

Friday, September 13, 2024

Summer Seaside Scene with Concord & 9th


For a last little nod to Summer this week I thought I’d pop in with one more scene which uses the Seaside Post Bundle from Concord & 9th.  Today I’ve used the stencil to create a Sunset view from the cliffs.  I ink blended with stencil for all the layers, and then added in some white gel pen and coloured pencil accents into the sea and sun rays. 


I added in some dies from the set to accent the sentiment (from the Parcel of Petals Stamp set), die cut the image with the large postage die in the set, and then stamped the background with postmarks in the stamp set.  I think this combination of Harbor Blue, Cranberry, Pebble and Cobblestone plus Creamsicle is a perfect Summer colour combo. 


This totally gives me the Northern California vibes!  Thanks for joining me!  


Thursday, September 12, 2024

Covered in Blossoms with Pinkfresh Studios


Hi!  I’m back with a another Summer card for this week.  Even though the weather today was decidely Fall-like, I’m bringing the blossoms with this lovely set from Pinkfresh Studios called Handpicked Flowers.   I was totally inspired by one of the sample pictures on the Pinkfresh site that I both had to have the set, and then did my own version of one of the cards.  

I started by using the coordinating stencil for the set on various parts of the cardstock in warm summery shades to cover most of the layer.  


Then I embossed the stamp set over the stencilling in white to give some definition to the petals.  I cut a tiny strip of white for the smaller sentiment, and added in a leafy vellum branch beneath this layer for a bit of whimsy.


And finally, I added the larger sentiment from the set cut with the coordinating die for this stamp set.  No extra embellishments needed with the romantic pattern of the flowers!   Thanks for stopping by! 

Sunday, September 8, 2024

September Summer with Concord & 9th


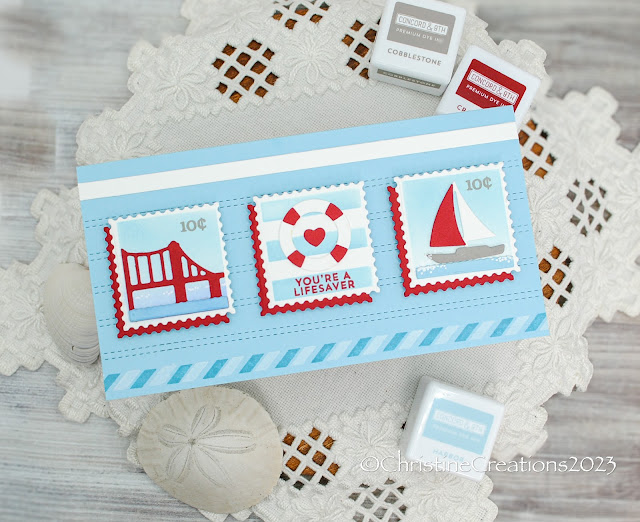
Hello!  I don’t know about you - but we’ve had the most beautiful hot end to Summer this week.  I’m not sure how many more days we’ll get back to 31 degrees Celcius yet this month.  But we enjoyed it with motorcycle rides, walks and time in the hammock.  With that, I wanted to take one last splash this week at Summer cards.  Today its with this wonderful designs from Concord and 9th called Season Post Bundle.  For this mini-slimline design I used the postage elements of the dies in the set to create a little scene for someone who’s been there for you. 


With some ink blending in the background with the stencils it gives some sky and sea colour.  I also added in some white gel pen to accent the sparkle of the water, and then its all about simple die cut layers, and a postage stamp bottom.  I also added textured stripes from Concord & 9th’s Double Stripe Card Front Die, to keep with that horizontal stripe theme of the mini-slimline.  A few postage marks and its as cute as can be!


Thanks for dropping by today!  I’ll have some more Summer for you this week, so stay tuned!

Wednesday, July 31, 2024

Billowing Peonies with Copic and Pencil from Altenew


Hello Again!  I’m popping in today with another beautiful set of Billowing Peony cards from Altenew which I coloured with a combination of Copics and coloured pencil.  As I mentioned the other day, this image is just huge, so I could create two slimline sized designs with one image.  


Here is a quick snap I took of the flowers after colouring, you can see its over 8 inches by 7 inches on my grid.  I cut it diagonally so that a part of both flowers was in both halves.  


For this first card I stencilled the background with the Halftone Stencil from Altenew, and then added some splatters of white acrylic paint and an interior die cut frame.  The image is popped up so it really has a sense of dimension.  


The lovely sentiment is stamped in white, and a few enamel dots accent.  


For the second card I ink blended a background with Wilted Violet and Seedless Preserves Distress Oxide ink and then used Waffle Flower’s Sweet Plaid Texture Die.  


Simple details finish off this design with enamel dots and a sentiment from the Altenew set.  


Makes for a beautifully dramatic set of floral cards!  My favourite!  

Saturday, July 13, 2024

Stitching Saturday Delphinium


After a bit of a break, I’m back today with another stitching Saturday design.  This time it’s some towering delphinium just like I have starting to bloom in my flower beds.  This bluey-purple shade are my favourite!  I loosely followed a pattern I found on the web, using The Stamp Market’s adorable Embroidery Hoop dies.  


The blue cardstock is run through Simon Say’s Stamp’s Pincushion Plate Wafer Die, to coordinate with the holes of the cross stitch die.  Then I added in a frame of green 1/4 inch Quick Strips from The Stamp Market.  


The foiled sentiment is a really pretty one also from The Stamp Market called Best Wishes Foil Plate.  

It makes for a sweet little Summer thank you note!  

Thursday, July 11, 2024

Big Thanks with Concord & 9th


Slimline Thanks Card with Floral background

Hi!  Earlier this Spring I purchased enough from Concord & 9th to get a little add-on paper pack.  Well, on this paper pack was a lovely “Thank you” lettering as part of the packaging.  Well, you never see a cardmaker wasting anything pretty, so I set it aside for just this occasion!  

I paired the colours of the big THANK word with Concord & 9th’s Flower Medley stamp set and stamped a whole bunch of blooms, die cut them with the coordinating dies and then made a little arrangement around the slimline sized card.  Colours are Dragonfruit, Clementine, Oceanside, Tidepool and Parsley.  


Next the letters are popped up on foam tape, and I added the “you” that is part of the sentiment in the stamp set on top of the K so it would complete the words.  To fill in some of the white space, I stamped a few of the tiny petals in.  Some white gel pen accents the letters too, creating the illusion of shine.  


Feels very bright and cheerful, and such a fun way to make use of packaging!  

Monday, June 10, 2024

Bridal Shower Flower Set


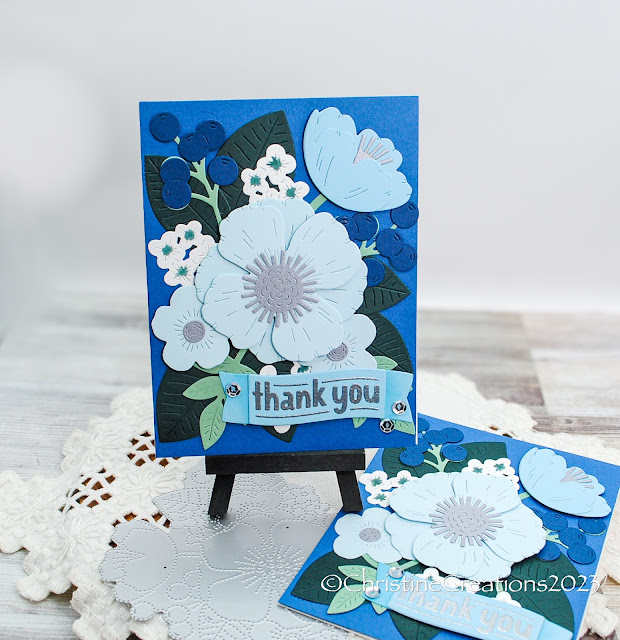
As I mentioned last week, we attended the graduation and wedding of our nephew in Colorado Springs recently.  There was also had a bridal shower for our new niece and I was glad we could attend it as well - it was a really special way to get to know her through the people that love her.  For part of her gift I made a coordinating set of thank you cards.  Eight of them in 4 styles.  You can always use thank you cards from a wedding!  So I started with Concord & 9ths beautiful bundle, Primrose Garden, and then all the coordinating colours from the wedding.  Then it was a delightful time of arranging the blossoms!


For this first design, I made an arrangement and then laid it out on a Quilted Card Front Die background of white cardstock.  The large flower centre is cut from metallic silver cardstock and the sentiment is embossed in silver on the banner.  I added silver sequins on all the cards for a bit of bling.  
 

This second design makes use of the imprint die pattern from the larger die (pictured beneath) and the flower are arranged on top of it.  The layering comes together so quickly with that dotted imprint.  


The cardstock colours I used for all the designs are Powder, Harbor, Blueberry, Midnight, Eucalyptus, Rainforest and white.  


This third design is also layered on the Quilted card base, with a more minimal flower arrangement.   


You can see I added some Copic colouring to the tiny white flower centers so they wouldn’t get lost in all the colour.  


This last design is my favourite because I used the main die to cut out the card front shape, so it has the most unique style.  You can also see by the flatlay card on the right, how much dimension is between the layers.   


Lots of extra volume in the flowers and berries on this design.  


And here are the eight cards together! It looks like a beautiful flower garden!  And an easy way for her to send a thank you card to someone on her gift list.  

Thanks for popping by today!  

Tuesday, April 23, 2024

Foiling with Crafty Meraki Two Ways


Hi there!  It’s Tuesday and that means another week of guest posting for Crafty Meraki and this week our theme is foiling!  So, I’ve brought you TWO very different designs with foiling, a floral and a masculine style design.  

First up this gorgeous array of flowers from Crafty Meraki’s very beautiful Elegance Hot Foil Plate and coordinating Stencil.  It’s a large sized flower and makes a great statement on a card.  I foiled the image twice in gold, once on white cardstock and then a second time on the new Rainbow Canopy Paper Pack.    


After trimming the flowers out fussy cutting style, and stencilling in purples shades with ink, I carefully added in a few of the patterned paper leaves into the design paper by paper piecing.  Those little pops of colour and pattern are a fun touch.  I used some die cut octagons in the background in purple cardstock and pattern paper to die the colours and pattern papers together.  


The pretty sentiment is also foiled on purple cardstock from Crafty Meraki’s Handmade Love Hot Foil Plate and coordinating die.  These are fun scripty fonts to play with.  

Next up is a more masculine style (or maybe better said a more neutral design).


I’m playing with my favourite colour, green!  For this design I started with Crafty Meraki’s Evergreen Elegance EAP.  This is a type of patterned paper with images that are already coloured, it makes for quick card making, embellishing or an entire design as I created today!  I picked a few sheets of coloured leaves that I liked, trimmed them out (though they do have coordinating dies) and combined that with some Olive Leaf Meraki Para-Dies, cut on vellum.   Then, because this is a foiling focussed card, I foiled both the sentiment from Meraki Moments Hugs Hot Foil Plate and die Combo in green faceted foil.  


To add foiled Olive Leaf die cuts in the arrangement, I foiled a rectangle using a solid foiling plate, and then die cut the foiled olive branches out of that piece of foiled paper.  When I found an arrangment I liked, I spread some Press n Seal overtop to hold everything together while I created the background.  

The background rectangle is run through the Crafty Meraki Parisienne Mini Slimline Para-Dies for that beautiful impressed pattern, and then I spritzed that layer with water and sprinkled some Lindy’s Magical powders (Pondorosa Pines Olive) onto the layer, spritzed again and all this beautiful pigmented green starts to play!  


Then I assembled the card with lots of foam dots to create a good amount of dimension.  All that green is so wonderful!  A few enamelled dots complete the accents.

Sunday, April 14, 2024

Monday Sunshine with Concord & 9th


Hello!  How about some sunshine to get ready for Monday morning?!  I have a cutie here from Concord & 9th with their newest Turnabout Stamp called Folkart Flower.  These stamps are a nice way to create your own layers of colour in a patterned paper style of print with up to 4 colours of ink, or you can stamp with less colours, even monochrome.  And this one is extra fun because you can choose to remove the center of the stamp to make space for a focal image.  I picked a fun colour combo I liked that sang Spring to me.  


I’ve paired the background stamping with some pretty die cute flowers from the Build a Bloom Dies to coordinate with the stamping.  This card is a 5 x 5 size.  


The sentiment is from the Turnabout Stamp, and I’ve added some extra enamel dots and leftover paper pieces to accent the middle like confetti.   

Thank you for dropping by!