Showing posts with label Tag. Show all posts

Sunday, August 11, 2024

Perfectly Peachy Poinsettias with Waffle Flower


Peach Poinsettia Postage Card and Tag

Well, here we are in August.  And ‘Christmas in July’ completely blew by me!  I have been working on a Conference for 2 years that was in July, and the proceeded to get bad case of Covid at the Conference, there was no creating for me for much of the month....so all the fun Christmas creations for me are going to be 'Christmas in August’ instead!

Today’s card and tag set use new stencils from Waffle Flower called Postage Collage Poinsettia Stencil, Poinsettia Background Stencil and Elegant Christmas 2 Stamp Set.  I created the poinsettia postage stamps with the stencil, added Postage Collage Stamp Set stamp marks and then die cut it all out with Waffle Flower’s Postage Collage Die.  


The stamps are layered over a background of stencilled poinsettias, and vellum with the prettiest little JOY sentiment from the Overlapping Christmas Words Stencil and coordinating die.  I love how each letter blends into the next


The coordinating tag has the background poinsettias stenciled in white, with a layer of vellum overtop for softness, and the sentiment is embossed with the Elegant Christmas 2 Stamp.  


They are such a pretty pair, with this fresh color combo!  

Sunday, May 5, 2024

Blossoms for Mother’s Day with Waffle Flower


Hello!  I just had a card sale for local friends and realized I didn’t have a lot of Mother's Day or Father’s Day cards, so I decided to add a few to the stash and started with these beautiful die cute blooms from Waffle Flower called  Painted Flowers Layering Die.  These have a really expressive beauty to them with lots of texture and layers.  I added some ink blending details on each petal, and then after I had glued/or put foam dots between the layers, I also added in some details with coloured pencil.  


I layered them on cardstock that I had ink blended with Evergreen Bough Distress Ink, splattered with water, with a little die cut circle as the “wreath” anchor.  I cut an extra blossom with the dies and chose to make a coordinating tag to go with the card.  It’s always nice when you can add something extra like that for gift packaging. 


It has a really fresh look with the pretty colour combination.  The sentiments are actually really old wood ones I had in my stash from Stampin’ Up!  I thought their simple fonts were a lovely touch for the designs.    Thanks for joining me today!  

Monday, October 2, 2023

Coral Poinsettias with Spellbinders


Hello!  I’m creating with some beautiful new items this week!  Today I created a card and matching tag with Spellbinders Christmas Bird Poinsettia Etched Dies.  This set has a great collection of greenery, poinsettia dies, and other cute Christmas items.  I started with some pretty corals and greens and my ink blending tools to give these petals and leaves lots of colour.  


Each layer is inked and splattered lightly with white acrylic paint, and I’ve added dimension between the layers with foam dots.  The dark grey cardstock really makes the colours pop.  


The sentiment die is cut several times and layered.  It comes from Concord & 9th’s Christmas Cloche Dies.  


I had some left over die pieces so I put them to good use by creating a coordinating tag for the card.  It’s a cutie little thing!  


Love how these pieces work together.  It’s a pretty set for gift giving!  


Monday, April 3, 2023

Easter Bunnies with TCP


Popping in today with some sweetness for Easter.  Easter for me is a special sacred week.  On Palm Sunday at Church we had all our littles come and wave palm branches and sing and it just overwhelmed me again at how precious and important it is for our children to have joy and rejoice in their faith.  So, these designs are a bit on the “sweeter” side of an Easter Celebration, with all the fun of baby lambs and bunnies.  

I’m using some retired The Cat’s Pajamas goodies for my designs because they still make me smile, but I’ll link wherever we have new SVG or digi versions.  First up, an adorable mini-slimline card.   


These two look to be getting into a little egg mischief to me.  I’ve stamped and coloured the Follow the Bunny Stamp set with Copics, then used the coordinating dies to cut them out, I’ve placed them on an ink splattered background, with a cute Slimline Suburbs CutUps also retired from TCP.  A couple of holeless sequins add a touch of sparkle to the card. 


Little peep chicks adorn the inside of the card cause they’re just cute.  


And the coordinating tag is created with TCP’s retired Lamb, Bunny, Chick Cut Ups dies, (now Spring Animals in SVG) as well as eggs from TCP’s Happy Easter digi set, and they’re all placed on a TCP Tag die, splattered with ink.  Such a cutie don’t you think?  


They make a cute pair ready for an Easter basket for Sunday!   Thanks for joining me!  
 

Sunday, December 5, 2021

12 Days of Christmas Challenge - Everyday Tags


Hello Friends!  I’m up today on the TCP Blog with a post for our 12 Days of Crafting Challenge.  My theme is an Everyday Tag Set, and I pulled together some sweet little designs for all types of gift giving.  


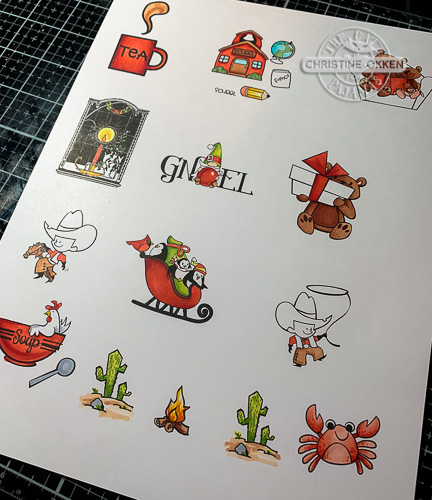
I began with a sheet full of digis from The Cat’s Pajamas printed onto a 8 1/2 x 11 sheet of XPress It Blending cardstock.   I coloured them up with Copics in a colour theme that was similar.  


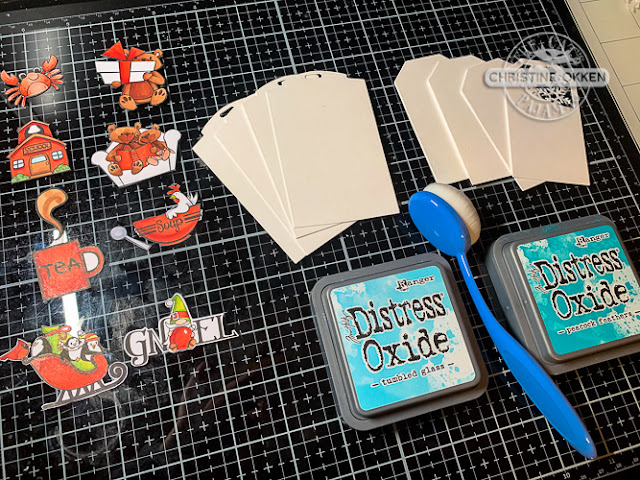
Next,  I picked a colour palette that would work for all the tags with a coral-red, warm brown and a bit of lime green.  To tie all the tags together I added teal blue as the base colour. I die cut all of the tags from heavy white cardstock, and then sponged Distress Oxide onto all the tags, using various stencils on each tag to go with the theme.  


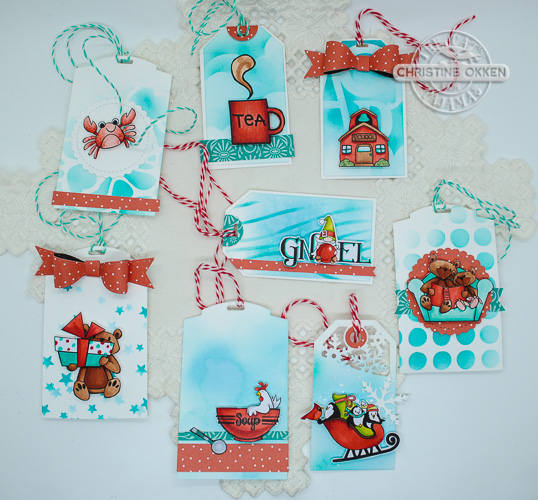
So here is my completed set of 8 Tags!  The colour palette makes them all work together well.  I used similar details on each tag that made creating go quickly - strips of patterned paper, circle dies, patterned paper bows and baker’s twine.  All you would need to do would be to purchase brown or white gift bags and you’d always have a tag and packaging for all these occasions!  


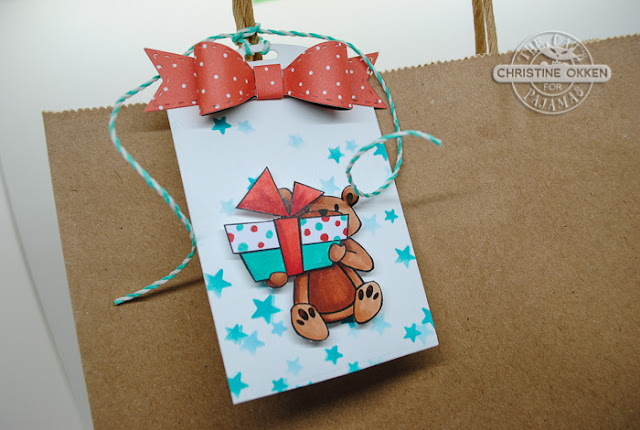
Here’s how the Birthday tag looks on a brown gift bag.  


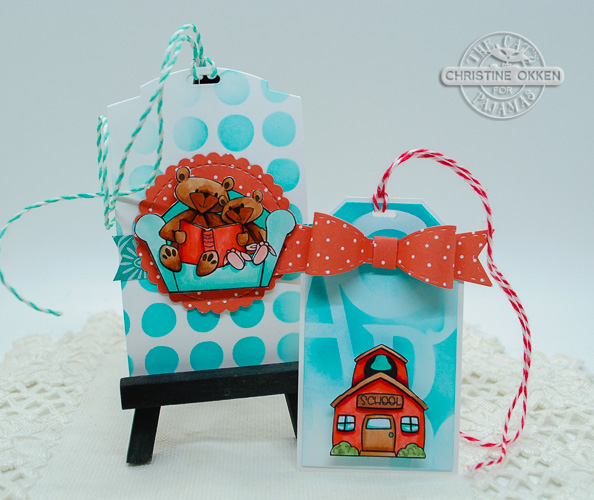
This sweet pair of tags that could work for a teacher, or parent.  


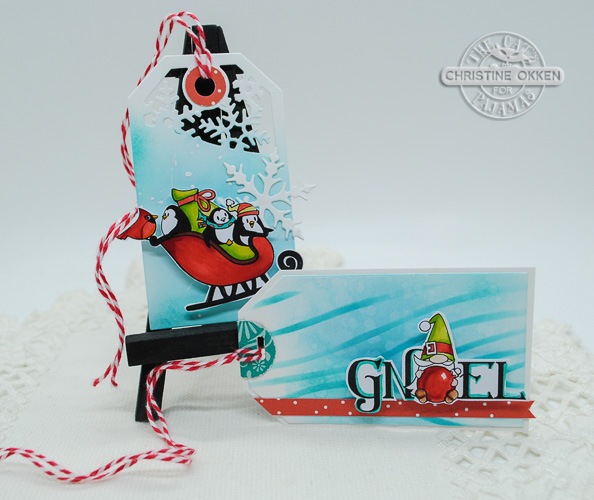
Of course you need a couple of tags for Christmas.  


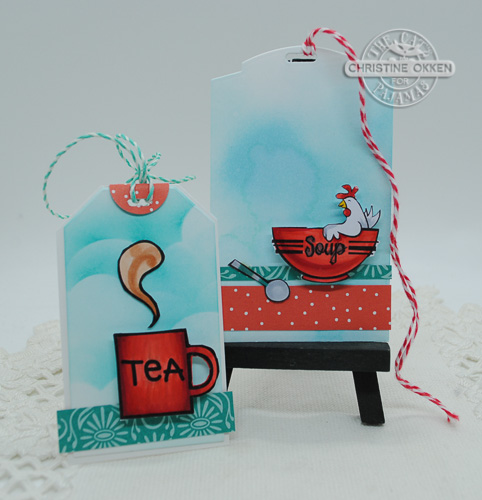
A pair of get well, or coffee gift tags.


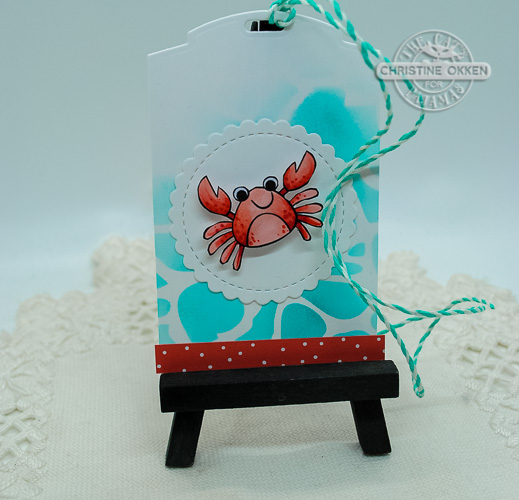
And finally a cute little crab that would work for a child, summer theme or all occasion.  

So, now that you’ve seen my inspiration, please join me by creating your own set of Everyday Tags for the Challenge!

To help you play along, get 25% off all our Digis Stamps and Cutable SVGS from November 26 thru December 25. And, our Digis Stamps and Cutable SVGS  are immediately downloadable in your TCP account once you purchase them. Now, that’s instant gratification! So, play along with us during the 12 Days of Crafting Challenge.  


Pop on over to the TCP Blog for more details and the Challenge Link!  Great prizes are available!  


Monday, November 2, 2020

Sparkly Snow Bears


We’re bringing on the sparkle this week with an adorable polar bear from The Cat’s Pajamas, and some super sparkly paper I picked up.  This month’s challenge at TCP is called Tag It and all you need to do is create a Tag or have a tag on your card design.  

So I pulled out the Warmest Wishes Bundle with this little guy and his friends, and coordinating Dies are included.  I was just going to create a tag (as you’ll see below), but then I decided that I would use the tag on a card design.  


But, its just as cute when it’s on it’s own.  I’ve added TCP’s Five Snowflakes Die, behind the sweatered bear, and a cute bow using TCP’s Easy Stitched Bow to top off the Wish Tag from TCP as well.  It makes tag making super slick.  


Some embossing in the background, a cute sentiment label from the Fancy Flip Dies, a couple of holeless sequins finish it off.  

So, please join us in the Tag It Challenge this month!  You could win a $50 Gift Voucher from The Cat’s Pajamas just for playing along!  

Monday, July 27, 2020

Sneaky Peek Christmas in July Hop!


Welcome to the TCP Blog Hop!  I hope you’ve come from the lovely Nancy’s blog on the Hop.  

All the new Stamps and Dies from the July Release are available!  And don’t forget if you want to get it all, the Kitty Kat pack (all new stamps & dies @ a 10% discount) and the Poochie Pack (all stamps at a 10% discount) are now ready for purchase too.


Today I’m showing off the beautiful Oh Christmas Tree, you can purchase it as a single stamp set, or in a Bundle with the Dies included.  With this kind of card, the dies make a really big difference.  


I’ve created a bit of a festive bower arrangement of Christmasy things using some lovely blues and greens for these designs.  Most of the items are stamped with Distress Oxide ink to get really good coverage, and it made for a nice multi-coloured sentiment from the set too.  

I’ve added a sweet little tag for a gift that is created using the new Peek-A-Boo Frames Die.  That die will be perfect for creating peek a boo designs on your card or an Advent Calendar, but it also works to create tags.  I just cut a little extra above the perforated edge to make a tag.  Embellishing it wiht some jingle bells and the sentiment from the new Beary Christmas set, because it worked perfectly!  Such a sweet little touch of Christmas cheer.  


Bits of twine on both the card and tag add some fun and a few holeless sequins on the card add some festive sparkle.  

Now please pop on over to see what lovelies Brenda has in store for you!  

Thanks for joining us at The Cat’s Pajamas for all the fun at Sneaky Peek Week!  

Friday, December 15, 2017

Using Power Poppy Packaging


If you’ve ordered stamps from Power Poppy before, you know in addition to providing beautiful illustration and high quality polymer stamps, Marcy goes above and beyond and packages every order with pretty papers, washi tapes and she writes a personal note.  Talk about sweet customer service!  On our most recent set of stamps, Marcy packaged mine with some striking black and printed paper with trees all over.  It was just too lovely to waste, so today it has a second life as a card accent and tag.  

I started with Power Poppy’s Cozy Cupfuls set and coloured it up with Copics.  Its still one of my favourite sets with those adorable little cardinals.  


After cutting their tails a bit “out of the box”, I put it through a stitched circle die.  Did you know that female cardinals almost have a green tint to their feathers?  

I added some black metallic paper to accent the black of the patterned paper to keep it really simple but festive.  I wee bit of holly leaves and sparkly berries accent the sentiment, and a bit of gingham ribbon and Nuvo drops finish it off.  


I also kept the tag really simple too.  I think tags are so sweet, but my gift recipients usually only look at them long enough to rip off the wrapping.  


Have you played along yet in our 12 Days of Christmas Challenge?  There are 12 possible ways you can enter, and tons of inspiration we’ve given at the Power Poppy blog over the past few weeks.   Be sure to check out the first day and entry spot HERE, and a summary of all the 12 Days of inspiration are HERE.  

Now take a peek at what the Bloom Brigade has for you today....

Allison Cope
Christine Okken

Katie Sims
Stacy Morgan

and Marcy at the Power Poppy Blog

Tuesday, November 7, 2017

Present Stack


It’s beginning to look a lot like Christmas in my neighbourhood...October 31 rolled in and over the next few days from there we had about 6 inches of snow fall.   In all likelihood, it’s here to stay.  So, it’s definitely put me in more of a Christmas mood.  Because of the demands of work, I’ve had to take a step back from being on the TCP design team for the time being, so it’s been months since I’ve had a chance to pick up these adorable stamps...today’s the day!  I pulled out TCP’s set The New Nice and stamped this snazzy kitty with a big stack of presents from a successful day of shopping...or wrapping!  

I created a thin tag for kitty to sit on which is perfect for this month’s Tag It challenge.  I stamped some snowflakes with another TCP set, Penguin Joy.   Then I added some pretty ornaments in and around the scene to make it festive, and topped the tag off with a pretty paper bow from TCP’s Easy Stitched Bow CutUps die, 


Colouring is done with Copics, and I added some sparkle to his collar to make him extra festive.  

I did a whole bunch of colouring one day last week and snapped quick shots along the way of my Copics  - so it’s not the usual clear photo (and half of them are upside down!), but I think you’ll get the idea.  


Save

Monday, October 31, 2016

Santa’s Light Up Pull Toy


Here we are again with another Tuesday rolling around, and I have a cute design with The Cat’s Pajamas for you.  


You know those little vintage pull toys that kids played with (and probably still do)....a duck, or a dog, a telephone or some other cute thing that often had a Fisher Price label on it?  Every time I saw this cute santa bunny in his fancy little Christmas bulb from TCP’s new set Santa is Coming, I kept thinking of a Christmas pull toy.  That’s how this card came about :)  

With one more week in the “TAG” challenge at TCP, I thought it would be fun to create a pull toy tag on the front of the card.  

I started by colouring up our lightbulb bunny with Copics and trimming him out.  Then I created the card front by stamping the background sentiment in White Craft Ink and embossing in white, then sponging Baja Breeze ink over the layer.  


Next, I popped my little Santa bunny onto this pretty tag made with our Holiday Tag Duo CutUps.  


Then, underneath the tag I created a slider/window with our Roller CutUps die, so that when you pull the “pull-toy” tag, it reveals another little sentiment stamped inside.  

All finished off with some felt and some sequins.  


For fun I added a little tag, also made with the Holiday CutUps die and felt (it cuts beautifully!) and added another cute pull toy Santa.  Now I have a card and tag ready for a present.    He’s just so cute!  


Want to get ahead of the game for your Christmas presents and join us in the TAG Challenge?  You have one more week!

Here’s the details:

1.  Every other Tuesday a new challenge will be posted on The Cat’s Pajamas blog and our Facebook page.
2.  If you want to play along you just upload your design to The Cat’s Pajamas blog page using the InLinkz button by the Monday, 11:55 EDT before the next challenge.  
3.  You are not required to use a Cat’s Pajamas stamp or die but if you have them we would love to see them.
4.  On the following TCP Tuesday, the winner will be chosen from the previous challenge and will receive a Cat Cash Voucher for $10 or $15 if a TCP product is used.
Check out the TCP Blog for more inspiration today!  

Saturday, October 4, 2014

World Card Making Day!


Hello CardMakers!  It’s a fabulous day to be creative!  Power Poppy is excited to invite you to some wonderful challenges today, and I’m jumping in with the first one!  My challenge is called “Woot For Tuts!”  It’s such a fun one too.  Just look up any of our “Inspire Me Monday” tutorials on the Power Poppy website and create!  Four challenges will be issued today and if you play along in all four you will be entered to win THREE Power Poppy sets of your choice!  Talk about a fabulous prize!  


When I saw Dina’s tutorial on making Pretty Little Tags way back in the spring I thought it was so fabulous....and I knew it would be a great one to apply to our brand new Christmas sets.  


Here is where I started, I stamped the gorgeous new Poinsettia stamp with VersaFine ink onto watercolour paper, and then coloured it up with Derwent Watercolour pencils, washing in a soft background as well.  After it was dry I spritzed some Mr. Huey’s shine overtop to give it some shimmer.  


Then I took a number of Spellbinder shapes and spread them out around my design capturing parts of the image, taping down with some washi tape and running through my cutting machine.  

After cutting I added some pretty little sentiments from our Bottlebrush Holiday set and then cut out a larger sized shape from the same Spellbinder’s die and formed a tag.  


The one difference between my tags and Dina’s is that I cut each tag base over top of a folded edge so that each tag opens up and you can write inside.

These Power Poppy Bloom Brigaders have inspiration for you from one of our Inspire Me Monday Tutorials...then we invite you to play too.  More details at the Power Poppy Blog!  And make sure you keep popping by there...there’s 4 challenges today!