Showing posts with label Sewing. Show all posts

Monday, September 2, 2024

My Mama the Seamstress with TCP


Lady Sewing Card

Hi!  I hope your Labour Day was great (if you’re in North America).  One of my core memories as a kid was that of my Mom sewing.  She was a gifted seamstress, and had that as a job full time or part time throughout her life.  I can’t tell you how many garments she sewed for me or for our kids over the years.  She was so gifted at it.  I remember her teaching me and her favourite phrase was “rip it out”.  It always mattered to her that I did it right.  She was always dressed beautifully and almost always something she had sewn.  

So this cute design is in honour of her.  It uses a new digi set from TCP called One Stitch.  It features all kinds of textile arts, embroider, crochet, knitting and sewing.  I coloured the image up with Copics, with some coloured pencil blending added.  


 I used a lot of fun colours to coordinate with this pretty plaid paper, and added little stitching themed dies and buttons from retired TCP dies.  She’s definitely got her fashion on!  


And, just like my Mom - a “you’re amazing” sentiment.  She truly was, and I miss her greatly!  Glad to have a sweet memory of her to celebrate with you today!

Friday, January 20, 2023

From Our Nest to Yours


One of the most common birds found at our bird feeders are Chickadees and I enjoy watching them take shelter from the cold tucked in each day.  This little cutie from Power Poppy called My Little Chickadee is such a fun and easy one to colour up, that its perfect for the latest Blossom Challenge: Clean Slate theme for clean and simple cards. He’s ruffled up and on this winterberry branch ready to sing a song!  

I created a mini-slimline design with blocks of colour in patterned paper that coordinated with the colours I used with Copics.  


Some soft pointillism dotted blue-grey background is a soft touch, and the accents are simple die cut branches from The Greetery which I added mica flakes to, to simulate sparkly icy snow.  


You get a sense of the sparkle on this view, it’s really shimmery in real life!

I hope you can join us for The Blossom Challenge:  Clean Slate HERE!  

Monday, January 31, 2022

TCP’s February Release is Sending Love!


Popping in today to welcome in the month of February with The Cat’s Pajamas New Release!  We’ve got themes of love, winter, friendship, and postal ephemera.  It’s my kind of vibe!  I have 3 designs to show you today beginning with this cutie called Miss Ewe. He’s got a fabulous flowing scarf and GASP Sheep POCKETS!  So cute!  He’s coloured up with Copics and sewn onto this mini-slimline design.  I love mini-slimline sizes....just the right amount of real estate to create.   


I’ve zig zagged between the layers then added the heart die from the new Conversations Hearts Cutable, and a sweet snowflake so it doesn’t just have to be for Valentine’s day.  


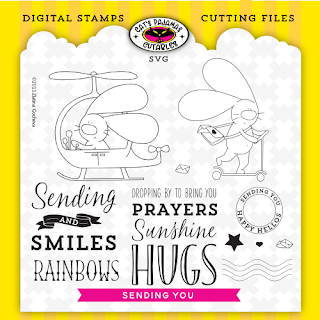
Next up is this adorable helicopter bunny from the Sending You Digi.  He’s coloured up with Copics to match this great flight themed paper I found in my stash.  He’d dropping by to bring LOVE with cute little die cut hearts, and I’ve popped him up on a layer of the new Square Stamps Cutable file.  


Isn’t the paper great?  

And last, but not least, this postage themed design...


It’s also using the Sending You digi set  and it is framed up using the little circular post-mark in the set,   enlarged enough to become the frame.  I trimmed out the inside of the circle frame and popped it up on the bunny image.  Some pretty brocade paper ties the pink and red together.  


You can see I’ve added some extra envelopes onto the main image and as fillers in the text frame.  The finished card is just less than 5 x 5.  

Here’s a peek below and the New Release goodies I used.  Thanks for enjoying the fun February Release with me!  


Tuesday, January 19, 2021

TCP’s Flower Wagon


We’re back for Day 2 of Sneaky Peek Week at The Cat’s Pajamas!  Today we’ve got fantastic spring themed dies to show off!  


This is the precious Flower Wagon Dies!  I had a great time finding some coordinating paper in my stash to pull together a patterned paper scene full of my favourite, spring flowers.  


All of the elements were pulled together into an arrangement I liked then added onto TCP’s die shape - Birch Snowglobe, what’s great about this die is that it also has an outer stitched line outsided of the cut line you can use.  I also added some machine stitching on the layers to match.  The pretty sentiment is from TCP’s Simply Stacked Sentiments stamped in Memento Espresson Truffle ink.  


Here is a peek at what the Flower Wagon Dies looks like:  


There is also an adorable Easter Basket set of dies you’ll see along the way as you hop to see the rest of The Cat Pack too!  


Are you In It to Win It?  All week of this release you have a chance to win a $10 Gift Code to the TCP Store!  All you need to do is comment on each of these blogs from The Cat Pack (and Instagram where applicable) and you’re entered to win!  Winners will be announced the next day on the TCP Blog!  

 Wendy 

Tuesday, March 6, 2018

Quilt Patterns for Baby


Are any of you quilters?  I have made a couple of quilts for friend’s babies and my kids, but really simple ones, not the really beautiful style of quilt that pieces into beautiful patterns or does fancy quilting on top.  The paper variety is always easier for me.   Today we have a paper quilt for baby.  The image is another old one from There She Goes called Cattitude.  As soon as I saw those little building blocks with the cats, my mind thought about the building block style of quilt.  I’ll be honest and say I made this card a LONG time ago, but I forgot to post it.  When I was saving a photo the other day from the last There She Goes card I made I found it again, so - bonus! Hopefully you’re ok with the inspiration - even if you can’t buy the sets any longer.  

To create the feeling of a quilt, I cut out a variety of squares in different patterns of paper so that it would fit on a standard size card and still have some borders between the squares.  Once they were adhered to the green panel, I ran it through my Big Shot using a lattice embossing folder.  You can use any folder that makes it look like you quilted all the squares.  The effect is so easy and cute!


I have some sewing themed accents including some paper buttons, and a sweet sentiment from an old SU set.  


Enjoy your day friends!  

Monday, January 13, 2014

Baby Shower Bonanza

As promised, I’m back with some of the creative projects I put together for the baby shower of one of our former students this past weekend, I thought I’d share them with you!


I knew that I wanted to start by making a banner for the little guy.  I often do this for baby showers, and I’ve done it for our kids too.  It is such a sweet way of decorating for the party, but also in making something for that child’s room too.  Wherever they go, he knows what spot is his.  I went to the fabric store and picked out a few fabrics I liked.  One of the gifts she requested for him was books, so when I saw this lighter blue fabric with the words from “Goodnight Moon” on it I knew I had a winner.  

It’s really to make banners.  I just cut out the banner shape, iron on some lighter weight interfacing, hem the edges, and then decorate.  Above you can see I appliquéd on a circle and die cuts of the letters of his name, interfacing those and then zig-zagging them on with my sewing machine.  It’s all sewn onto a long length of wide grosgrain ribbon (probably about 8 feet) then accented with buttons.  

As I was looking at the banner I thought, “hmm, I wonder if I could make a quilt too?”.  I have never made a quilt, but I knew the basic steps, and I’ve sewn a long time and have a mom who’s a professional Seamstress, so I knew I’d have help if I needed it.  So, here’s what I did!


I started with the center panel.  I knew I wanted the design to have a similar feel to the pennants so I appliquéd the pennants onto the panel first.  


I  knew I wanted it to be really simple because it was my first quilt, so I picked a layout I knew I could manage alright.  So, these were my contrasting fabric layers, laid out how I thought I might like them.  


As I looked at that center panel, I realized I needed something in the bottom corner, so to also personalize the quilt like the banners,  I added the appliquéd “m” for his name, and then added rows of the center panel fabric on the outsides of the rows.  I don’t have quilt cutting equipment so I was hand-cutting and measuring and re-cutting and measuring….quilt equipment would have been easier, but that’s not in the budget right now! :)  So this is the front all sewn together before I started the quilting.  


Here it is quilted (just stitching in the ditch style) and the binding pinned on the back before hand-sewing.  I don’t have a walking foot for my machine, so it’s not perfect by ANY stretch of the imagination, but its soft and sweet.  And I was really proud of how it turned out, especially for my first quilt.  


Here’s my tall son holding up the finished quilt for me.  It was a real work of love, not perfection, but I know it will keep him cozy, and it’s made especially for him.   Finished quilt was 36 inches by about 50 inches.  Not perfect baby quilt size in the length but that’s all the fabric I had.  


Here’s a closeup of the quilt.  It was a really hard project (as in time consuming and brain work :) but a fun project too.  I think I might even make another one!  

Here’s a few more pictures from the party.  


Paper banners I made with one of the girls for the decorations, we had several strings throughout the rooms.  


Here was his banner at the party.  


This fun onesie project was thought up by one of my other girls.  She took quilting fabric and scraps from the quilt and used double-sided interfacing on it.  Then she had the Baby Shower Guests create onesies for him.  TOO CUTE!  Check out the little moustache!  Most of them had designs on the front and on the bum :)  


And these are my girls.  Each of them have graduated in our Youth Ministry and I love them.  Two are leaders with us right now, and one is a former leader.  The bottom five are all former students of mine.  We’re all laughing and have funny faces because the photographer didn’t know you also had to look through the view finder on my camera.  The beautiful laughing lady with the baby is the new mama :).  The two dark haired ladies and the lady on the lower right are the ones who did the shower with me.   It’s a beautiful stage of life to still share with them.  I’m so blessed to have known them all these years.  I’ve known each of them since they were 14 or 15 and now they’re seeing new milestones in their life.  So grateful for God’s goodness.  

Thanks for dropping by to share the fun with me!

Thursday, December 13, 2012

Making a Difference

Hi all and welcome to the grand finale of Flourishes' December release! If you've been following our sneaks this week, we are happy to report, they are no longer sneaks! All three of our new sets are now live RIGHT HERE in the Flourishes store! We even have our New Release Bundle -- it's a deal where you get 10% off all our new sets when you purchase it in the bundle. What fun! The set we are unveiling today is part of a continuing collection of sentiments aimed at being a "go to" when it comes to offering someone a bit of thanks! It's the latest set in our "Inside & Out" collection!


 Give the inside and outside of your cards a dash of pizazz with this fun new set from Becky Fleck! Inside and Out Thank You is the perfect little sentiment set for all the different ways to tell someone Thank You!  There are some really wonderful, creative mix and match sentiments that I know I'll be using.  Not just the same ol' same ol' here.  :)


See what I mean?  Isn't that a perfect addition to thank you?  I know I'll be using this one a lot, there are many people we work with or people around us that make a real difference in our lives or in the lives of others.

I began by cutting out this beautiful shape with the Perfectly Pierced Classic Hourglass Die from Flourishes from Flourishes Classic Ivory cardstock, then sponged some Memento Espresso inside the die.  Then I stamped the larger thank you with Memento Nautical Blue ink, and the smaller sentiment in Memento Rhubarb Stalk ink.  I love how the sewing on the card goes with the piercing in the dies.

All of this was to match the gorgeous new paper and embellishements from Teresa Collins called Now and Then, which I used extensively.  We're carrying the collection in paper, hexagon adhesive shapes, decorative Washi Tape, and enamel dots all to coordinate (and I used them all!).  Today was the first day I've ever used Washi Tape!  What do you think?


I finished off the design with some beautiful Cotton Dentelle Trim Lace in Kraft.  It's so classy!

If you like this set, you might like our others called Inside & Out Just Because or Inside & Out Happy! Be sure to check them out as well.


Would you like to try to win this set? All you need to do is leave some love in the form of a comment on the blogs below! Why? You need to try to figure out who is the…  


One of the ladies on our link list below will be picking a name from the comments on her blog post today. We don’t know which one it is… so the more blogs you leave comments on, the more chances you have to win!

Just click HERE; to check out this beautiful set in the Flourishes store! And... while you're hopping over to the store, if you've been following our Gambler's Sale - you should know that ALL items on our Sale Page are now listed at....      

That's 45% off retail! These bargains are too good to pass up! Stock up on papers, embellishments or ribbon because you won't be able to get these goodies for prices much lower! Be sure to visit our SALE PAGE! And now, to the moment you've all been waiting for! Hop on over to see our fabulous design team and the gorgeous creations they fashioned using our brand new and ever-so-versatile set that's full of gratitude!
DID YOU KNOW YOU COULD WIN OUR ENTIRE DECEMBER RELEASE? Have you checked out our Let's Hop Challenge? Just click HERE to find out how to play! You have until THIS AFTERNOON --- Friday, December 14th at 5 PM EST --- to play along! Winners will be announced Saturday (tomorrow) in our Winner’s Circle blog post!

Word on the street is, there might be more than one winner chosen for the Let's Hop Challenge! So get those fingers inky and good luck! Be sure to stop by tomorrow to see if YOUR NAME lands in our Winner's Circle! See you then!      

Thursday, November 22, 2012

Love Stitching


Welcome to another Friday at Flourishes!  We've got some more peeks at this month's fabulous release for you today!

For Black Friday....I put together another fun card with the pretty Stitched for You set and the 123 Create Kit - For the Record.  There is so much you can do with this set and kit!  The image was cut out with our new Silhouette Shape for this set, and stamped with Memento Tuxedo Black ink onto Flourishes Classic White Cardstock.  


I layered the cut image onto a Fancy Tags Three Spellbinders Die to give it that pop of black.  And look at that cute knitting needles and yarn charm from the kit!  I added some stitching because it fits the home made theme.  


And for a change I also decorated the inside of the card, stamping some of the pretty "embroidered" elements from the set on the bottom of the card as well.  

LOTS happening today at Flourishes! We have our Black Friday Sale combined with the Gambler's Sale...making for some really great bargains in the store!  Be sure to check it all out!

The Codes below are for percentage off total order and no back orders will be accepted. Discounts will not be applied to gift certificates or wholesale orders of any kind. Discounts will apply to all items already on sale – so check out our Gambler’s Sale items HERE! Prices have dropped on this sale list  to 30% off. So, the time is now to buy with these additional discounts!

PLEASE NOTE: This sale must exclude Copic products due to MAP pricing requirements.


Now head on over to the rest of the Design Team to see what they have in store for you with November's Sets!


  • Christine Okken (you are here)
  • Cindy Lawrence
  • Danielle Kennedy
  • Heather Jensen
  • Julie Koerber
  • Sharon Doolittle
  • Silke Ledlow
  • Stacy Morgan
  • Tammy Hershberger


  • Sunday, November 18, 2012

    Stitched With Love


    How about another sewing themed card from the New Releases at Flourishes this month?  This image from the Stitched for You Set in particular just popped out at me from the set.  I love the little tomato pin cushion with the strawberry hanging down.  And those fat quarters of fabric!  AH!  Don't get me started.  I know that fabric for a sewer or quilter is like designer paper for a card maker.  Bliss!

    I colored and paper pieced the image with these new papers from the For the Record 123 Create Kit.  The top and bottom fabrics in the stack are paper pieced (from the kit papers) and the middle two coloured with copics.  Then I've accented with ribbons from the kit and a sweet little pin that also come in the 123 Kit.  The image is also cut out with the coordinating Silhouette Cut File from Flourishes.  It gives such a polished finish to images.  


    The sentiment is stamped with Memento Tangelo Ink and Memento Love Letter Ink.


    Busy day ahead for me.  My mom and I are painting my daughter's new room!  Catch ya later!