Showing posts with label Vintage. Show all posts

Monday, January 15, 2024

Cupids Forever with TCP!


Well hi again!  I’m back today with an adorable design for Valentine’s or a Wedding that I think you’ll love!  It’s got so much classic vintage Valentine flair!  It’s new from TCP this month and is called Cupids Forever.  I think they are just adorable.  

I started with some Copic colouring in peachy shades with a nod to Pantone’s 2024 Colour of the year this year “Peach Fuzz”.  I happen to LOVE peachy shades, so you might see more of these glowing peach colours ahead!  Each image was fussy cut out, and then placed on a mini slimline design with retired TCP dies to be vintage “windows” for each of them.  


I’ve added some little hearts as accent between the cupids.  I chose not to add a sentiment because then it is open for use for Valentine’s and for a wedding.  To make it a bit more vintage I added some pretty crochet lace.  There are so many more cute cupids in this set too!  


 Aren’t they all just precious!  Thanks for joining me today.  


Sunday, January 7, 2024

Beautiful Flowers with Simon Says Stamp


I’m delighted to share some new colouring with you!  This week’s Wednesday Challenge at Simon Says Stamp is to use something new.  These gorgeous roses called Beautiful Flowers are new to me, and aren’t they a knock-your-socks-off stamp?  This is my favourite type of image to colour, with tons of petal power potential!  I started my colouring with Copics and finished with colored pencils.  I wanted it all to have a soft vintage/shabby chic effect, so I’ve added deep greens and gold for the greenery.  

This card size is a bit bigger at 4 4/8 x 6 1/4.  


Aren’t the petals and leaves pretty?  I also vintaged it up by stencilling on the card base with gothic stencil, and added ink blending, gold Lunar Paste and little dew drops.  


The sentiments in the set are amazing!  I stamped Happy in Grapefruit Ink from Concord & 9th, embossed the smaller white parts of the sentiment and then added a little white gel pen to the Happy.  

Appreciate your visit and comments!   

Friday, August 19, 2022

TCP’s August Blizzard!


Hi there!  Well, we’ve been in a heat wave for weeks here, and for us that’s not so pleasant without central air conditioning, so today I’m going to COOOL it off with some of the newest August Release goodies from The Cat’s Pajamas.  I have two designs today, starting with this one called All The Trimmings.  Today I’ve got a dapper snow-Santa with a teal blue-green hat and bow tie to coordinate with that shapely carrot nose.  He’s surrounded with presents from the set and placed on a fun background that uses a retired  swirling snow die from TCP that creates indented pattern, and some fun sponging and spritzing with sparkly Shimmer Mist.  


In real life those colours from the background paper and the presents match much better than how the photo captured it.  I wanted the patterned paper to look like a wrapped package and the snowman design to appear as the tag accent to the present.  


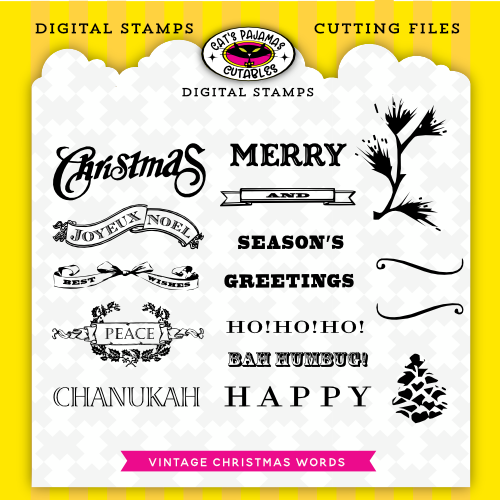
Now moving to something more warm and cozy, I used the Vintage Holiday Words digi stamp to create a woodsy warm Christmas card.  I printed the digi in a very pale greyscale and then used very sharpened Prismacolor Pencils to add colour to the words and pine accents.  It really gives the words a cozy softness that pairs with the woodland paper from Craft Consortium.   


A few die cut accents from TCP retired dies add a pop of colour to coordinate with the paper, as well as a couple of enamel dot berries.  

I’ll be back on Tuesday with more from the TCP Release, but for now here’s a peek at the New Release items I used today.  


Monday, August 17, 2020

A Bank Robbery


Howdy again Pardners!  I’m back with another Western Slimline design for The Cat’s Pajamas Challenge this month.  This time we’ve caught the sunset Bank Robbery in progress!  This trio of trouble have held up the bank and are running off into the sunset.  I’ve used TCP’s Western Digi Stamp Set cause it’s so darn cute.  

All the colouring on the town and penguins is done with Copics.  


For the background layer, I sponged layers of sunset colours onto the Great Outdoors Stencil  with TCP’s Big Beautiful Blending Brush and some Distress Inks (Rusty Hinge, Wild Honey, Spun Sugar, Blueprint Sketch), and then added a bit of Prismacolour Pencil to give the clouds some extra definition.  It gives it a bit of the look of an aged scratchy photo.  


For some colour I added some stars with the Liners CutUps and accented the sentiment with some Bitty Banners.  


Some twine at each end adds to the rustic western feel, and finishes it off.  

Join us in the Slimline Challenge this month and you could win a $50 Gift Code to The Cat’s Pajamas Store!  

For more Slimline Fun please pop on over and visit the other Kitties in the Cat Pack playing along today. 

Saturday, October 21, 2017

Happiest Holidays: Glitter House Village


As often happens when we first see Marcys illustrations, I think I gasped out loud when I saw todays sweet,sweet set called Glitter House Village.  I've had such a fascination for sweet little minature scenes from the time I was little, and I think this set really captures the whimsy and warmth of the Christmas season.  

Heres what Marcy had to say about this beautiful set.  

Obsessed. I'm totally obsessed with the precious ’40s-era glittered cardboard villages, decked out in micro-flitter, tufted with cottony snow, based on home designs of the time. Also called "putz" houses, the tiny buildings (homes, churches, shops) were available in dimestores, allowing everyone to create a sweet snowy Christmas village on their mantel. These days, you can find remakes of the vintage glittery cardboard houses — and you an also find them in this fun stamp set! Have a great time coloring this one in all manner of palettes, decorating the bottlebrush trees and adding dimension for that 3-D effect. And don't forget to use lots of sparkle as a finishing touch. Two accents - felt pom-pom fringe and an evergreen bough - can be repeated to make a swag below the village. Randomly stamp the snowy sky as a background. Place the large or small North Star ornament in the sky with the radiating glow.


In March of this year I made a similar design with a spring-time Garden Gate theme and our set Natural Beauties.  This set looked like a great way to revisit that theme with a little Christmas Village.  I coloured it all up with Copics to give it the feel of a tiny cardboard village.  Then I cut a little gate with my Silhouette machine, and formed a card 4 1/4 x 11 with scoring lines at 2 3/4 inches from each end on the long sides.  Then I just trimmed around the fence to create the gate opening.  

After it was put together I pulled out some chunky glitter and after adding some Mono-Multi glue to the rooftops and snow, covered it with glitter.  That’s one of the sweet hallmarks of Putz Houses, they do celebrate a lot of glitter.  Chunky glitter though - is a little hard to photograph!  


Here’s a few views with the fences open from each side.  The set includes some lovely boughs and borders you can incorporate, and I thought they looked so perfect along the fence.  


You can see that chunky glitter gets everywhere, just like snow :)


I’ve tried to capture the shimmer and shine of the glitter in this photo.  It is such a sweet scene don’t you think?  I can’t wait to colour it up in other themes....like pastel....I think that would be gorgeous!


Here's the Bloom Brigade in action....


Allison Cope
Christine Okken

Kathy Jones
Tosha Leyendekker

and Marcy at the Power Poppy Blog

Friday, August 14, 2015

Generously Shabby


Ready for some shabby romance?  I’ve designed another card for this month’s Shabby Chic Challenge at Power Poppy.  I decided to go with another no-line style colouring just because I think the softness of the technique really lends itself to this shabby style.  I used the gorgeous new polymer set So Grateful.  The dahlia arrangement here is just so pretty!  I stamped the image in Memento Desert Sand onto XPress It Blending Cardstock and then gave it some soft copic colouring.  Then I trimmed it out with a little border, spritzed it with some Mr. Huey’s Shine, and got ready to work on my background. 

I just LOVE the Tim Holtz Gothic stencil.  It’s my go to stencil for elegant looks.  I used embossing paste on the purple cardstock and then let it dry completely.  After it was dry I sponged some SU Almost Amethyst ink in different spots around the embossing paste to give it a aged look and curled up the edges.  

I placed a Spellbinders die cut in white underneath the the window I had cut out and then stamped the sentiment and sponged over some more of the stencil in ink softly over the sentiment.  


In this shot you can see the shine of the Spritz on the flowers.   Then, something I rarely do, I added some rolled paper roses to the design.  I think these are Verve dies.  Then I finished off with some pearls and lace and it has that vintage shabby appeal.  


Here’s a look at the challenge graphic again.  We sure hope you can join us in creating some thing Shabby & Chic and have your chance to win some Power Poppy goodies!  Here’s the girls playing along today...


Christine Okken
Julie Koerber
Leslie Miller
Stacy Morgan
Tosha Leyendekker


Now here’s some FUN NEWS!  Tomorrow we’ll be showing off another NEW Digi image at Power Poppy.  It’s a beaut!


AND....as well on Saturday, we’ll also be playing along over on Passionate Paper Creations and ushering in a coloring contest. As a part of this promotion, the brand new Sunflower Power will be on sale for 24 hours only for $3!! You can use this image to enter the contest and two lucky winners will get a $25 gift certificate to the Power Poppy store! 

Friday, August 7, 2015

Shabby Sunflowers


We’re delighted to bring you another month long challenge at Power Poppy!  This month Cindy is our hostess and she’s challenging us to go Shabby & Chic!  


I was so excited to play with the new digital image from Power Poppy - Sunflower Power.  Oh my, I just love it so much!  I love sunflowers and their beautiful tilted faces and that gorgeous pop of yellow and brown.  They sing of summer!  I printed the image in a more sepia type tone to give the image a no-line colouring look.  It sure looks great on this type of image.  I used a stitched die to cut it out, allowing the smaller sunflower bloom to be “out of the box”, and then I coloured it all up with copies with a really loose style of colouring.  

Then to make it shabby, I distressed all my edges, including this great warm paper (it’s an old pack that I had in my stash).  Then I took a leaf die and some artichoke cardstock, cut and curled the edges to give them realism and tucked them behind the layers.  


I sponged up the sentiment in some sunny yellows, added some vintage style brads and a little butterfly and voila!  Shabby and chic :)  


Here’s the Copics I used. 


Here’s the Bloom Brigade in action with Shabby Chic, we hope you’ll join us in the challenge this month for your chance to win a Power Poppy set!  

Allison Cope
Christine Okken
Cindy Lawrence
Stacy Morgan

Friday, April 24, 2015

Lacy Lady

Hello Friends, I’m here with a new challenge at A Day for Daisies, and it’s Add Lace!


Adding lace is perfect for these new images from ADFD,  the one that I used today is called Vintage School Girl Two, I think she’s so Downton Abbey feeling, and it was fun to give her that vintage look with the colouring and overall card design.  

I used a Mojo Monday sketch from a few weeks ago, pairing it with these papers from Carta Bella - Yesterday, and adding several types of lace into the design.  


For accent I added this large vintage brad and the twine bow.  

I think it’s so elegant and lovely!  The sentiment is from Power Poppy’s Dynamic Duos:  Peonies and Tulips.  

Hope you can join us in the Add Lace Challenge!  For more details see the ADFD Blog.  

Friday, January 9, 2015

Vintage Rose

Happy Friday everyone?  Got any wonderful plans for the weekend?  Tonight I get to have a fun date with my husband at an NHL game.  Not that my team has been winning much lately, but I’m looking forward to the time with my love.  

Today I’ve got some Power Poppy love going on here on the blog too.  


I decided to pull out one of the first sets that Marcy created for Power Poppy, it’s called Springtime Love, and it’s really love-y and lovely!  I stamped on XPress it Blending cardstock, then coloured with Copics and finally distressed it up sponging with ink, torn and peeled paper edges and some irregular sewing.  I don’t often distress, but I really loved how this paper from an older pack of Glitz dp looked so I used my distress inks (Tea Stain and Vintage Photo) and Memento Espresso until it took on similar tones to the paper.  For accent I’ve added some brown cotton lace and a fancy brad that has that vintage feel too.  


This is Mojo Monday’s Sketch this week as well.  And now you can join us in the Power Poppy Peep of the Week, showing us your Power Poppy creations.  

Here’s the Bloom Brigade playing along today...


Allison Cope
Christine Okken (
you are here)
Cindy Lawrence
Dawn Burnworth
Julie Koerber
Leslie Miller
Stacy Morgan

Sunday, July 27, 2014

Farmers Market


I am so excited to begin our Sneak Peeks at Power Poppy this month!  You will be totally wowed by what we’re going to show you in the week ahead.  It’s such a fabulous combination of polymer sets that I know you will love.  

Today’s set just *might* be my favourite for the month...but then again so *might* tomorrow’s set too!  I might just be saying that every day :)  

But today’s set, Farmers Market is indeed totally awesome!  It combines all the most beautiful autumn bounty that you might see at your local farmers market in a set.  Marcy did a fabulous job!  

Here’s what Marcy told us about the inspiration behind this set, "Inspired by the bounty of the local market - the freshness of our earth's gifts, the saturated colors, the rustic baskets.... I think there is something really dear about the market that creates a coziness and sense of community. Folks standing in line to pick out the perfect heirloom tomato, or the newest variety of colorful cauliflower (did you know it comes in orange and purple and bright green, not just white?) The bounty we carry home in our arms - some of us wondering..."What the heck am I going to do with all of this?" but we buy it anyway! "


Just LOOK at this wonderful apple box!  So amazing right?  It was so fun to colour, and just think of all the combinations you could put in there for the varieties of apples we have.  

I stamped the image on Xpress It Colouring paper in Memento Tuxedo Black and coloured with Copics.  Granny Smith are some of my favourite apples so I had to include them in there.  

I wanted to include some rustic touches so the edges are sponged and sewn, and the background strips are embossed with woodgrain and distressed with ink.  


A bit of twill, ruffled cotton ribbon, twine and enamel dots finish it all off.  


Inside I distressed the sentiment panel to give it that woodgrain look as well.  


Here’s the Copics I used.  


And now you can jump on over and see what the rest of the Bloom Brigade playing with today’s set have to show off to you!

Allison Cope
Christine Okken
 (you are here)
Cindy Lawrence
Danielle Kennedy
Dawn Burnworth
Julie Koerber
Katie Sims
Leslie Miller
Stacy Morgan
Tosha Leyendekker


Monday, June 30, 2014

The Good Old Summertime


I’m back tonight with another card for The Cat’s Pajamas Inspiration Challenge....and the TCP Summer Blog Hop too.  It’s the first full week of summer vacation here and the kids have been enjoying the freedom of lazy days and sleeping in (it’s actually happening for the first time in my parental life!).  Amazing!


So to celebrate all that’s summmer, I pulled out the very fun Vintage Summer set from The Cat’s Pajamas.  I really love this bike ride silhouette.  Riding is something we have fun doing as a family in the summer.   I stamped the main image on navy cardstock and embossed in white, cutting it out with the Framed Up dies that go with this set and accenting with some enamel dots.  On the Kraft cardstock I stamped all the various sentiments from this set several times along the side accenting with an MME paper strip and some stapled ribbons to match the inspiration photo on the right.  

Inside the little berry basket that I cut with my Silhouette I have some chocolate chip cookies that my daughter baked.  Makes a cute little presentation I think :)

Here’s some closer pics of the card and berry basket. 


Jump in on the challenge!  You still have one week left AND if you use any products from this latest summer release you could win in our...


We liked playing with our Summer Stamps, CutUps Dies and Cutables so much we thought we'd like to see what you did with them. 
So from now until July 24 we are having a Summer Blog Hop. Just use at least one stamp, or die, or Cutable from our Summer collection and add it to the Inlinkz on the right column of this blog and you could win a $50 Gift Certificate!  It's that easy!  Seriously - who wouldnt want $50 to spend in the TCP store!  

C'mon, pull out your new TCP Stamps and dies and download those Cutable files and get inky with us! 


Sunday, June 29, 2014

Vintage Geraniums


If there’s one annual flower I plant every year it’s geraniums.  They’re perfect for pots, they add rich pops of colour and are pretty easy to care for, they keep blooming and blooming if you remember to dead-head them.  I love the variety of colours they come in, their beautiful deep green ruffled leaves, and I’m delighted to see these Geraniums I can enjoy all year long illustrated by Marcy!  They’re SO gorgeous!  


I decided I wanted to go a little vintage with these geraniums and shabby them up a little.  I began by softening the digi, printing it in a bit of a grey rather than in deep black.   Then, I began colouring the blooms with both Copics and finishing up with Prismacolor Pencils.  That combination of colouring mediums gives some really great depth that I enjoy.  After colouring,  I weathered up the edges of the paper with my fingernail and then sponged a lot of Ranger Distress inks into the cardstock.  

On the background layers of Kraft Cardstock I embossed and did some rich sponging too.  


For accents I added a string of various colours of sequins inspired by Nancy Thomas.  I coloured up the seambinding with Copic Reinkers in a plastic bag to match the colour of the geraniums, then finished with some linen thread.  


Here’s the Copics and Prismacolors I used.


And here’s the beautiful Bloom Brigade playing with today’s amazing set!  

Allison Cope
Christine Okken
 (you are here)
Cindy Lawrence
Danielle Kennedy
Dawn Burnworth
Julie Koerber
Katie Sims
Leslie Miller
Tosha Leyendekker


And be sure to see what Marcy has to say about these beauties!