Showing posts with label Home Decorating Projects. Show all posts

Sunday, December 3, 2023

12 Days of Crafting with TCP - Christmas Placecards


Hello friends! Today I'm back for another day of The Cat’s Pajamas 12 Days of Crafting!  I thought it would be fun and festive to create place cards for our Christmas table.  For us, Christmas Eve after Church is all about our extended family, but Christmas Day is our family of 5, plus significant others if they are around.

So, I created a set of place cards that will match our dinnerware and the ever cute and retro set Give A Little from the November Release.  


I began by printing the whole digi set on Copic XPress it paper, and colouring the images up with Copics in colours that would coordinate with what we had.  Then I trimmed out each image, die cut some sparkly snowflakes from a retired TCP die, and started to assemble simple folded place cards (2”x 3 1/4”) from cardstock. I ink-blended the edges of the cardstock to get a little more depth of colour.  

I tried to pick the image that matched something about the person, so since my husband is my honey, he gets our favourite bear PJ.  


Next up, for our son who grew up milling through the presents to see how many he had, it’s Poochie the pup.  On each place card I have some mirrored holeless sequins and their name written in white gel pen.  


Now for our other son it’s Poochie surrounded by presents and stuffies.  


Next, for our daughter, it’s Sprinkles the Cat on a candy cane. 


And finally, one for me.  And since I’m the shortest in the family, I get the ornament holding penguin.  

They make a sweet little set ready for Christmas Day!  Hope you’ve enjoyed the tour!  

Wednesday, November 30, 2022

Snowy Village Decor

12 Days of Crafting Graphic
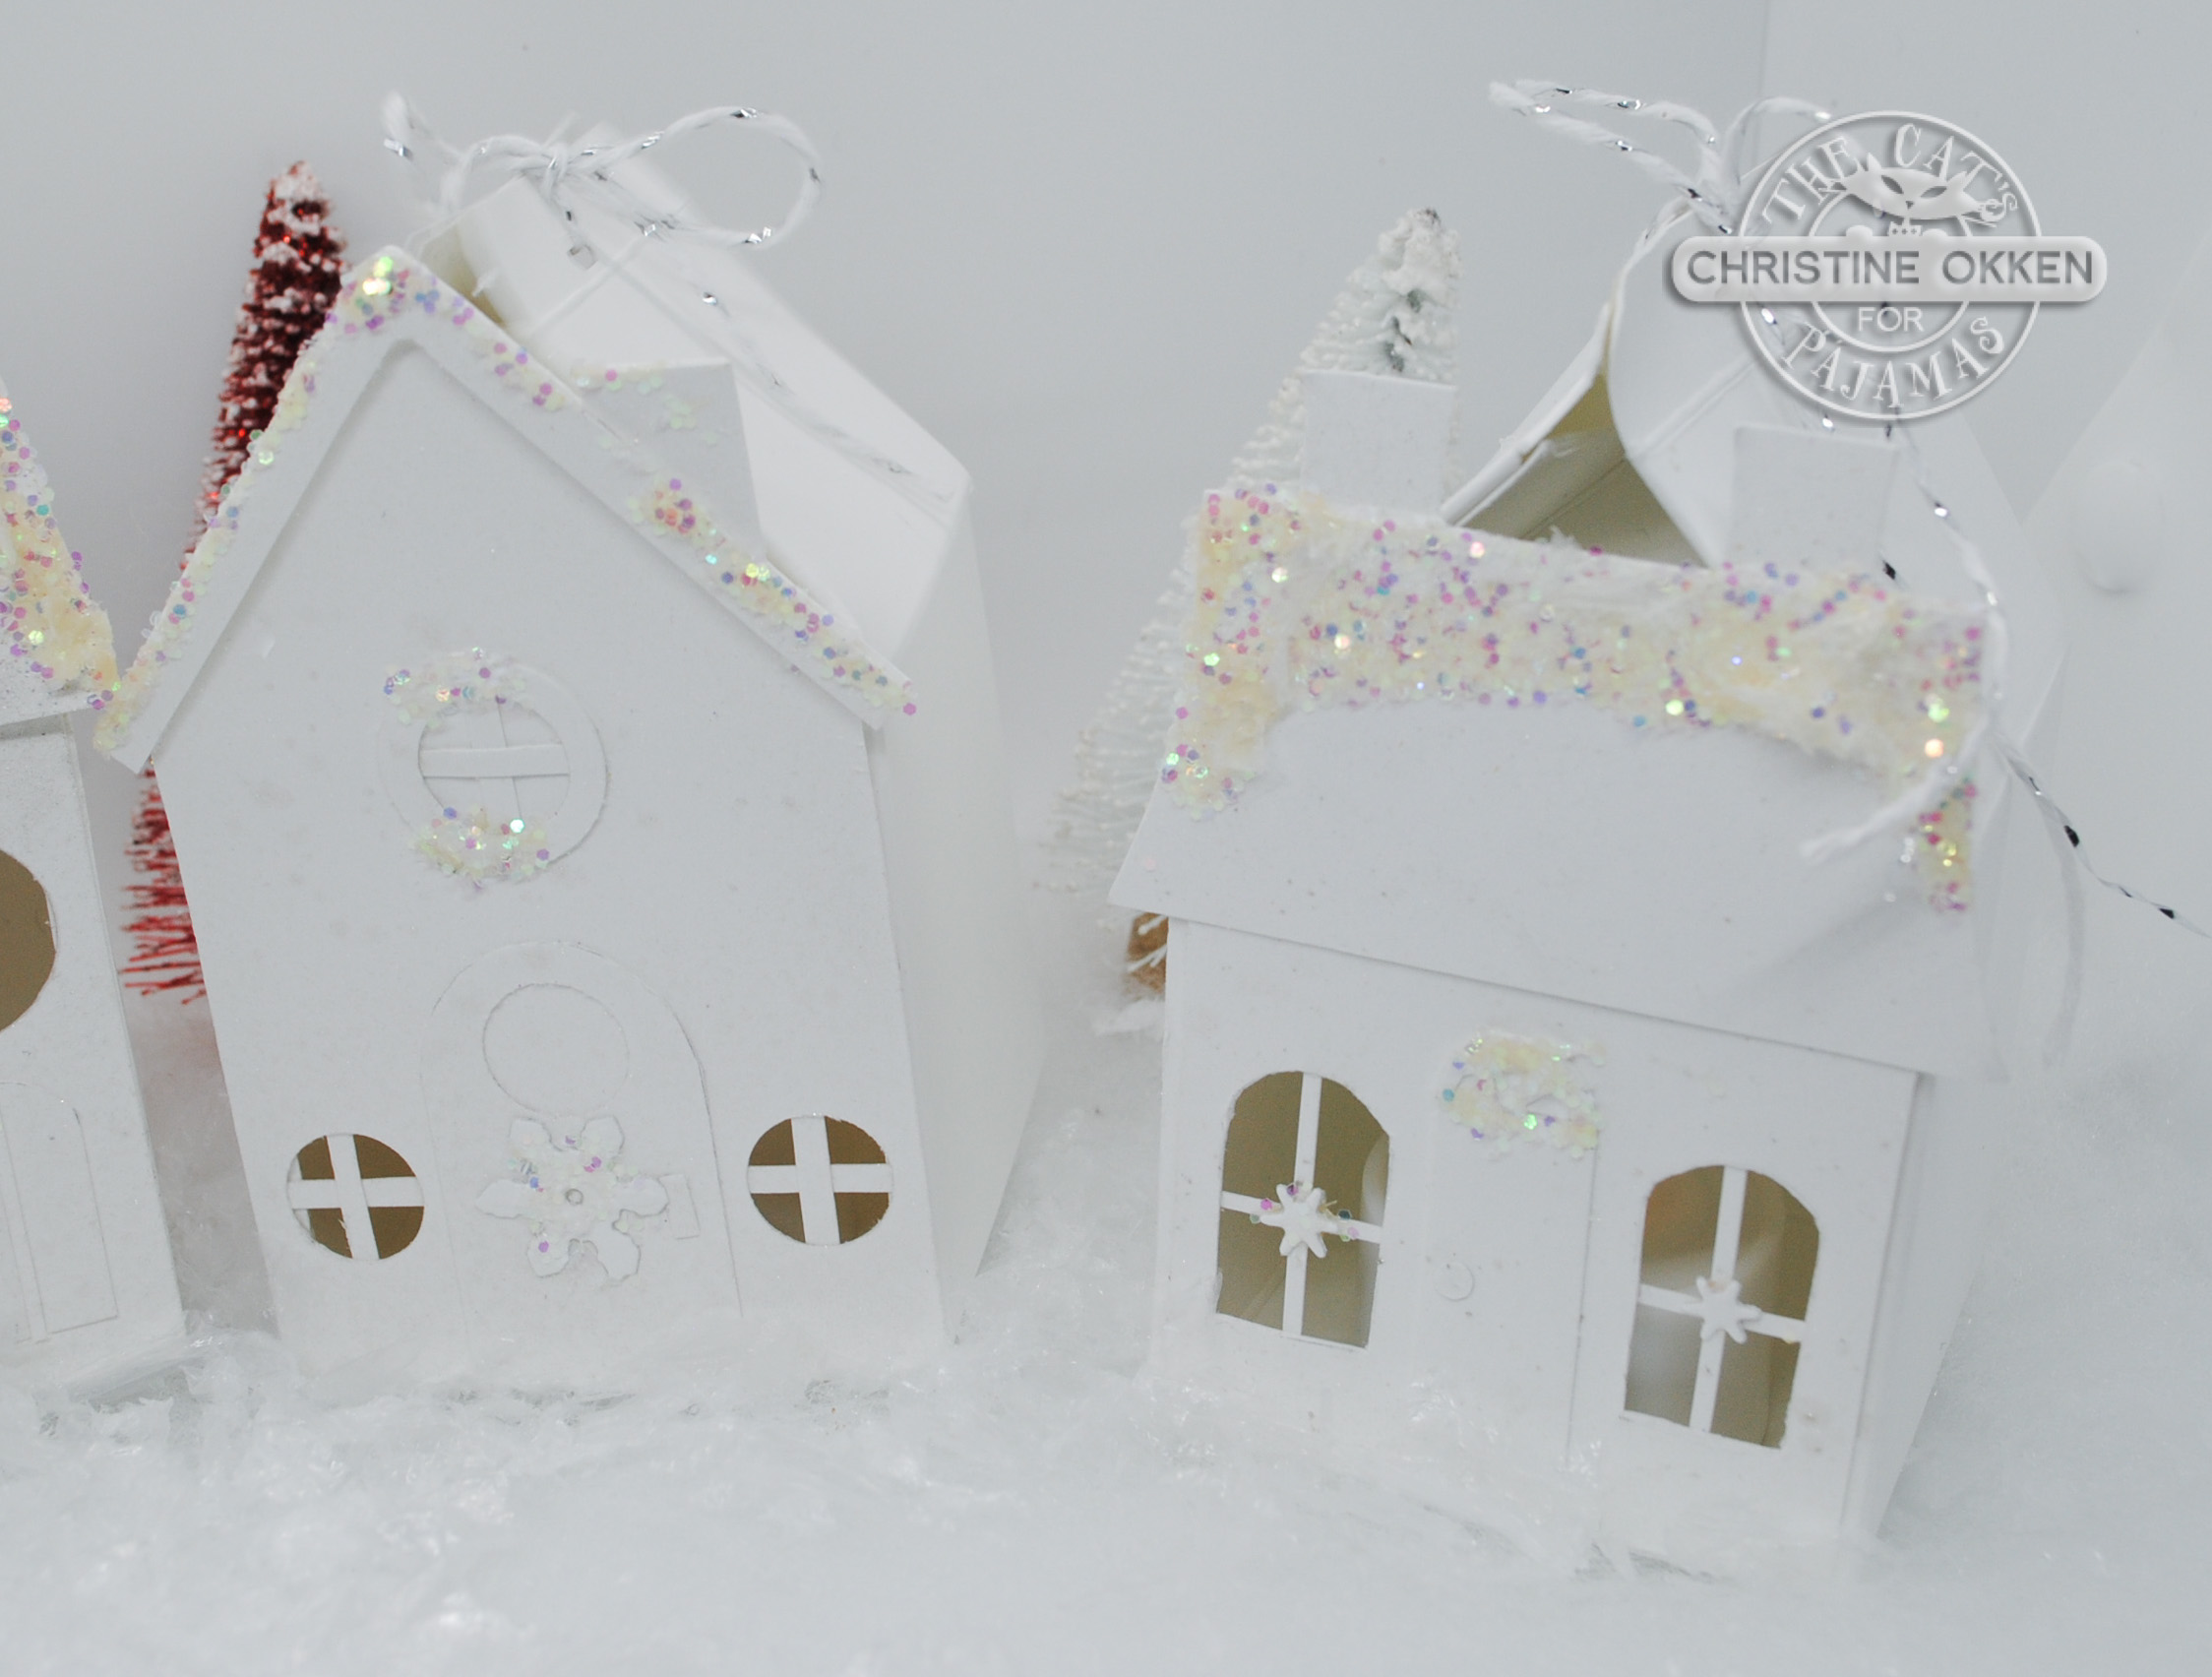
Frosty Greetings to you and yours today! We’ve had a snow day here with soft flakes falling all day long.  It’s so pretty, that is until you have to shovel it! With that snowy theme in mind, today I’ve created an adorable little Snow Village with brand new cutting files from TCP called Village Treat Boxes.  These cute .svg files can be cut, or print and cut, sized to your liking and can hold any little treat you’d like to put in them.  But I thought they’d be adorable to create a snow village to decorate a mantel or little corner of the house.  


Doesn’t it look cozy?  Each little box is about 3 1/2 inches high.  

I used the files to create the boxes, and then used the print and cut portion of the .svg files to make templates where I could cut out rooves, doors, windows and accents to decorate each house. Alma has created a great video that shows you how to put the boxes together.

I knew I wanted to add in battery powered tea lights into each little house, so I cut openings in each box so light could get through the doors or windows.  


Here’s a peek at the individual houses I created.  I spritzed them all with shimmery sparkle, so each house has lots of shine in person.  Then I added thick chunky glitter snow to the rooves and snowflake “wreaths” for the doors.  Each box is tied at the top with some silver threaded ribbon to hold it together.  


In the window you can see I’ve added the tea light in the box.  And how cute is that tiny snowflake wreath!  


And here’s a little pic of what it looks like in the dark with the tea lights shining.  Like a welcoming little Hallmark town!  


And here is what it looks like on one of my picture shelves in our entryway.  With some sweet little bottle brushes in-between it makes a cherry little welcome to our home!  

Here is what the houses look like in colour, and you can see that they look great sized up too.  


I hope you’ve enjoyed this little Snow Village Tour and are inspired to create one for yourself!

We’re inviting you to participate along with us in the 12 Days of Crafting!  Choose any of the days of the 12 to be inspired by, and create along with us! 

1. Upload a project to this link by December 24.

2. Be sure to let us know what day your project was inspired by.

3. TCP products are not required but are encouraged.

4. You may submit for any and all days but only once for each inspiration day.

5. Use #12DaysCrafting22 if uploading to social media.

Prizes include three $10 flash prizes and one $25 grand prize to be announced on December 30. 

Saturday, December 18, 2021

Sweet and Sugary Christmas from Power Poppy


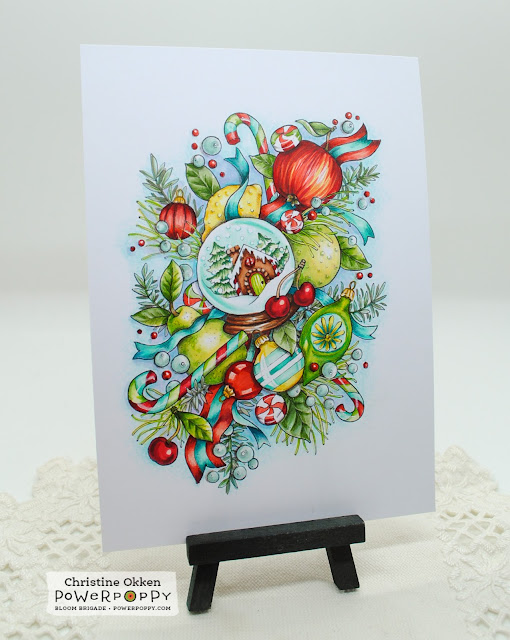
Sending Christmas Greetings to each of you!  Today I’m bringing you something new from Power Poppy!  It’s part of two new images from Marcy, and this one is called Sweet and Sugary Snowglobe and it’s a WOW illustration for sure!   

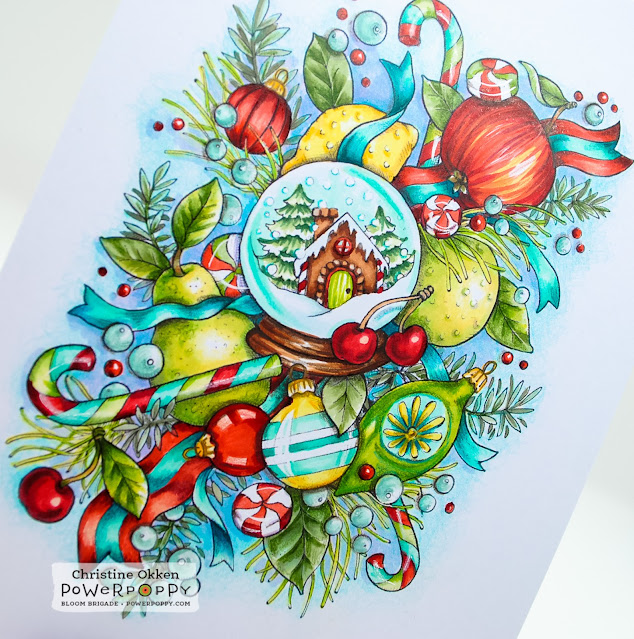
I’m off work for a couple of weeks, so I spent a few hours cozied up with this amazing image and my Copic Markers and Prismacolour Pencils.  So nice to have a few hours in a row to colour.  This image is really fun because it has so many textures....fruit, leaves, foliage, ribbon, glass, candy....lots to play with!   I printed the digi image to be 5 x 7 inches so I could display it for Christmas, but you could certainly make a card that size too.  


I picked a fun colour palette of red, bright green, and pops of turquoise and yellow.  I’ve added some white accents on the candy to give it cellophane wrapper reflection, but everything else is Copics with Prismacolour pencils for depths.  


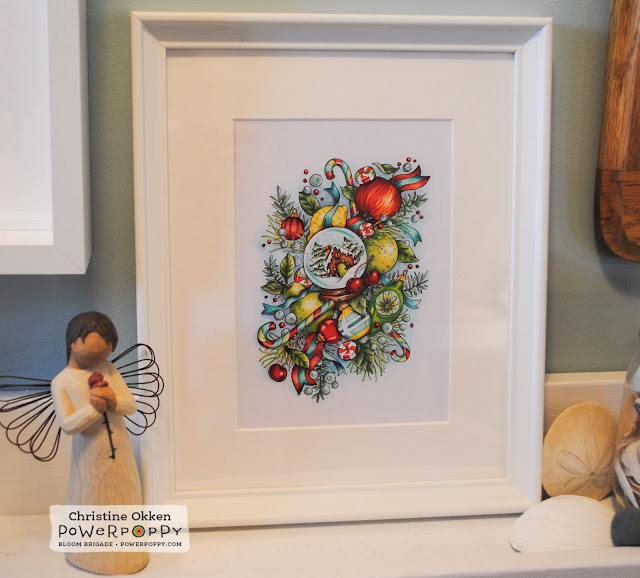
Here’s what it looks like framed and on the picture shelf by our front door!  A great design to celebrate the season!  

I hope you’ll pop on over to see this image and the second one from Marcy called Cozy Candlelit Sips

And pop on over to Stacy’s blog to see her creation with these images!  

Wednesday, March 25, 2020

Wash Your Hands


Hi Friends!  Hope you’re all tucked in and safe in your spaces.  A few days ago I posted my work in progress of this fun image on Instagram, so now that it’s finished and already on display at home, I thought I’d give you a look here as well.  It’s a brand new digital colouring sheet from Power Poppy called Wash Your Hands, and it’s a steal of a deal at $1.99.  I printed it up to be 5 x 7 and then gave it some colour with Copics and Prisamcolour Pencils.  It’s it a fun image?  I love positive messages right now rather than fear-producing ones  None of us need that.  So, it was totally peaceful to spend some time bringing this to life.  I love the colour combination as it seems so cheerful as well.  


Here’s another shot of it flat-lay that gives you a different view, just not showing as much contrast in the image.  In real life all the bubbles have tones of whatever colour is near them.  

So if you’re looking for something inexpensive, and positive to spend some time on...pop on by Power Poppy for this one...and lots more on an amazing sale too!  

Friday, December 7, 2018

Peace Painting


Good Morning Friday Friends!  I am revelling in a winter wonderland here.  We received 34 cm, or just over 13 inches of snow this week, AND I was able to take a work trip to the mountains!  You couldn’t ask for anything better in my book.  Makes you just wanted to snuggle up and be cozy.  

I have a confession to make....I haven’t done ANY Christmas decorating yet.  None.  The way November worked out with our trips, and now coming back into Advent Season in ministry, there’s just been no time.  So, while we were away I took along a new digital image printed on Arches Watercolor paper, from Power Poppy called Ultimate Poinesttia, (also available in polymer as a stamp set called Winter Wonderland) and my Zig Clean Colour Real Brush Watercolour markers, and spent an afternoon painting a small piece that can sit on our picture shelves at the front door.   Watercoloring always slows me down in all the best ways.  

The Zig Clean Colour Real Brush Markers add a LOT of deeply pigmented colour.  I find if I’m doing a more fine art piece like this, I have to put the colour on a palette and just pick it up with a paintbrush at first to develop my glazing layers, otherwise, you get a lot of staining and then it’s harder to move the colour with the brush.  


This gorgeously scripted sentiment is from Marcy’s set, Amaryllis Bliss.  I love the beautiful jewel tones and the richness of the pink poinsettia paired with the white anemones.  The finished piece is about 5 x 7, and works perfectly in an inexpensive IKEA frame.  


Here it is a the front door on our rustic pictures shelves.  A pop of Christmas until I can hopefully get to putting up the tree and the rest of the decor this weekend!  And it would work beautifully for a gift item too - which is the theme of this week’s Creative Confetti Challenge at Power Poppy!  Pop on in and join us!  Each month someone is chosen to win a $50 Gift Code to the Power Poppy Store! That makes a fun Christmas Gift for you!

Christine Okken
Katie Sims
Stacy Morgan

and Marcy at the Power Poppy Blog

Saturday, July 21, 2018

Love One Another - Home Decor Watercolour

We’re back with another brand new illustration from Power Poppy in our 5 Days of Digis Kickoff!  Today it’s the spring gardeners dream, Love One Another.  


As soon as I saw this image I let out a gasp!  Not only does it combine some of my favourite spring flowers in a spectacular way, I also love the verse included.  We want that to be a hallmark of our family.  We all need that reminder of living out love for toward each other.   I think it is incredibly beautiful!  So, as I did with the image yesterday, this lovely digital got a super-size treatment and I made another 8 x 10 piece for our home, printed on Arches Cold Press 90 lb paper.


I took a few days to watercolour this one so that the layers of glazing could show through the work, and you’d get the sense of a depth of colour.  Watercolouring is done with a mix of Daniel Smith and Gansai Tambi watercolours.  I’ll admit the first few layers, I had my doubts that I could make it work, but I’m so pleased with how it finally came together.  I still think I paint a bit too “tight” and need to continue to practise on making it a bit looser, but I love the vibrance I was able to achieve and how cheerful it is.  On long winter days it will be a good reminder of spring coming.  


I’ll show you a few closeups of some of the elements.  I was able to give that luna moth some fun colour that I’m really pleased with, and even used my tiny #0 brush to lightly feather in the detail to his antennae.  

I looked up some colouring for beetles and found a fun one (as much as beetles can be fun), that was an iridescent teal with bronze.  Well, my Gansai Tambi Watercolours have a gold/bronze metallic shade that was perfect for making him come to life.  I also had a lot of fun with the caterpillar (I made him to look like a monarch caterpillar) on the bottom right which you can just catch a glimpse of.  


I gave a little varied colour treatment to the sentiment to make it sing.  I love this version of the verse from John 13:34.  "So now I am giving you a new commandment: Love each other. Just as I have loved you, you should love each other. (NLT).  Oh, I hope our lives continue to be characterized by love.  Tender, self-sacrificing, relentless, hope-filled, believing-in kind of love.  

Here is the image which comes with or without the sentiment, be sure to check it out HERE.


And now, more sneak peeks of this beauty can be found with the Bloom Brigade and Instant Gardeners HERE:
Christine (you are here)
Stacy
Rhea
Barbara
Cheryl 
Save

Friday, July 20, 2018

Kindness is the Way for Home Decor


Happy Friday to you all!  We’ve got a gorgeous jam-packed few days ahead with Power Poppy’s 5 Day’s of Digis Release!  I’ll tell you, WOW you are going to love what’s in store.  Marcy’s really put her heart into these beauties, and we’re kicking it all off to day with a stunner that is FREE, FREE, FREE!  (I get just giddy saying that because it’s just like her to be so generous with you!)


Introducing Kindness is the Way!  Here is Marcys description of it.  

Our first 100% FREE download with a botanical theme — I am proud to offer Kindness is the Way here at Power Poppy. Whether you've never worked with digital stamps before and want to give it a risk-free try, or you are an experienced digital download aficionado in search of new flowers to color, this image is here for you! I've prepared an allover pattern of Gerbera Daisies in black and no-line versions. Then you also get two versions of the background with the phrase "Kindness is the Way" superimposed, using lettering that you can color in. Lastly, a single Gerbera Daisy is included in case you want to just keep things simple.


As you can see I decided to make a larger piece for my home decor.  I love that about digital images. They are so easy to manipulate to a much larger size without taking away from the integrity of the original drawing.  This is an 8 x 10 sized piece.  

We’ve done a lot of work around our house this spring and summer, and I’ve done a lot of painting inside the house, so now I’m looking to put different artwork on the walls.  I’ve always had this dream of having art with encouraging verses and words for us to be inspired by, so when I saw Marcy’s illustrations for this release I knew it was perfect for my theme!  You can see how it looks on our mantle in the photo at the beginning of the post. What family doesn’t need that reminder for how we treat each other and how we live in this world of ours!

I took my time and watercoloured this beauty in shades of blue, blue-green, grey and green with my Gansai Tambi watercolours on Arches Cold Pressed Watercolor paper.  I use 90 pound weight for digitals because it runs through my printer perfectly.  


Here is what it looks like in more natural light, so you can see more of the texture of the paper, which I always think is part of the beauty of watercolour.  


Here’s just a peek at what part of the digi looks like, there’s so much more in the actual FREE image. Pop on in to the store and pick it up!  And thank you Marcy for your kindness in bringing all of us such a lovely design!

I’ll be back tomorrow with some more from this release, hint....it’s another piece of watercoloured artwork!

And now here’s the rest of the Bloom Brigade and Instant Gardener team playing along today...

Christine - you are here

Friday, January 19, 2018

Rosé All Day Completed!


Earlier this week I showed you my initial progress on an art piece with Power Poppy’s new set, Rosé All Day.  Well, it’s complete!  I put some more time into it on Wednesday night in front of Season 2 of ER.  Man I loved that show!  Honestly it was a little challenging to decide what to concentrate on - the show or my colouring :)!  

The piece is just over 6 x 6 inches finished sized, and I placed it on my mini easel and for now it will go on our mantle.

It is primarily coloured with Copics, and I finished off some of the shading and line work with prismacolor pencils.  Even though most of the shades are in the RV copic family, I didn’t skimp, and used a whopping 46 markers on this design, so I’m not going to even attempt to take a picture of them.

I wanted each element to have it’s own “feel” and distinct shade of colour so you could differentiate between the elements of the design, but I also wanted it to have an overall cohesive aspect as well.  I tried to accomplish this by bringing some colours from other areas into each other so they would tie together.

For instance, in the roses, I used RV00, RV02, RV04, RC09, but I also added shadows with BV00 and BV02, plus a wee bit of B63 so that it tied into the more purple tones of the cyclamen and coloured pencil crayon (which I did with RV00, RV52, RV66 and B63).  The Redbud and ribbon are done in RV63, RV66, RV69.  Then, because I had some blue tones going on in the flowers, I did my paintbrush in B63, B66, B69.  It adds contrast, but takes on the tones of the shadows in the flowers.  No-line colouring has some challenges because you gradually start to lose your reference lines as you colour.  You can manage this by having another reference piece nearby to refer to, and in colouring you do need to add some definition in with your markers or pencils to your outer areas so you can see the shadows and a bit of the outline when it’s finished.


The leaves were fun to do, particularly those amazing varigated cyclamen leaves, I did them with a combo of G21, G24, G28 with some B10, B11 and B66 for the shadows.  This was one spot I added prismacolor pencil at the end giving the depths some blue-green and the highlights some yellow-green so that they tied into the more yellow green of the stems.  Super fun project to work on. Sometimes you just need a bigger piece to stretch you.  Thanks for enjoying the journey with me!  

Be sure to stop by the Power Poppy Blog to see what Marcy has in store today and also my Bloom Brigade sisters playing along with inspiration.  Don’t forget that our weekly Hues to Use Challenge is going on, as well as our monthly Power & Spark - Grab a Map Challenge.  You could win anything from a guest spot on the blog to a $50 gift certificate to the Power Poppy store!  

Christine Okken (here)
Julie Koerber
Katie Sims
Stacy Morgan

and Marcy at the Power Poppy Blog

Wednesday, December 6, 2017

A Christmas Pom Pom Garland


Hello there! It’s Christine here and I am excited to be joining in on Power Poppy's December Power & Spark Challenge with our Twelve Days of Christmas twist! As visions of sugar plums dance in your heads, is the paper still flying in your crafting spaces? If you love to put a colorful and personal spin on your holiday creations, we love to hear it and we’re here to help! For the next week and a half, get ready for Power Poppy’s festive and fun take on the 12 Days of Christmas – a time to get inspiration to deliver that homespun charm not only to your loved ones but around your home as well. Each day the Power Poppy designers will be sharing ideas on all kinds of projects from home décor to accents for your holiday dinner table to ideas on how to package up those holiday goodies with style!

And guess what? If you play along with us during any one of the 12 days and try our project at hand, link up your creation right here and you’ll be in the running for our Power & Spark 12 Days of Christmas Challenge winnings! You’ll  have 12 ways to enter. Play along once or try all 12 days for more chances to win a....

 $50 shopping spree to the Power Poppy Shop!

Here on DAY SIX, I’ve chosen to create a garland for Christmas to decorate a mantle.  As I was dreaming up some ideas I decided to make my garland a little whimsical and add some homemade  pom poms to the garland as accents, which I’ll also show you how to create on the Power Poppy Blog.  

Here’s a peek at what you’ll find there, using the lovely new Winter Wonderland set.  I’ve taken a couple of pictures of the garland outside, where the light was a little better and then where its hung underneath our mantle on the fireplace where the lighting isn’t as good, but it gives you the idea of how it can be used.  


Here’s a peek at what the letters look like close up.  


I took a Tim Holtz Stencil (Flourish), some embossing paste and glitter and added some pretty sparkly dimension to the letters, giving it some time to dry.  Funny story, in all my years of creating I’ve never spilled too much glitter, but on this project I accidently dumped a whole container of glitter everywhere.  Let’s just say, “sparkle for days’.  

I gave each letter a border of Rich Razzleberry paper to give them a little more stability. 


For the O, after adding the sparkly dimension, I placed the spray of flowers on the left hand side of the letter attaching using foam dots.  


These next photos give you a bit of of better look a the colouring and the dimension in the spray.  


As beautiful as the stamp looks coloured, it’s equally as lovely stamped in a single colour because of how detailed it is.  I also think it helps the garland from becoming too fussy by only adding one coloured up image.  


On the Power Poppy Blog I show you how to create the little pom poms between the letters and how I pulled it all together.


Wishing you great JOY this season!  

Friday, October 13, 2017

Spread Your Wings


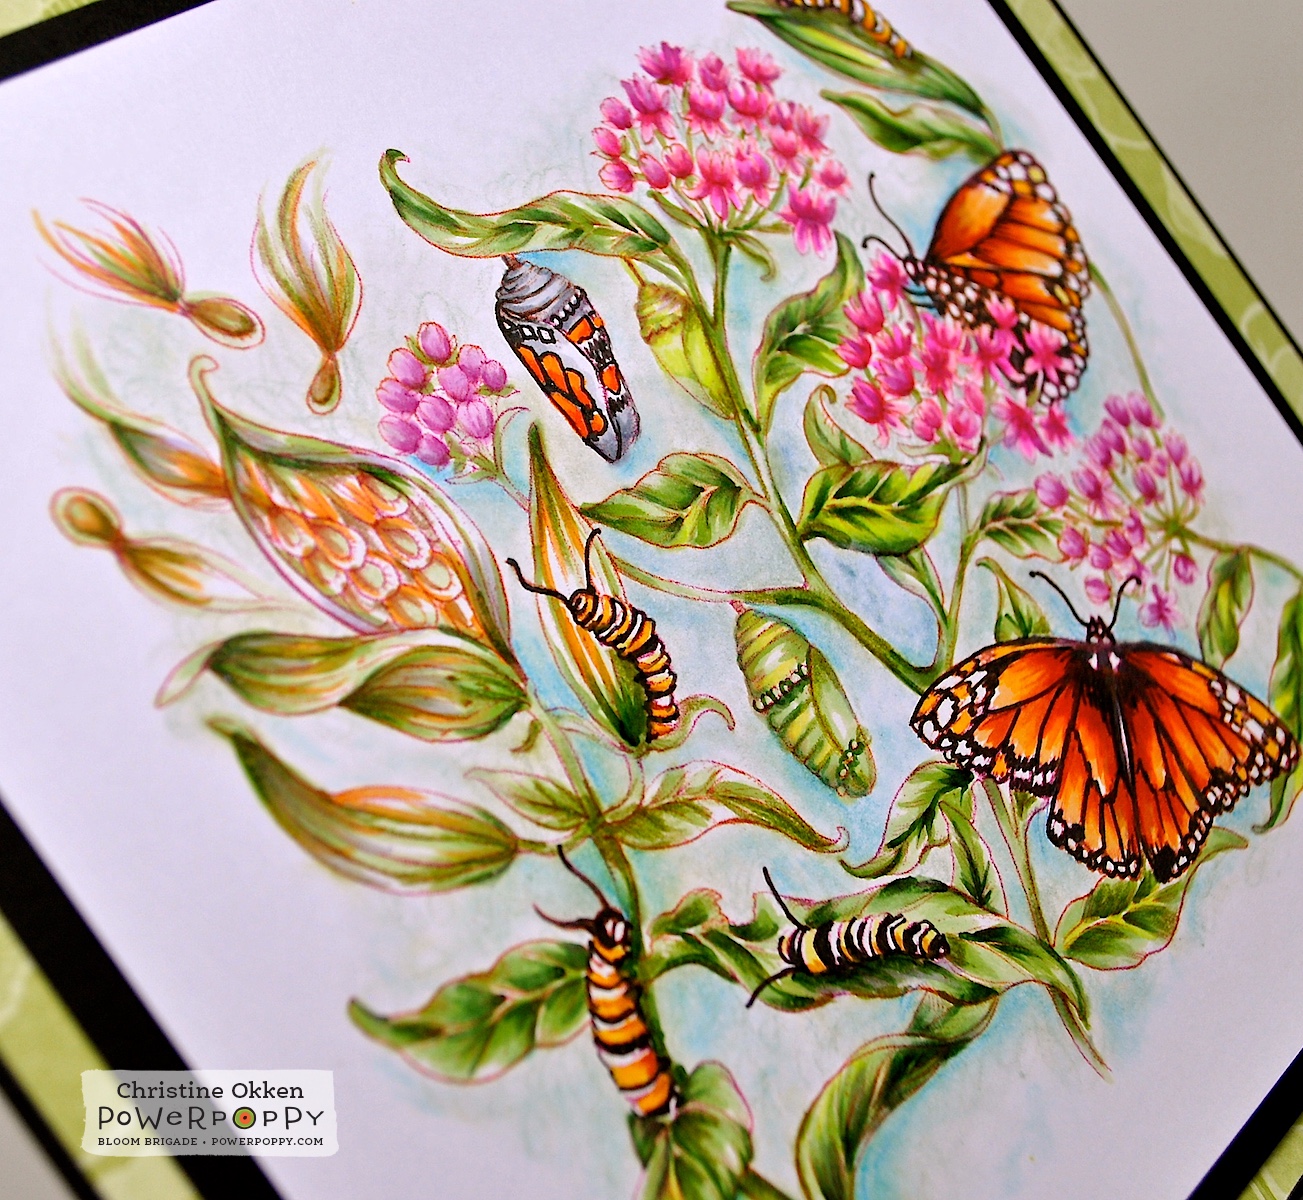
Happy Friday friends!  A few months ago Marcy illustrated a beautiful design for her son’s school graduation called Monarchs and Milkweed.  It’s a gorgeous picture of the stages of a monarch butterfly as well as the milkweed they lay their eggs on.  I printed it up a few weeks ago intending on creating something special with it, but I wasn’t sure which direction I would go with it.  I printed it quite large and just couldn’t bring myself to cut it down at all, or after all the work of colouring to make it into a card that I’d have to give away :).  So, instead it turned into a larger piece, about 7 inches x 7 inches, that I could put on a small easel to display.  

Our printer was acting up on me, so, instead of the grey ink I wanted it to print in, it came out a more rust shade, but it seemed to work well with this neutral palette.  


I think the different stages of the monarchs and milkweed are so striking.  I coloured the image up with Copics, but came in and added some details and the background with Prismacolor Pencils.  


When it came to the black parts of the caterpillars and the butterflies I used a black glittery Spica pen to add in the details.  Not only does the black pop against the other neutral outlines, but it also adds a touch of sparkle.  I’m hopeless at capturing sparkle when photograping my creations, but you get the idea.  


Such a beautiful image that reminds me that transformation still happens, all the time, and that it takes some work to spread your wings and fly.  I hope that thought is a good encouragement to you today.  

Now...we’ve got a fabulous challenge going at Power Poppy in case you missed it called Mini and Mighty that you’ll want to check out HERE.  Enter and you could win a $50 Power Poppy Shopping Spree!

Also...hold onto your hats....NEXT WEEK starts our Happiest Holiday 2017 Release at Power Poppy and it’s going to WOW you.  Marcy’s in rare creative form and we’re really looking forward to sharing it all with you.  Sneak Peeks start October 15!  


Christine Okken
Stacy Morgan

Tosha Leyendekker