Friday, December 22, 2017

Mitten Tidings


Today the Power Poppy team is bringing our Christmas greetings to each of you!  One of the things we’re going to do is showcase one our favourite Christmas card creations (which I’ll do in a minute). I did happen to have a new one I created the other day that I’ll show you first.  

This design was actually inspired by two things, the colours from this week’s Hues to Use at Power Poppy, and the lovely Katie Sims.  Katie did a card with a similar layout last week that I loved so I thought I’d incorporate it into this design.  I’m using the lovely Bough Wow Wow set, and it’s all coloured up with Copics.  To really accentuate the bough, I trimmed it out with a little border.  

Here’s the Hues to Use graphic showing these great traditional Christmas colours...


I’ve added some snowflakes on the kraft cardstock from our fun new set, Snow Kissed because of the cool nordic feel to the set.  I’ve also stamped the nordic pattern on the green layer in white craft ink.  


Finished off with a wood veneer heart, a couple of sparkly enamel dots and some pretty ribbon.  


Now for one of my all time favourite cards.  That’s a hard choice!  I finally narrowed it down to this one from 2015.  


I think the combination of a fun Power Poppy sketch, the unusual colour palette, and the gorgeous Poinsettia stamp set won me over, to make it my #1.  

Sending each of you much love and blessing this season.  Thank you for all of your warmth, support and kind comments over the year.  Praying that you will take some moments to be still, be renewed,  be loved  - and to love others richly over these next days.  Let’s make the world a better, more creative, more loving place by our investment in it.  


Here’s the beautiful Bloom Brigade with their Christmas Creation greetings for you today!

Allison Cope
Christine Okken
Cindy Lawrence

Julie Koerber
Kathy Jones
Katie Sims
Stacy Morgan
Tosha Leyendekker

and Marcy at the Power Poppy Blog

Monday, December 18, 2017

Into the Mess


With Christmas just days away, I’ve been thinking a lot about the first Christmas and the magnitude of Jesus being born into our messy world;  a stable, a manger, the smell, the cold, the vulnerable.  There was no neat and tidy about the first Christmas. 

Just yesterday, we heard the news of the sudden passing of a friend, others we know faced an uncertain outcome after surgery for their child, my father-in-law has been moved into a dementia unit in a home and after 63 years of marriage, my in-laws are not in the same place, there’s a lot of adjustment for all of us as we watch the long goodbye of Alzheimers.  The headlines are full of difficult news;  yet I will choose to celebrate Christmas once more.  Not because all is joyful, but because I don’t have to face the complexities of life all alone.  Jesus enters my mess, and I can experience peace.  I hope that’s an encouragement for whatever mess - or joy is in front of you today!

This lovely image is from A Day for Daisies and its called A Sign I Give.  I love the details in all the folds of the fabric and the beautiful open spaces to add colour.  

I placed the manger scene all on a white card base with a lot of sparkle.  I used a stencil and embossing paste sprinkled (when wet) with glitter to get a very shimmery effect.  So much so that you can see speckles of glitter on the image too.  


I added some scalloped border, some satin ribbon and some sparkly curly ribbon to finish it off.  

Thanks for stopping by friends!  

Friday, December 15, 2017

Using Power Poppy Packaging


If you’ve ordered stamps from Power Poppy before, you know in addition to providing beautiful illustration and high quality polymer stamps, Marcy goes above and beyond and packages every order with pretty papers, washi tapes and she writes a personal note.  Talk about sweet customer service!  On our most recent set of stamps, Marcy packaged mine with some striking black and printed paper with trees all over.  It was just too lovely to waste, so today it has a second life as a card accent and tag.  

I started with Power Poppy’s Cozy Cupfuls set and coloured it up with Copics.  Its still one of my favourite sets with those adorable little cardinals.  


After cutting their tails a bit “out of the box”, I put it through a stitched circle die.  Did you know that female cardinals almost have a green tint to their feathers?  

I added some black metallic paper to accent the black of the patterned paper to keep it really simple but festive.  I wee bit of holly leaves and sparkly berries accent the sentiment, and a bit of gingham ribbon and Nuvo drops finish it off.  


I also kept the tag really simple too.  I think tags are so sweet, but my gift recipients usually only look at them long enough to rip off the wrapping.  


Have you played along yet in our 12 Days of Christmas Challenge?  There are 12 possible ways you can enter, and tons of inspiration we’ve given at the Power Poppy blog over the past few weeks.   Be sure to check out the first day and entry spot HERE, and a summary of all the 12 Days of inspiration are HERE.  

Now take a peek at what the Bloom Brigade has for you today....

Allison Cope
Christine Okken

Katie Sims
Stacy Morgan

and Marcy at the Power Poppy Blog

Wednesday, December 6, 2017

A Christmas Pom Pom Garland


Hello there! It’s Christine here and I am excited to be joining in on Power Poppy's December Power & Spark Challenge with our Twelve Days of Christmas twist! As visions of sugar plums dance in your heads, is the paper still flying in your crafting spaces? If you love to put a colorful and personal spin on your holiday creations, we love to hear it and we’re here to help! For the next week and a half, get ready for Power Poppy’s festive and fun take on the 12 Days of Christmas – a time to get inspiration to deliver that homespun charm not only to your loved ones but around your home as well. Each day the Power Poppy designers will be sharing ideas on all kinds of projects from home dĂ©cor to accents for your holiday dinner table to ideas on how to package up those holiday goodies with style!

And guess what? If you play along with us during any one of the 12 days and try our project at hand, link up your creation right here and you’ll be in the running for our Power & Spark 12 Days of Christmas Challenge winnings! You’ll  have 12 ways to enter. Play along once or try all 12 days for more chances to win a....

 $50 shopping spree to the Power Poppy Shop!

Here on DAY SIX, I’ve chosen to create a garland for Christmas to decorate a mantle.  As I was dreaming up some ideas I decided to make my garland a little whimsical and add some homemade  pom poms to the garland as accents, which I’ll also show you how to create on the Power Poppy Blog.  

Here’s a peek at what you’ll find there, using the lovely new Winter Wonderland set.  I’ve taken a couple of pictures of the garland outside, where the light was a little better and then where its hung underneath our mantle on the fireplace where the lighting isn’t as good, but it gives you the idea of how it can be used.  


Here’s a peek at what the letters look like close up.  


I took a Tim Holtz Stencil (Flourish), some embossing paste and glitter and added some pretty sparkly dimension to the letters, giving it some time to dry.  Funny story, in all my years of creating I’ve never spilled too much glitter, but on this project I accidently dumped a whole container of glitter everywhere.  Let’s just say, “sparkle for days’.  

I gave each letter a border of Rich Razzleberry paper to give them a little more stability. 


For the O, after adding the sparkly dimension, I placed the spray of flowers on the left hand side of the letter attaching using foam dots.  


These next photos give you a bit of of better look a the colouring and the dimension in the spray.  


As beautiful as the stamp looks coloured, it’s equally as lovely stamped in a single colour because of how detailed it is.  I also think it helps the garland from becoming too fussy by only adding one coloured up image.  


On the Power Poppy Blog I show you how to create the little pom poms between the letters and how I pulled it all together.


Wishing you great JOY this season!  

Monday, December 4, 2017

Let Me Take Ewe Skating


Popping in with a sweet little scene of winter and these cute sheep from The Cat’s Pajamas called Melt My Ice.  I think they look so cute tucked into together, and with all that wool I bet they are quite cozy.  

I made use of TCP’s Double Snowflake CutUps Dies for accenting the scene.  I love these dies because they are so detailed and can be used with all the pieces still in the die.  I’ve added a few enamel dots and some pretty red striped and organza ribbon.  


Here you can probably see I spritzed the whole card with shimmery spray so it really shines.  


Inside the sentiment is from the set, and you can see that the designer paper has a skate theme to it too.  


Here’s the Copics I used - sorry it’s a bit shadowed I snapped this one on the fly!  


Friday, December 1, 2017

Peace On Chickadees


We’re started a fabulous 12 Days of celebration at the Power Poppy blog with our 12 Days of Christmas December Challenge.  Each day for the next 12 days one of the Power Poppy Bloom Brigade will be posting a Christmas themed idea for your inspiration and inviting you to play along.  Katie is bringing you ADORABLE inspiration on the Power Poppy Blog today and I’ll have more details about the challenge at the end of my post.  

For today, I thought I’d pull out the sweet chickadee from our new set Tweet Tidings and create a cozy card.   I looked up some ideas for colouring winterberry and found that some of the foliage can be a burgundy green mix and some of the actual berrries can be purple.  I thought that would be an interesting colour combination for the design.  


Isn’t this fluffy little guy adorable?  That sweet little face makes me smile.  I added some white die cut poinsettias (The Cat’s Pajamas), and rhinestone gems to bling them up a little.   The sentiment is from another new Power Poppy set, Rustic Rejoicing.  


Inside the card is a simple bit of stamping and designer paper.  Here are more details about our 12 Days of Christmas...


As visions of sugar plums dance in your heads, is the paper still flying in your crafting spaces? If you love to put a colorful and personal spin on your holiday creations, we love to hear it and we’re here to help! For the next week and a half, get ready for Power Poppy’s festive and fun take on the 12 Days of Christmas – a time to get inspiration to deliver that homespun charm not only to your loved ones but around your home as well. Each day starting today, our designers will be sharing ideas on all kinds of projects from home dĂ©cor to accents for your holiday dinner table to ideas on how to package up those holiday goodies with style! 

And guess what? If you play along with us during any one of the 12 days and try our project at hand, link up your creation HERE and you’ll be in the running for our Power & Spark 12 Days of Christmas Challenge. That’s right – you’ll have 12 ways to enter. Play along once or try all 12 days for more chances to win a $50 shopping spree to the Power Poppy Shop! 

Here’s some more inspiration from the Bloom Brigade today....

Christine Okken (you are here)
Cindy Lawrence

Katie Sims
Stacy Morgan

Friday, November 24, 2017

Frosty Bows


One month till Christmas friends!  It seems so hard to believe and I’m not anywhere near ready, are you?  Do you venture out for the Black Friday sales where you are?  They’re becoming more and more popular around here in Canada, but I’m not much of a crowd-fighter kind of shopper :)  

I thought I’d pull out a card I made a few weeks ago that celebrates some frosty shimmer in a very clean and simple way.  I began with Power Poppy's Digital Stamp - Merriest Berries, on Copic XPress it Blending cardstock.  What’s awesome about this set is that it comes with three different variations of a bubbling cluster of Holly and Mistletoe overflowing with berries.  One version just has the bow, one, has dovetail ribbon ends and one has a candy cane in it.  

I added some colour with Copics in a cool palette with a little bit of sparkle on the thread of the bow.  

I placed it all on a layer of white where I had added embossing paste through a Tim Holtz stencil (Gothic),  while the embossing paste was still wet, I sprinkled it all with giltter so that it would dry in the paste and it gives it a beautiful shimmer.  


\

Just a wee bit of curly sparkly ribbon, some silver twine, and a bit of sequins for accent.  


Here’s the Copics I used.  


Did you see Power Poppy’s wonderful Black Friday (and Weekend) Sales???  Be sure to check them out on the Power Poppy Blog!  


And here’s the Bloom Brigade playing along today.

Christine Okken
Stacy Morgan
and Marcy at the Power Poppy Blog

Monday, November 20, 2017

The Reel Deal


A few weeks ago one of our son’s best buds turned 15.  He happens to love fishing, so I knew I had the perfect image to use from Power Poppy, Leaping Trout (digi) and the sentiment from another Power Poppy Digi, Reel Deal.  

Last year I did a larger trout design that I really loved, it’s actually my most pinned image ever, so I used some similar colours and a bit different layout.  

As I was pulling out some papers I thought might work, I realized the tones in the designs were a bit off.  That’s why I love my Copics, I could just sweep a light colour that I used in my colouring overtop of the patterned paper and it matches perfectly, tying everything together.  


Here’s my Copics for the colouring.  Isn’t he a handsome fish?  Best part of all, after opening it, the 15 year old said “this is actually really cool!"


Friday, November 17, 2017

Hi, Mr. Snowman!


Even as I’m typing this today,  the snow is gently falling outside my window.  It’s definitely a day for tucking in a being cozy.  I have a sweet little snowman to show you from Power Poppy’s new set,  Snow Kissed.  It’s such a cute combination of sweet images and Scandinavian prints you can put together to really jazz up your cards.  

I wanted him to have that warm cozy feel too, so I chose some warm grays to colour him up with and then added a layer of Kraft Cardstock with the patterns stamped in white and red in the background.  


I also added the prints to the sentiment banner (though the red heart is harder to see).  I snuck in a little die cut flower behind the sentiment that gives the feeling of an intricate snowflake and then finished it off with some twine and enamel dots.  


The inside is stamped too, and here’s the Copics I used for colouring.  


Here’s the Bloom Brigade playing along today...


Allison Cope
Christine Okken
Cindy Lawrence

Julie Koerber
Katie Sims
Stacy Morgan
Tosha Leyendekker

and Marcy at the Power Poppy Blog

Friday, November 10, 2017

Framed Lenten Roses


Have you had a chance to play in our Power Poppy Power & Spark Challenge yet this month?  Cindy’s given us a fun challenge called Portion Control.  It involves using just part of your image on your design which I think helps you look at your stamps in a new way.  And, if you play along you could win a $50 gift certificate to the Power Poppy Store!  That’s a fun early Christmas present.  

On today’s card I used the very lovely set, Heaven and Nature Sing.  I love the look of Lenten Roses!  They are so dainty and come in some interesting colours, so I combined two of my favourite colours they are created with, a deep burgundy pink and an acid green.  I used just portions of the image around a square cut piece of XPress It Blending cardstock to create a bit of a framed feel, cutting out the center with my snippy scissors.  

On the layer beneath, I used a detailed Spellbinders Die and stamped the sentiment inside the popped up frame and then added a layer of pomegranate paper underneath for a nice rich contrast.  


For the embellishments I added some pretty gems that take on the tones of the roses, and blue greens.  


Here are the Bloom Brigade with inspiration for you today?  
Save
Allison Cope
Christine Okken
Cindy Lawrence

Julie Koerber
Stacy Morgan

and Marcy at the Power Poppy Blog

Tuesday, November 7, 2017

Present Stack


It’s beginning to look a lot like Christmas in my neighbourhood...October 31 rolled in and over the next few days from there we had about 6 inches of snow fall.   In all likelihood, it’s here to stay.  So, it’s definitely put me in more of a Christmas mood.  Because of the demands of work, I’ve had to take a step back from being on the TCP design team for the time being, so it’s been months since I’ve had a chance to pick up these adorable stamps...today’s the day!  I pulled out TCP’s set The New Nice and stamped this snazzy kitty with a big stack of presents from a successful day of shopping...or wrapping!  

I created a thin tag for kitty to sit on which is perfect for this month’s Tag It challenge.  I stamped some snowflakes with another TCP set, Penguin Joy.   Then I added some pretty ornaments in and around the scene to make it festive, and topped the tag off with a pretty paper bow from TCP’s Easy Stitched Bow CutUps die, 


Colouring is done with Copics, and I added some sparkle to his collar to make him extra festive.  

I did a whole bunch of colouring one day last week and snapped quick shots along the way of my Copics  - so it’s not the usual clear photo (and half of them are upside down!), but I think you’ll get the idea.  


Save

Friday, November 3, 2017

The Olive Tree


Hi Friends!  What do you think of the new blog look?  I’m still working out some of the pieces, so let me know if you find something that isn’t working....till then here’s some new creativity...


Another Friday has rolled around in a brand new month, so that means it’s a new Power & Spark Challenge at Power Poppy!  This month Cindy is our hostess and she’s inviting us to use “Portion Control”, meaning - take advantage of part of your image and showcase it.  Be sure to join us with your creation and you could win a $50 Shopping Spree at the Power Poppy store!  


For my design I used Power Poppy’s beautiful set, Olive and Oak Expanded.  I only stamped part of the image in various places on my panel of XPress It Blending cardstock, and then started colouring.  I began by colouring the olive leaves and olives, then as I looked at it, I thought, "wait a minute!  I really like the image being only partially coloured".  So I have TWO ways to look at portion control, the stamping of partial images and partial colouring too!  

All I did to the oak leaves and acorns was add a bit of neutral shading, so they had a bit of definition, but primarily - it’s the pointillism and crosshatching that Marcy illustrated them with that really shines.  


I added some black twine and sewing to frame the image and added some highlighting to the Bible verse.  This verse is a tender encouragement.  The olive theme and this verse reminded me of a devotion I had read by Lysa Terkheurst.  I’ve added at the bottom of the post if you’d like to read it as well,  I hope it encourages you too.  I really appreciate her writing.  


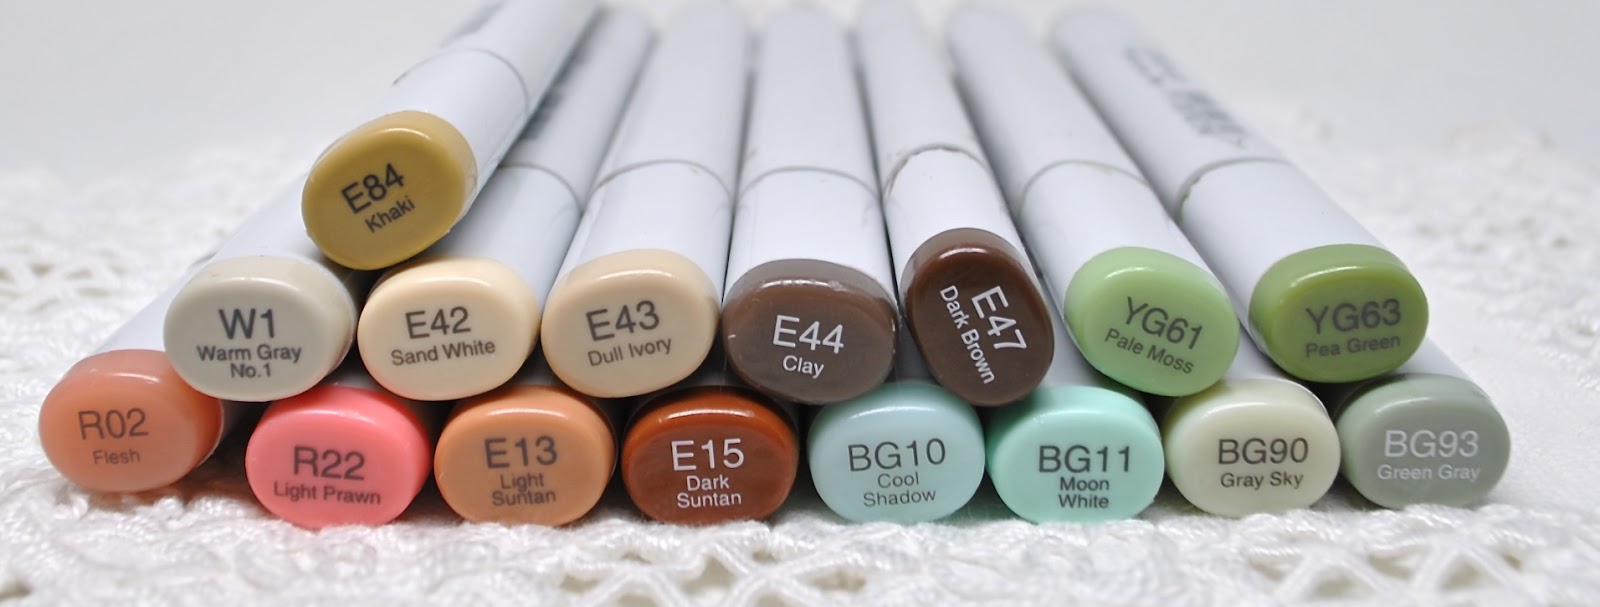
Here is the inside of the design.  I added a simple black line to ground the image and link it to the outside design.  And below are the Copics I used.  


Here’s my Bloom Brigade Sisters playing along today....

Allison Cope
Christine Okken
Cindy Lawrence

Julie Koerber
Katie Sims
Stacy Morgan
Tosha Leyendekker

and Marcy at the Power Poppy Blog


What I Learned From the Olive Tree... by Lysa Terkeurst

The olive tree is such a picture of why our hearts must go through the crushing times.

The crushing times are necessary times. 

First, in order to be fruitful the olive tree has to have both the east wind and the west wind. The east wind is the dry hot wind from the desert. This is a harsh wind. So harsh that it can blow over green grass and make it completely wither in one day. The west wind, on the other hand, comes from the Mediterranean. It brings rain and life. The olive tree needs both of these winds to produce fruit — and so do we. We need both winds of hardship and relief to sweep across our lives if we are to be truly fruitful.

The crushing times are processing times. 

Another thing to consider about the olive tree is how naturally bitter the olive is and what it must go through to be useful. If you were to pick an olive from the tree and try to eat it this month, its bitterness would make you sick. For the olive to be edible, it has to go through a lengthy process that includes:
washing,
breaking,
soaking,
sometimes salting,
and waiting some more. It is a lengthy process to be cured of bitterness and prepared for usefulness. If we are to escape the natural bitterness of the human heart, we have to go through a long process as well … the process of being cured.

The crushing times are preservation times. 

The final thing I want to consider about the olive is the best way to preserve it for the long run. It must be crushed in order to extract the oil. The same is true for us. The biblical way to be preserved is to be pressed. And being pressed can certainly feel like being crushed. But what about 2 Corinthians 4:8, where it says we are “pressed … but not crushed”? Let’s read verses 8 and 9 in the King James Version: “We are troubled on every side, yet not distressed; we are perplexed, but not in despair; Persecuted, but not forsaken; cast down, but not destroyed…”

This was one of the biggest “aha” moments for me standing in the shadow of the olive tree: crushing isn’t the olive’s end. Crushing is the way of preservation for the olive. It’s also the way to get what’s most valuable, the oil, out of the olive.

Keeping this perspective is how we can be troubled on every side yet not distressed … pressed to the point of being crushed but not crushed and destroyed. I think I need to revisit these truths often: When the sorrowful winds of the east blow, I forget they are necessary.

When I’m being processed, I forget it’s for the sake of ridding me of bitterness. And when I’m being crushed, I forget it’s for the sake of my preservation. I forget all these things so easily. I wrestle and cry and honestly want to resist every bit of this. Oh, how I forget.

Maybe God knew we all would forget. And so, He created the olive tree.
Lysa TerKeurst